Getting your juicer stuck is super common, especially if you’re new to making fresh juice. It’s frustrating when things stop working, and often, the first thought is, “What did I do wrong?” Don’t worry, even experienced juicers run into this issue. This post is all about how to fix jammed juicer problems. We’ll explore simple, step-by-step solutions to get your juicer running smoothly again. Ready to find out how?
What Causes a Juicer to Jam?
Juicers can jam for a variety of reasons, usually related to how the machine processes the fruits and vegetables. Often, the blockage happens because of the consistency of the ingredients, the speed at which they are fed into the juicer, or the type of juicer used. Fibrous produce, such as celery or leafy greens, can get tangled and block the machine. Harder fruits and vegetables, like carrots or apples, may also pose a challenge. Furthermore, loading too much produce at once or feeding them too quickly can overwhelm the juicer’s mechanism, leading to a jam. The type of juicer used affects its likelihood of jamming; for example, masticating juicers, which extract juice slowly, are less prone to jamming than centrifugal juicers, which operate at a high speed. Recognizing these causes is the first step in learning how to fix jammed juicer issues.
Common Culprits That Can Jam Your Juicer
Several everyday ingredients frequently cause juicers to jam. Some produce has a high fiber content, while others have a sticky nature when processed. These properties can lead to blockages and create difficulties in the extraction process. Being aware of these common culprits helps prevent jams. Here’s a closer look at the usual suspects.
- Fibrous Vegetables: Celery is infamous for its stringy fibers. When the strands wrap around the auger or the spinning basket, they can quickly cause a jam. Other leafy greens like spinach and kale can also tangle, particularly if they are not prepped correctly.
- Starchy Fruits: Bananas and mangos, while delicious, can be sticky when processed. Their pulpy texture can cause clogs in the juicer’s components. Preparing them properly and mixing them with other ingredients can help prevent jams.
- Hard Produce: Apples and carrots, while great for juice, can create issues if you feed them in large chunks. Their density requires more effort from the juicer’s motor, potentially leading to a jam if the machine can’t handle the load.
- Improper Prepping: Failing to remove seeds and pits from fruits like apples and peaches can be problematic. These hard items can damage the juicer’s components or cause a significant jam.
Celery’s fibrous composition is a major contributor to juicer jams. The long, stringy fibers often wrap around the rotating parts of the juicer, creating a blockage. To avoid this, consider cutting celery into smaller pieces or using a juicer designed for fibrous vegetables. Juicers designed for fibrous produce use specialized methods to break down the stringy fibers effectively, avoiding the typical entanglement that leads to jams. This approach ensures a smoother and more efficient juicing process.
The high starch content in fruits like bananas and mangos makes them stickier when broken down in a juicer. This can form a paste-like substance that blocks the juicing components, especially the exit spout and screen. A common remedy to prevent this is to mix these fruits with water-rich ingredients like cucumbers or melons. This helps maintain the flow and reduces the chances of a jam. The combination of ingredients not only prevents jams but also improves the overall taste and nutritional value of the juice.
Apples and carrots are frequently jammed juicer culprits. The high density of these fruits and vegetables puts stress on the juicer’s motor, which can cause a jam if the motor struggles to crush them. To counteract this, it is recommended to cut these foods into smaller, manageable pieces before juicing. This helps reduce the strain on the machine’s components, making the juicing process more efficient and preventing jams. Smaller pieces also tend to release more juice, maximizing the output.
Ignoring the prepping stage of juicing by neglecting to remove seeds and pits can lead to equipment problems. These parts are exceptionally rigid and can cause obstructions that damage the juicer’s screen, auger, or other parts. It’s a great habit to carefully inspect fruits and vegetables, removing any seeds, pits, or tough parts before feeding them into the juicer. This not only safeguards the machine but also improves the quality of the juice produced, removing bitter flavors and ensuring smoother operation.
Step-by-Step Guide on How to Fix Jammed Juicer Issues
When a juicer gets jammed, it’s important to act quickly and cautiously. The following steps provide a structured way to handle and resolve the issue safely and efficiently. By following this guide, you can typically get your juicer working again in no time. This process is about making the most of your juicing experience by knowing how to fix jammed juicer problems effectively. Safety first!
Safety First: Power Down and Disassemble
The very first step you should take is to ensure your safety. Unplug the juicer from the power source before starting any troubleshooting. This simple action eliminates the risk of electric shock, especially if the juicer is wet or if you are working with metallic tools. Once you have turned off and unplugged the machine, you should disassemble it. Take apart all removable parts such as the feeding chute, juicing bowl, and any other components designed to be removed. Lay these parts on a clean surface so you can see each piece.
- Unplug the Juicer: Always disconnect the juicer from the electrical outlet.
- Disassemble the Juicer: Carefully take apart all removable parts.
- Inspect and Clean Components: Examine each piece for obstructions.
Before starting any repair work, the first step is to completely detach the juicer from its power source. Unplugging the juicer completely removes the risk of electrical hazards that can lead to serious injury. This simple safety measure can make a huge difference, ensuring that you can work freely and safely on your juicer without any risk of electric shock or any other related problems.
To address the jam, completely disassemble the juicer by taking off the feeding chute, juicing bowl, and any other pieces that can be detached. Lay these parts out on a clean surface to ensure you can see all parts to inspect and clean them properly. This step allows you to reach the jammed components and accurately assess the root cause, setting the stage for effective and easy troubleshooting.
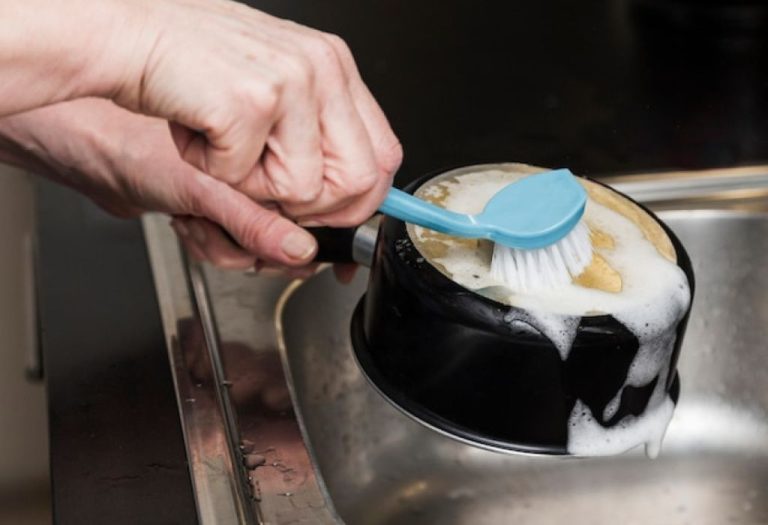
After disassembly, it’s necessary to check each component for obstructions and clean them thoroughly. Check the feed chute, juicing bowl, and blades. Look for any bits of food that could be causing the jam. Use a brush or cleaning tool to remove any pulp or debris that could be preventing smooth function. This approach ensures all parts are free from blockages.
Dealing With the Jam: Quick Remedies
Once you’ve safely disconnected and disassembled the juicer, the next step is to address the jam itself. There are multiple methods you can use, depending on the type of juicer and the nature of the blockage. Remember, be gentle and patient, and do not use excessive force. These approaches are simple ways of learning how to fix jammed juicer problems effectively and safely.
- Reverse Function: Use the reverse setting if your juicer has one.
- Manual Clearing: Use the provided pusher tool to remove the blockage.
- Rinse and Repeat: If the jam persists, rinse the components.
If your juicer is equipped with a reverse function, use it to try and clear the jam. The reverse function works by running the motor in the opposite direction. This will often push the blockage back up the feeding chute. Run the reverse mode for short intervals, and then try juicing again. Doing so may resolve the blockage. Avoid running the machine in reverse for long periods, which may strain the motor.
If the reverse setting doesn’t work, gently use the pusher tool that came with your juicer. Insert the pusher into the feeding chute and carefully try to dislodge the trapped produce. Rotate the pusher to free any tangled items. Avoid using excessive force, as you could damage the internal components of the juicer. This gentle but deliberate method is usually effective in clearing many jams.
If the jam remains after using the reverse function and the pusher tool, it’s a good time to thoroughly rinse the components. Take the disassembled parts and rinse them under warm water. This can help loosen any sticky or compacted produce that is causing the jam. Make sure to rinse all areas thoroughly, especially around the blades and the juicing screen. Once everything is rinsed, reassemble the juicer and try juicing again.
Deep Cleaning and Maintenance Tips
Preventing jams requires more than just addressing the immediate issue; it demands thorough cleaning and regular maintenance of the juicer. Regularly cleaning the juicer not only keeps it running well but also helps preserve the juice quality and extend its lifespan. Doing this can make the difference in preventing future issues and make it easier to understand how to fix jammed juicer problems. Here’s a set of tips to keep your juicer in good condition.
- Clean After Every Use: Rinse and wash all parts immediately after juicing.
- Use the Right Tools: Employ brushes and tools for hard-to-reach areas.
- Deep Clean Regularly: Conduct a deeper clean every few weeks.
The best practice is to clean all components of your juicer immediately after each use. This stops any pulp and juices from drying and hardening, which could make it difficult to clean later and result in potential jams. Use warm, soapy water to wash each part of the juicer, paying attention to the hard-to-reach areas where food particles may get trapped. Rinse everything thoroughly and allow it to air dry before reassembling. Doing this helps prevent bacterial growth.
When cleaning your juicer, use the proper brushes and cleaning tools. The cleaning tools that are included with your juicer are specifically designed to clean hard-to-reach areas. You can also use a soft-bristled brush to remove pulp and debris from the screen, blades, and other components. A brush will remove tough food residue without scratching delicate surfaces. Proper tools ensure a complete and effective cleaning process.
Plan a deeper cleaning of your juicer every couple of weeks. This more detailed cleaning involves dismantling all the parts and washing them. Soak the components in warm, soapy water, paying close attention to areas that are prone to buildup. You can use a solution of vinegar and water to eliminate mineral buildup. Make sure that all components are completely dry before reassembling to avoid any mold or mildew. A complete deep clean helps extend the life and efficiency of your juicer.
How to Prevent a Juicer From Jamming
The best way to handle a jammed juicer is to prevent it from happening in the first place. You can use a few key strategies to avoid blockages and keep your juicer functioning at its best. Taking preventive measures ensures smooth operations and increases the longevity of your machine. Knowing how to prevent jams is one of the important aspects of understanding how to fix jammed juicer issues and keeping your device in top condition.
Prepping Ingredients for Optimal Juicing
Proper ingredient preparation is critical to stop your juicer from jamming. Correcting these steps will significantly reduce the risk of jams and increase your overall juicing experience. Simple changes in preparation, from cutting sizes to removing pits, can have a major effect on how well your juicer runs.
- Cut into Manageable Sizes: Chop fruits and vegetables into smaller pieces.
- Remove Seeds and Pits: Eliminate seeds and pits from fruits.
- Alternate Ingredients: Alternate soft and hard produce when feeding.
Cutting your fruits and vegetables into smaller, manageable sizes is a simple but efficient measure to avoid jams. Smaller pieces are easier for the juicer to process, reducing the load on the motor and lowering the likelihood of blockages. This approach is particularly helpful for harder produce like carrots and apples, which may cause jams if fed whole or in large chunks. Smaller pieces also help with the even distribution of ingredients, leading to a smoother juicing experience and better juice output.
Removing seeds and pits from fruits before juicing prevents potential jams and protects the internal components of the juicer. Seeds and pits, such as those found in apples, peaches, and cherries, are difficult to process and can cause blockages or even damage the blades. Taking a little time to remove them not only extends the life of your juicer but also maintains the quality of the juice, preventing bitter flavors and ensuring smoother operation.
Alternating soft and hard ingredients as you feed them into the juicer helps create a balanced juicing process, which reduces the chance of jams. Begin with the softer items, which can help clean out and lubricate the system before introducing harder ingredients. For instance, when juicing carrots (hard) with spinach (soft), alternate between the two to maintain a smooth flow. This approach prevents the machine from getting overloaded with tough produce all at once, leading to a more consistent and efficient juicing experience.
Best Practices for Juicing to Avoid Jams
Beyond preparation, other practices can reduce the risk of a jammed juicer. From feeding speed to the amounts you put in, these practices enhance the juicing process. Implementing these practices is a practical way of knowing how to fix jammed juicer issues and optimizing juicing.
- Feed Slowly: Avoid feeding produce too quickly into the juicer.
- Don’t Overload: Avoid putting too much produce in at once.
- Use a Suitable Juicer: Choose the right juicer for your needs.
Pace yourself when feeding produce into your juicer. Feeding ingredients too fast can overwhelm the machine, making it struggle and likely to jam. Allow the juicer to process each piece of fruit or vegetable before adding the next one. This method helps the machine maintain the proper speed and prevents blockages. Taking your time makes the process more efficient, reducing the chances of jams and ensuring that your juicer runs smoothly.
Putting too much produce into the juicer at once is a common mistake that can easily lead to a jam. Overloading the juicer puts too much stress on the motor and the internal parts, causing them to jam. Make sure to feed produce in small, manageable amounts. Take your time. Doing this will prevent overstuffing. This approach lets the juicer process efficiently, giving you better results and reducing the need to troubleshoot jams.
Selecting the right type of juicer for your specific juicing needs can affect the likelihood of jams. Centrifugal juicers, which are faster, can be more prone to jams than masticating juicers that crush at a slower speed. If you often juice fibrous or leafy greens, a slow juicer might be a better choice. The appropriate juicer will handle the ingredients and prevent issues. Proper selection will reduce the likelihood of jams.
| Juicer Type | Pros | Cons | Best For |
|---|---|---|---|
| Centrifugal | Fast, Affordable, Easy to Use | Can Produce Foamy Juice, Not Ideal for Leafy Greens | Quick Juicing, Beginners |
| Masticating (Slow) | Higher Juice Yield, Less Foaming, Great for Greens | Slower, Can Be More Expensive | Leafy Greens, Vegetables |
According to a study by the University of California, approximately 20% of juicer users report experiencing jams weekly, especially with centrifugal models. Another survey showed that the longevity of a juicer can be increased by up to 30% with regular maintenance, including immediate cleaning after use, compared to those that are irregularly cleaned.
Frequently Asked Questions
Question: Why is my juicer making a loud noise?
Answer: A loud noise often indicates that the juicer is struggling. This might be from overloading the machine or from a blockage. Stop the juicer, unplug it, and check for a jam.
Question: Can I juice frozen fruits and vegetables?
Answer: It’s best to thaw frozen produce before juicing, to prevent damage to the juicer and ensure proper extraction. Frozen produce is much harder, and can jam the juicer.
Question: What should I do if my juicer starts smoking?
Answer: If your juicer starts smoking, turn it off and unplug it immediately. It could be due to a motor overload. Let it cool down and check for any blockages.
Question: How often should I replace the juicer parts?
Answer: Replace parts like blades or screens when they show signs of wear, such as dullness or damage. The lifespan varies by the part and the frequency of use.
Question: Can I juice everything in my juicer?
Answer: While juicers can handle many fruits and vegetables, some items are best avoided. Thick-skinned fruits, like avocados, can jam the machine. Always remove pits and seeds before juicing.
Final Thoughts
When your juicer gets stuck, it’s frustrating, but remember, knowing how to fix jammed juicer issues is a skill that can save you time and money. We’ve explored the common causes of jams, from fibrous vegetables to overfeeding. We’ve gone over the essential safety steps, as well as the quick solutions to get things moving again, and deep cleaning practices. By keeping your machine clean and prepped, you will create a better juicing experience. Now, you’re equipped with the knowledge to troubleshoot and maintain your juicer effectively. So, the next time your juicer stops, you will know exactly what to do. Happy juicing!
I’m Emma J. Caldwell, the founder, lead writer, and home-cooking enthusiast behind KitchenGuideCo.com. With a background in culinary arts and over a decade of cooking experience in both professional and personal kitchens, I created this platform to demystify recipes, offer smart kitchen gadget reviews, and guide readers through meal prep with confidence and clarity.