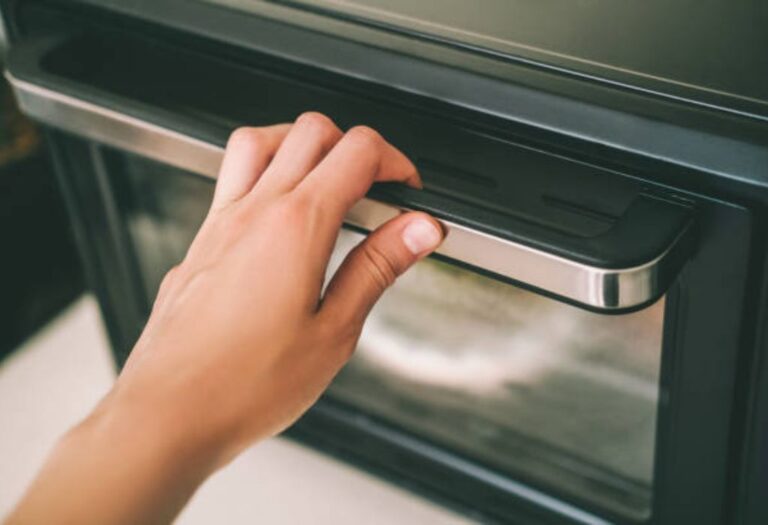
Many people find that how to clean microwave with vinegar seems hard. It’s often because they don’t know the best method or fear damaging their appliance. Don’t worry, it’s actually super easy! This guide will show you how to clean your microwave quickly and effectively using only vinegar. We will break down the steps so you can keep your microwave fresh and clean, without any fuss. Let’s get started.
Key Takeaways
- You’ll learn a safe and natural way to clean your microwave.
- The process uses simple ingredients most people already have at home.
- You’ll get step-by-step instructions to eliminate food splatters and odors.
- This method is environmentally friendly and avoids harsh chemicals.
- The end result is a sparkling clean and fresh smelling microwave.
Cleaning Your Microwave: A Vinegar-Powered Guide
Microwaves are a kitchen staple, and like any appliance that handles food, they need regular cleaning. Food splatters, grease, and lingering odors can build up quickly. Luckily, you can avoid this by cleaning your microwave with vinegar. This method is effective, safe, and uses natural ingredients. It also cuts down on harsh chemicals that you wouldn’t want near your food. We will explore how simple this cleaning process is and how to make it a part of your regular kitchen routine.
Gather Your Supplies
Before beginning, you will need just a few basic items. These are likely already in your kitchen, making this cleaning method accessible. This simple setup means you can start cleaning right away without a special shopping trip. Having the right tools ensures that you get the best results without damaging your appliance. Preparing your supplies will help you keep the process streamlined.
- White Vinegar: This is the main cleaning agent. White vinegar is a natural deodorizer and disinfectant, perfect for cutting through grease and grime.
- Water: You’ll need water to dilute the vinegar, making it gentle enough for cleaning.
- A Microwave-Safe Bowl: You’ll use this to hold the vinegar and water mixture.
- A Clean Cloth or Sponge: For wiping down the interior after steaming.
White vinegar is a key component when cleaning your microwave. White vinegar, which contains acetic acid, is a safe and effective cleaner that naturally helps to disinfect. This natural element breaks down food residue, removes odors, and leaves your microwave fresh and clean. The mild acidity of white vinegar is safe for most microwave interiors, unlike harsh chemical cleaners. Using vinegar keeps your microwave hygienic without the risk of residue from chemical cleaners.
Water is just as important as the vinegar because it helps to dilute the vinegar. This dilution creates a steam that helps to loosen and lift stubborn food splatters. This is especially useful for dried-on food. The right amount of water is crucial. It ensures that the cleaning process is gentle, preventing any potential damage to the microwave’s interior. Using the right amount keeps the process effective and safe.
Using a microwave-safe bowl is crucial for safety and effectiveness. This bowl must be able to withstand the heat from the microwave without melting or releasing harmful chemicals. A microwave-safe container helps create the steam needed for cleaning, ensuring that the entire microwave interior is treated. This helps to loosen the dirt and grime. Avoid using metal or anything that isn’t microwave-safe to prevent sparks and damage. Choosing the right bowl sets the stage for a safe and successful cleaning.
Having a clean cloth or sponge is necessary to wipe down the interior of the microwave. This tool is vital for removing loosened grime and moisture after steaming. It also ensures that all surfaces are clean. Choose a cloth or sponge that won’t scratch your microwave’s interior. A clean cloth prevents cross-contamination and helps to keep your microwave sanitary. This simple step makes the cleaning process complete.
The Step-by-Step Cleaning Process
Now that you have your supplies, it’s time to start cleaning! Following these steps will help you clean your microwave with vinegar effectively. This straightforward process is easy to follow and delivers excellent results. By following these steps, you’ll be able to enjoy a clean, fresh-smelling microwave in no time.
- Prepare the Vinegar Solution: Pour equal parts white vinegar and water into your microwave-safe bowl.
- Microwave the Solution: Place the bowl inside the microwave and heat it for 5-10 minutes, or until the solution boils and the inside of the microwave is steamy.
- Let It Sit: After microwaving, let the bowl sit inside the microwave for a few minutes without opening the door. This allows the steam to continue working on stubborn stains.
- Wipe Down the Interior: Carefully remove the bowl (it will be hot). Use a clean cloth or sponge to wipe down the interior walls, ceiling, and floor of the microwave.
- Clean the Turntable (If Applicable): Remove the turntable and wash it separately with warm, soapy water. Rinse and dry it thoroughly before replacing it.
Mixing vinegar and water correctly is key to the cleaning process. A 1:1 ratio is generally recommended. This balance provides enough cleaning power from the vinegar. It is also gentle enough to be safe for your microwave. Use the right proportions to ensure the steam is effective. This step sets the foundation for breaking down grime and removing odors, making the rest of the cleaning process easier.
Heating the vinegar and water solution inside the microwave is the primary action. This process creates steam that loosens splattered food and grease from the microwave walls. The steam spreads throughout, reaching all areas of the appliance. It is very important to heat the solution long enough to create a steamy environment. Doing so ensures that all surfaces are covered and cleaned. The heated steam eliminates food odors and makes wiping the interior easy.
Allowing the steam to sit inside the microwave for a few minutes is important. This step helps the steam to further soften and detach dried-on food and grime. It also helps to freshen up the air and remove unwanted odors. This is a passive step, but it dramatically boosts the effectiveness of the cleaning process. Patience allows the steam to do its work. This makes wiping down the microwave much simpler and more effective.
Wiping down the interior is the final step in the cleaning process. This is when the loosened food and grime are removed. Ensure that you have let the steam work its magic, allowing it to soften and lift the mess. Use a clean cloth or sponge to wipe away all surfaces. Pay close attention to corners and areas with heavy splatters. This step removes all traces of dirt and leaves the microwave fresh. It completes the cleaning, leaving your appliance in top condition.
Cleaning the turntable is an important final touch. This is the area of the microwave that usually collects food. Remove the turntable carefully and wash it using warm, soapy water. This removes any food particles and grease that may be stuck on it. Rinse the turntable thoroughly to remove soap residue, and dry it before returning it to the microwave. This ensures every part of the appliance is clean and ready for use.
Dealing with Stubborn Stains and Odors
Sometimes, your microwave might have extra tough stains or strong odors. Don’t worry; you can take some extra steps to solve these problems. These tricks will help you get your microwave as clean and fresh as possible, no matter how bad the problem.
- For Extra-Stubborn Stains: If you have dried-on food that won’t come off, let the vinegar solution sit in the microwave for a bit longer. You can also add a few drops of dish soap to the solution for extra cleaning power.
- To Combat Strong Odors: Add a teaspoon of lemon juice or a few drops of essential oil (like lemon or tea tree oil) to the vinegar solution to help neutralize odors.
- Repeat if Necessary: If the microwave is very dirty, you may need to repeat the steaming and wiping process.
When dealing with persistent stains, you will need to try some extra steps. First, let the vinegar and water mixture steam for a longer period. This longer steaming time will soften and loosen the baked-on food. If that doesn’t work, add a few drops of dish soap to the solution. The soap’s extra grease-cutting action will help to break down the tough stains. This combined approach is very effective for removing even the most stubborn marks, leaving your microwave spotless.
Sometimes, your microwave may have strong, unpleasant odors. Adding extra ingredients to the vinegar solution can help with this. Lemon juice or certain essential oils work well. They contain natural odor-fighting properties. These ingredients will not only leave your microwave smelling fresh, but they also offer a pleasant scent. They neutralize lingering smells from past food preparation. This step enhances the cleaning process, leaving your kitchen smelling good.
In cases of heavy grime, repeating the cleaning process may be necessary. For really dirty microwaves, one round of steaming and wiping may not be enough. Repeating the process helps to break down layers of dirt and food splatters, ensuring that the microwave is thoroughly clean. Repeat the steps until all the stains are gone. This may take a few tries. Repeating the process guarantees that the microwave is spotless and ready for use.
The Benefits of Cleaning With Vinegar
Choosing vinegar to clean your microwave offers a range of benefits. It’s a natural, cost-effective, and safe way to keep your kitchen appliance clean and healthy. These advantages make vinegar a great choice for your regular cleaning routine.
- Natural and Non-Toxic: Vinegar is a natural cleaner that doesn’t contain harsh chemicals, making it safe for you and the environment.
- Cost-Effective: Vinegar is inexpensive and readily available, making it an affordable cleaning option.
- Effective Cleaning: Vinegar effectively cuts through grease, removes stains, and eliminates odors.
- Safe for Your Microwave: Vinegar is gentle on microwave interiors, unlike some harsh chemical cleaners that can damage the appliance.
- Environmentally Friendly: Vinegar is biodegradable and doesn’t release harmful chemicals into the environment.
The use of vinegar offers a non-toxic cleaning solution. Unlike commercial cleaners, vinegar is made without harsh chemicals. This makes it safer for you, your family, and the environment. Because it is natural, you can use it confidently. You will not have to worry about the harmful chemicals. It keeps your food area healthy. Using vinegar supports a healthier home and planet.
Vinegar is an inexpensive cleaning solution. It is affordable and accessible, making it an excellent choice for every household. It costs much less than commercial cleaners. You likely have it at home already. Using vinegar can save you money. This keeps your cleaning budget under control. You can achieve great cleaning results without having to spend a lot of money.
Vinegar is an effective cleaner because it cuts through grease. It can remove stains and eliminate odors. The natural acids in vinegar help break down food splatters, making them easy to wipe away. It also removes any odors, leaving your microwave smelling fresh. This multi-tasking ability makes vinegar a powerful cleaner. It simplifies your cleaning tasks, and ensures that your microwave is clean.
Using vinegar is safe for your microwave. Unlike some chemical cleaners, vinegar does not damage the microwave’s interior. This is because it is gentle. It won’t harm the materials used in the appliance. This ensures your microwave functions properly. Using vinegar extends the life of your appliance. It also keeps your microwave safe for food preparation.
Vinegar is an environmentally friendly choice because it is biodegradable. This means it breaks down naturally and won’t harm the environment. Unlike chemical cleaners, vinegar doesn’t release harmful chemicals. This reduces your environmental impact. Using vinegar is better for both your home and the planet. It’s an easy and sustainable cleaning method.
Other Microwave Cleaning Methods
While cleaning with vinegar is a popular choice, there are other methods you can use to clean your microwave. Each method has its own benefits, and depending on your needs or preferences, another method may be a better option.
Using Lemon Juice
Lemon juice is a natural cleaner that works similarly to vinegar. It offers a fresh scent and effective cleaning action.
- Preparation: Cut a lemon in half. Place the lemon halves in a microwave-safe bowl with about a cup of water.
- Microwaving: Microwave the lemon and water mixture for about 3-5 minutes, or until the water boils and the inside of the microwave is steamy.
- Wiping: After letting it sit for a few minutes, carefully remove the bowl and wipe down the interior of the microwave with a clean cloth.
- Benefits: Lemon juice provides a fresh, citrus scent and is effective at cutting through grease.
- Considerations: May not be as effective for removing strong, persistent odors as vinegar.
Preparing lemon juice is simple. Simply slice a lemon in half. Then place the lemon halves in a microwave-safe bowl. Add about one cup of water. This setup is the base for creating steam. It will work to loosen food splatters and remove odors, making the cleaning process simple. This ensures effective cleaning and a refreshing lemon scent.
Microwaving the lemon and water mixture is the core of this cleaning method. Heat the mixture for approximately 3 to 5 minutes. Watch until the water boils and the interior of the microwave steams up. This process generates steam infused with lemon. This helps to loosen food splatters and grease. This also creates a fresh citrus scent that enhances the cleaning experience.
Allow the steam to sit inside the microwave for a few minutes. Then, remove the bowl carefully. Use a clean cloth to wipe down the interior walls, ceiling, and floor. This step removes the loosened grime. It leaves the microwave clean and smelling fresh. This makes the cleaning task easier and more enjoyable.
This method offers several advantages. The lemon juice provides a refreshing, natural scent. It also effectively cuts through grease and food splatters. Using lemon juice is a pleasant alternative to vinegar, especially if you prefer a citrus fragrance. This method keeps your microwave clean and leaves a pleasant scent.
While using lemon juice is generally effective, it has certain limitations. It might not be as effective in eliminating strong, stubborn odors, unlike the more potent acetic acid in vinegar. This is an important detail when choosing the best cleaning method for your needs. Consider your microwave’s condition to select the right approach.
Using Baking Soda
Baking soda is a mild abrasive that is excellent for gentle cleaning and deodorizing.
- Preparation: Mix a few tablespoons of baking soda with water to create a paste.
- Application: Apply the paste to the interior of the microwave, paying attention to areas with splatters or stains.
- Scrubbing: Gently scrub the interior with a non-abrasive sponge or cloth.
- Rinsing: Wipe away the baking soda paste with a clean, damp cloth.
- Benefits: Baking soda is a gentle abrasive and a great deodorizer.
- Considerations: May require more scrubbing effort than vinegar or lemon juice.
To begin, mix a few tablespoons of baking soda with water to create a paste. The paste’s consistency should be like a spreadable cream. This mixture will serve as a gentle abrasive. This helps to lift and remove dirt and grime from the microwave’s interior. This simple step prepares the cleaning solution, ensuring that it is ready for use.
Using the paste, apply it to the interior of your microwave. Concentrate on areas with splatters or persistent stains. Gently rub the paste over the surfaces to loosen the grime. The mild abrasive action of the baking soda will help remove dirt. Make sure you cover all the affected areas. This ensures a clean and fresh microwave.
After applying the baking soda paste, gently scrub the interior. This process is key for removing dirt. Use a non-abrasive sponge or cloth to avoid scratching the microwave’s surfaces. Gently scrub the surfaces, using circular motions. This will help remove all the loosened grime. This step ensures a clean and effective outcome.
After scrubbing, use a clean, damp cloth to wipe away the baking soda paste. This process removes all traces of the cleaning agent and any loosened dirt. Ensure that all the paste is gone to avoid leaving a residue. Properly rinsing will leave your microwave clean and ready for use.
Baking soda has several advantages. It is a mild abrasive, making it suitable for gently cleaning surfaces without scratching. It also acts as a great deodorizer, removing unwanted odors from your microwave. These traits make baking soda an excellent choice for a fresh and clean microwave.
While baking soda is very helpful, it might require more effort than other methods. You will need to scrub more to get the same level of cleaning. It’s important to consider your cleaning needs and effort you want to apply. If you prefer a faster approach, vinegar or lemon juice might be better. Choose the best approach that matches your needs.
Using Commercial Microwave Cleaners
Commercial microwave cleaners are designed to provide a quick and effective cleaning solution. They often contain strong chemicals that are designed to easily remove food residue and odors.
- Preparation: Follow the manufacturer’s instructions for the specific cleaner you are using. This typically involves spraying the cleaner onto the microwave’s interior.
- Application: Spray the cleaner onto the interior surfaces, paying special attention to areas with food splatters and stains.
- Waiting Time: Allow the cleaner to sit for the recommended time specified on the product label. This will give the product time to break down food residue and grime.
- Wiping: Wipe down the interior of the microwave with a clean cloth or sponge to remove all traces of the cleaner and loosened debris.
- Benefits: Quick and easy to use; often effective at removing tough stains.
- Considerations: May contain harsh chemicals; always follow safety instructions.
Before using a commercial cleaner, you must follow the manufacturer’s instructions. This usually involves spraying the cleaner on the inside of the microwave. The instructions will give details on the proper usage of the product. Following these guidelines ensures the best results. It also prevents any potential damage or safety concerns. Read the instructions carefully before use.
Spray the commercial cleaner over the interior surfaces of your microwave. Direct your attention to areas with food splatters and stains. Applying the cleaner to these problem areas will help break down the grime and make it easier to clean. Ensure that the cleaner coats all surfaces that require cleaning. This prepares the interior for wiping, resulting in a clean and sanitized appliance.
After applying the commercial cleaner, allow it to sit for the suggested time. Check the label for the waiting time. The cleaner needs enough time to break down food residue and grime. It allows the cleaner’s ingredients to work effectively. Following the waiting period is key for efficient cleaning and for maximizing the product’s effectiveness.
After the recommended waiting time, wipe down the inside of the microwave. Use a clean cloth or sponge to remove all traces of the cleaner and any loosened debris. Make sure you remove all the product, leaving a clean surface. This step prevents any chemical residue and guarantees the hygiene of the appliance.
Commercial cleaners offer benefits in their speed and effectiveness. They usually work quickly and are designed to easily remove tough stains. They offer a simple and fast approach to microwave cleaning. If speed and convenience are the priority, these products are a good choice.
Commercial cleaners may have downsides, as they can contain harsh chemicals. It’s important to follow all safety instructions. Ensure that you have adequate ventilation and wear gloves. Read and follow all warnings on the product label. Always use these products cautiously.
Comparison Table: Cleaning Methods
Here’s a comparison table to help you compare the different cleaning methods discussed:
| Method | Pros | Cons |
|---|---|---|
| Vinegar | Natural, cost-effective, effective, safe for microwave | May require a stronger solution for tough stains, scent might not be desirable for everyone |
| Lemon Juice | Fresh scent, cuts through grease effectively | May not be as effective against strong odors, not as strong as vinegar |
| Baking Soda | Gentle abrasive, great deodorizer | Requires more scrubbing, may be time-consuming |
| Commercial Cleaner | Quick and easy, effective on tough stains | May contain harsh chemicals, safety concerns |
Frequently Asked Questions
Question: Can I use any type of vinegar?
Answer: White vinegar is the best choice because of its high acidity and lack of color, which helps to avoid staining. Other vinegars might not work as well.
Question: How often should I clean my microwave?
Answer: It’s best to clean your microwave once a week, or whenever you see food splatters or notice odors.
Question: Is it safe to microwave vinegar?
Answer: Yes, it is safe. Mixing vinegar and water and microwaving creates steam that helps to clean your microwave effectively.
Question: Can I use vinegar to clean the outside of my microwave?
Answer: Yes, you can use a diluted vinegar solution to wipe down the outside of your microwave. This will get rid of any fingerprints and food stains.
Question: What if the smell of vinegar lingers after cleaning?
Answer: Open the microwave door to air it out, or you can microwave a bowl of water with lemon juice to help neutralize the smell.
Final Thoughts
Keeping your microwave clean doesn’t have to be a chore. Using vinegar offers a simple, natural, and effective way to remove food splatters, odors, and grime. The method uses easy-to-find supplies. This approach not only cleans your appliance but also keeps your kitchen safe from harsh chemicals. By following the step-by-step instructions, you can easily remove food and grease. You can also freshen the microwave with the help of the simple steam-cleaning process. Regular maintenance with vinegar will not only keep your microwave clean. It will make your kitchen a more pleasant and healthy space. Start cleaning with vinegar today, and enjoy a fresh and clean microwave!
I’m Emma J. Caldwell, the founder, lead writer, and home-cooking enthusiast behind KitchenGuideCo.com. With a background in culinary arts and over a decade of cooking experience in both professional and personal kitchens, I created this platform to demystify recipes, offer smart kitchen gadget reviews, and guide readers through meal prep with confidence and clarity.