Many of us love fresh, warm bread, but sometimes it gets stale. Finding the best way to revive it can be tricky for a beginner. The how to warm bread in microwave topic is a popular one because everyone wants that perfect, soft slice. Don’t worry, it’s simpler than you think. We’ll explore some easy steps to get your bread warm and delicious again. Get ready to enjoy your bread just like it was fresh from the oven!
Key Takeaways
- You can easily warm bread in the microwave without drying it out.
- Knowing the right techniques prevents bread from becoming tough.
- Using a damp paper towel is a simple trick for moist bread.
- Different types of bread may need slightly different microwave times.
- You can avoid rubbery results by following a few simple steps.
Why Warm Bread in the Microwave?
There are many reasons why people want to warm their bread. Cold bread can be less appealing, lacking the aroma and texture that warm bread provides. Warming it also revives the bread, making it feel softer and more enjoyable to eat. Perhaps you bought bread earlier in the day, and it’s cooled down. Or maybe you’re grabbing a quick bite. Heating it up in the microwave offers a fast and convenient way to restore its freshness. The microwave provides a rapid method to bring bread back to its original delicious state, perfect for various meals and snacks.
Beyond convenience, warming bread can also improve its flavor. The warmth can release the bread’s natural aromas, enhancing the overall eating experience. Think of a simple slice of toast with butter, or a warm roll for a sandwich. These small touches make a big difference, showing why the microwave is a simple yet powerful tool for bread lovers. It’s a quick fix that transforms the eating experience, especially when time is of the essence.
The Problem of Dry Bread
One common problem when warming bread is dryness. Microwaves cook food by heating the water molecules within, which can quickly lead to the evaporation of moisture. This process, if not managed carefully, results in bread that becomes hard, stale, or rubbery. This is often the biggest hurdle people face when figuring out how to warm bread in microwave. Without the right techniques, you can easily ruin your bread, which leads to disappointment and wasted food.
The science behind this is simple. Microwaves agitate the water molecules inside the bread, causing them to vibrate rapidly and eventually turn into steam. If the bread doesn’t have enough moisture, or if it’s exposed to the microwaves for too long, the steam escapes, leaving the bread dry. Different types of bread have varying moisture content, which is why it’s important to understand the process and use proper methods. Therefore, knowing how to trap the moisture during the process is key.
- The Science of Microwaving: Microwaves use electromagnetic radiation to heat food, specifically targeting water molecules, leading to rapid heating.
- Moisture Loss Explained: The primary cause of dry bread is the rapid evaporation of moisture due to the heat generated by the microwave.
- Bread Types Matter: The moisture content of the bread is a critical factor, with drier bread types requiring more careful handling.
Quick Methods for Warming Bread
There are several easy methods for warming bread in a microwave, all designed to maintain the right moisture level and avoid dryness. The key is to introduce moisture back into the process, preventing the bread from losing its original softness. Experimentation and slight adjustments can help you find your preferred method. These techniques focus on simplicity and quick results, ensuring you enjoy your warm bread without a lot of effort.
The methods focus on using techniques that prevent bread from drying out. These involve different degrees of dampness or adding moisture. The goal is always the same: to get the bread warm without making it tough or rubbery. Each method is designed to be user-friendly, allowing anyone to achieve great results with minimal preparation time. With these strategies, you can easily bring back the freshness of any bread you have on hand.
Using a Damp Paper Towel
One of the easiest methods is using a damp paper towel. Simply wet a paper towel and squeeze out the excess water, ensuring it is damp but not soaking wet. Wrap the bread in the damp paper towel and microwave it for a short period, usually 10-20 seconds. This method is effective because the damp paper towel creates a humid environment, which helps to keep the bread moist while it warms up. It’s a quick and simple solution. You can quickly bring your bread back to its original warmth.
The damp paper towel releases steam as it heats, which is absorbed by the bread. This prevents the bread from drying out and maintains its soft texture. If you are warming a larger piece of bread, you may need to increase the time slightly, but always err on the side of caution to avoid overcooking. This method is effective for various types of bread, providing warmth without sacrificing the quality. It’s a reliable and easy way to warm your bread.
- Prepare the Towel: Wet the paper towel and remove excess water. It should be damp, not dripping.
- Wrap the Bread: Enclose the bread in the damp paper towel. Make sure it’s fully covered.
- Microwave Time: Microwave for 10-20 seconds.
Using a Microwave-Safe Container
Another option for how to warm bread in microwave is using a microwave-safe container. Place the bread in a container and add a small amount of water to the bottom of the container. The water creates steam as the bread is heated, keeping the bread moist. This method is especially helpful for drier bread types, offering extra moisture during the heating process. It gives you a way to keep moisture levels up for a great result.
The container acts like a mini-steamer, trapping the moisture and preventing it from escaping. You can use any microwave-safe container, like a plastic or glass dish. The amount of time depends on the bread type and the power of your microwave, so start with shorter intervals. This method is useful when you want to warm several slices or a larger piece of bread at once. It’s convenient when you are looking to warm multiple items at once.
- Container Selection: Use a microwave-safe container, such as a glass or plastic bowl with a lid.
- Add Water: Put a small amount of water in the bottom of the container.
- Heat Time: Heat for short intervals, usually 15-30 seconds.
Microwave Bag Method
For a variation of these methods, you can use a microwave-safe bag. Place your bread inside, add a few drops of water, and then seal the bag. Microwaving the sealed bag will create a steamy environment, similar to the container method. The key is to make sure the bag is suitable for microwave use. This technique is especially useful for quickly warming rolls or buns. This ensures the bread stays soft.
The bag traps moisture, allowing the bread to heat evenly without drying out. Make sure the bag is not sealed too tightly, as the steam could build up too much pressure. Always check the bread after the recommended time and add more time as needed. Using a bag is often an easier way of trapping moisture than the container method, as you don’t need to transfer the item. It offers a simple way to warm individual pieces of bread.
- Bag Preparation: Place bread inside a microwave-safe bag.
- Add Water: Add a few drops of water into the bag.
- Seal and Heat: Seal the bag loosely and microwave for about 10-20 seconds.
Special Considerations for Different Bread Types
The methods you use for how to warm bread in microwave can depend on the type of bread. Different kinds of bread have different moisture contents and structures, meaning they will react differently to the microwave. Understanding these differences helps in preventing common issues like dryness or uneven heating. With a little awareness, you can ensure that each type of bread comes out perfectly warm and fresh.
For example, dense breads like sourdough or whole-wheat may require a slightly longer warming time than lighter breads such as rolls or baguettes. It’s also important to consider the size and shape of the bread. A thicker loaf will need more time compared to a thin slice. Being aware of these variations helps you get the best possible result for each type. Understanding the bread type helps you to achieve the right result.
Handling Crusty Bread
Crusty breads, such as baguettes or sourdough, can be warmed using the methods described earlier, but they often benefit from slightly different care. These breads are prone to becoming hard in the microwave, so it’s extra important to use moisture-retaining techniques. The goal is to soften the interior without making the crust rubbery. They need gentle care so that they stay great tasting.
Using a damp paper towel or the microwave-safe container method works well. Keep the microwave time short and check frequently to ensure the crust doesn’t over-harden. For crusty bread, you may want to warm it in short bursts, allowing it to rest for a few seconds between each burst. This helps in maintaining its texture. This careful attention will preserve the bread’s texture.
- Moisture is Key: Use a damp paper towel to avoid a hard crust.
- Short Bursts: Warm in 10-second intervals to prevent overcooking.
- Monitor the Crust: Check the crust’s texture and adjust the time as needed.
Warming Soft Breads
Soft breads, like rolls or sandwich bread, tend to dry out more easily than crusty breads. The key is to heat them gently and quickly. Using a slightly less damp paper towel or even microwaving them without a towel, for a very short time, might be sufficient. This is because soft breads have a higher moisture content, and they may only need a quick touch-up to be warm and ready to enjoy. They need a simple approach to maintain their softness.
Avoid over-microwaving soft breads, because the result can be a tough or rubbery texture. Start with very short intervals, around 5-10 seconds, and check the bread frequently. Soft breads are great for experimenting to find the right amount of time. The less time they’re in the microwave, the better, so they don’t lose their great texture. You are looking to get warmth, not to cook them.
- Shorter Times: Start with very short microwaving times, such as 5-10 seconds.
- Less Moisture: Use a slightly less damp paper towel, or none at all.
- Frequent Checking: Regularly monitor the bread to prevent overcooking.
Warming Bread with Fillings
If you’re warming bread that has fillings, such as sandwiches or bread with cheese or other ingredients, you need to consider the filling. Microwaving can cause fillings to heat unevenly or the bread to become soggy. You should consider how the filling will respond to the heat. This approach ensures a satisfying result.
Using a damp paper towel helps maintain the bread’s moisture, while preventing the fillings from drying out. For sandwiches, you may want to wrap them in the damp towel for a slightly longer time, keeping an eye on the fillings. You may want to lower the heat. This ensures that the bread is warmed without affecting the fillings’ texture or taste. You want a well-rounded result when including fillings.
- Wrap Carefully: Use a damp paper towel to ensure moisture without sogginess.
- Check Fillings: Ensure fillings are warm and not overheated.
- Adjust Time: Use shorter intervals, as fillings may heat quicker.
Avoiding Common Mistakes When Microwaving Bread
Even when following the right methods, you might run into some common issues when trying to how to warm bread in microwave. Knowing these mistakes can prevent them and help you get the best results every time. These pitfalls include overcooking, uneven heating, and the use of the wrong materials. Addressing these mistakes helps to improve your bread-warming skills, ensuring you can enjoy warm bread whenever you want.
The most common issues are drying out the bread and uneven heating. By keeping a close eye on the process and making simple adjustments, you can avoid these problems. Proper preparation, such as using the correct amount of moisture and the right settings, makes a big difference. Addressing these mistakes will allow you to get the best result when you warm your bread.
Over-Microwaving the Bread
The most common mistake when warming bread is over-microwaving. Leaving bread in the microwave for too long will lead to it drying out and becoming hard. Start with very short intervals, about 10-20 seconds for most methods, and always check the bread after each interval. The microwave can quickly change the texture of bread. You should monitor the bread closely to avoid this mistake.
Over-microwaving happens because the heat from the microwave rapidly evaporates moisture. Once the moisture is gone, the bread will become hard or rubbery. It’s better to under-microwave than to over-microwave, as you can always add a few more seconds. So always start with a low setting. This lets you maintain the bread’s original texture. Careful attention helps to prevent issues.
- Short Times: Start with short microwaving intervals.
- Frequent Checks: Check the bread after each short interval.
- Adjustments: Increase the time in very small increments.
Using Incorrect Materials
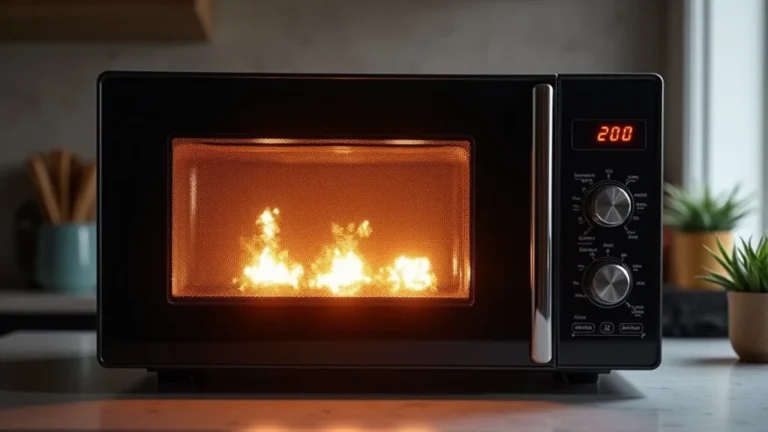
Another mistake is using incorrect materials in the microwave. Not all containers or wrappers are microwave-safe. For example, using metal containers or foil can damage the microwave and potentially cause a fire. Knowing which materials are safe to use is crucial for both food quality and appliance safety. Safety is always a top priority when using the microwave.
Always use microwave-safe containers, such as glass, certain plastics, or paper products. Avoid anything metallic. Check the packaging of any plastic items to ensure they are marked as microwave-safe. Using the wrong materials can create a safety hazard, which is why it’s important to understand this point. This prevents potential issues. Safety is very important to consider.
- Check Labels: Always verify that containers are microwave-safe.
- Avoid Metals: Never use metal containers or foil.
- Use Paper: Paper towels and microwave-safe bags are typically safe.
Uneven Heating
Uneven heating can also be a problem. This is when some parts of the bread are warmer than others. This is often because the microwave doesn’t distribute heat evenly. You can solve this by rotating the bread halfway through the microwaving process, or by placing it in a way to optimize heat distribution. It’s always good to try different techniques.
Uneven heating can happen with both small and large bread items. This may affect the taste and texture of the bread. Try placing the bread towards the edge of the microwave, as this is where the heat is often most concentrated. Rotating the bread helps ensure even heating throughout. These simple steps ensure a more satisfying result. These steps will help you.
- Rotate Bread: Rotate the bread halfway through the microwaving process.
- Placement Matters: Position the bread strategically in the microwave.
- Watch Carefully: Monitor for any uneven heating.
Alternative Warming Methods
While microwaves are quick and convenient, there are other methods for warming bread. These methods might be a good alternative, depending on what you have available and the type of bread. Each has its pros and cons, but exploring these options gives you more control and flexibility. This lets you decide which is best for your particular situation.
From the oven to the toaster, these methods can provide different textures and results. Some methods involve direct heat, while others rely on gentle warmth. These methods are designed to suit different bread types and desired outcomes. You can decide what best suits the result you’re seeking. Exploring these options helps in finding the best way to get warm bread.
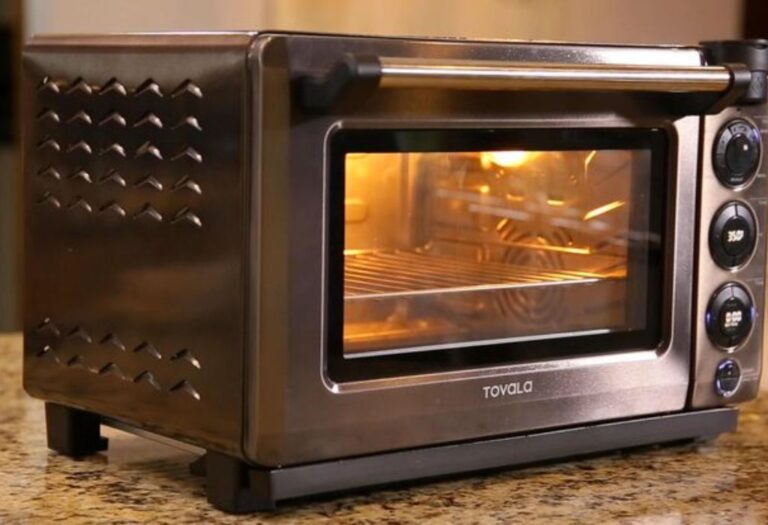
Using a Toaster Oven
A toaster oven offers a good option for warming bread, providing a crispier texture than a microwave. You can set the toaster oven to a low temperature, around 300°F (150°C), and place the bread directly on the rack. The even heat helps warm the bread, while also making the outside more crisp. The toaster oven is a great option for a more consistent result.
Unlike the microwave, the toaster oven warms the bread more slowly. This reduces the risk of drying it out. The warmth also improves the flavor of the bread. This option is useful for all sorts of bread. The toaster oven allows for greater control over the browning of the bread. You can get that great taste and texture that suits you.
- Low Temperature: Use a low temperature setting, around 300°F (150°C).
- Gentle Heat: Place bread directly on the rack.
- Crispy Texture: Benefit from a crispier exterior.
Warming Bread in the Oven
Warming bread in a standard oven is another option. Preheating the oven to a low temperature, around 300°F (150°C), will work well. Place the bread directly on the rack or in a baking pan. This method is effective for warming large quantities of bread. It allows for even and thorough heating. This method requires a bit more time but offers great results.
Compared to the microwave, the oven provides a more gentle and even heat. This is beneficial for keeping the bread from drying out. This method is especially helpful for large loaves of bread. The oven will retain more moisture. You will get great results. The method requires a little preparation.
- Low Heat: Set the oven to 300°F (150°C).
- Even Heating: Provides thorough and even warming.
- Large Quantities: Perfect for warming larger quantities of bread.
Using a Skillet
You can also warm bread using a skillet. Place the bread in a dry skillet over low heat. The skillet will gently warm the bread, creating a slightly crisp exterior. This method is especially effective for tortillas or flatbreads. It is also good for sandwich bread. It’s a useful way to provide some great texture.
The skillet provides direct heat, which quickly warms the surface of the bread, while not drying out the inside. You can flip the bread occasionally to ensure even heating. This method gives a slight crispness. It’s quick, easy, and requires minimal equipment. The skillet is a simple, effective way to warm bread with great results.
- Low Heat: Use low heat for gentle warming.
- Direct Heat: Provides a slightly crisp exterior.
- Flip Often: Flip the bread for even heating.
Frequently Asked Questions
Question: How long should I microwave bread?
Answer: It depends on the bread type and your microwave’s power. Start with 10-20 seconds, checking and adjusting as needed.
Question: Do I need to wrap bread before microwaving it?
Answer: Yes, wrapping bread in a damp paper towel or using a microwave-safe container helps retain moisture and prevents the bread from drying out.
Question: Can I use aluminum foil to warm bread in the microwave?
Answer: No, avoid using aluminum foil, as it can damage your microwave and pose a fire hazard.
Question: How do I warm bread with filling in the microwave?
Answer: Wrap bread with filling in a damp paper towel and microwave in short intervals, watching to ensure the filling warms without drying out the bread.
Question: What if my bread gets too hard in the microwave?
Answer: If the bread gets too hard, you’ve likely over-microwaved it. Add a few drops of water and try warming it again for a shorter time.
Final Thoughts
So, you’ve discovered simple ways for how to warm bread in microwave and bring back that fresh-from-the-oven goodness. You’ve learned quick and easy methods using a damp paper towel, a microwave-safe container, or even a microwave bag. Remember to adjust the time based on the bread type, and always start with short intervals, checking frequently to prevent dryness. Keep in mind those easy tips for different types of bread and avoid those common pitfalls. Now you have a range of options.
With a little practice, you can transform stale or cold bread into a warm, delicious treat. Get creative and find what works best for you and your favorite kinds of bread. You can now effortlessly revive that loaf or roll. So next time you have some bread, you’ll know how to enjoy it, warm and fresh, in just seconds. Now, get ready to enjoy your warm bread and all its delicious possibilities!
I’m Emma J. Caldwell, the founder, lead writer, and home-cooking enthusiast behind KitchenGuideCo.com. With a background in culinary arts and over a decade of cooking experience in both professional and personal kitchens, I created this platform to demystify recipes, offer smart kitchen gadget reviews, and guide readers through meal prep with confidence and clarity.