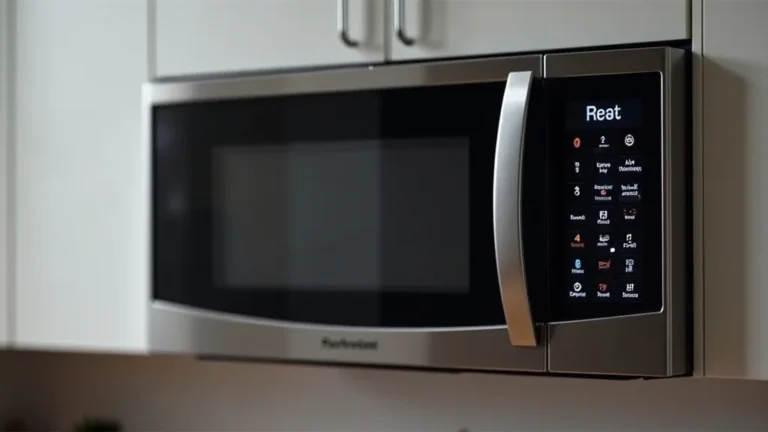
Cracked or peeling microwave interiors are a common problem. If you’re wondering how to repair microwave interior coating, you’re not alone! It can seem like a tricky task. But don’t worry, it’s often easier than you think. This guide is designed to provide you with a simple, step-by-step solution. We’ll cover everything you need to know to get your microwave back in working order safely. Keep reading to learn how to fix that peeling interior and keep your meals heated!
Key Takeaways
- Learn about the main reasons why microwave interior coatings get damaged.
- Find out what safety measures you need to take before starting the repair.
- Discover the essential tools and materials for successful repairs.
- Master the step-by-step process of cleaning, prepping, and applying new coating.
- Understand the different types of coatings and how to choose the right one.
- Get tips on maintaining your microwave to prevent future damage.
Why Microwave Interior Coatings Fail
The interior of your microwave faces some rough conditions. High heat, steam, and food splatters all contribute to the breakdown of the coating over time. The primary job of this coating is to keep the magnetron, the heart of the microwave, safe from moisture and grease. The coating also helps direct microwave energy efficiently, ensuring even cooking. When the coating fails, the microwave becomes less efficient, and can even be dangerous. Understanding the main causes of coating failures helps in preventing and dealing with them effectively.
Common Culprits of Coating Damage
Several factors can lead to the deterioration of a microwave’s interior coating. These include the age of the appliance, how you use it, and the materials you put inside. Regular cleaning and care can extend the life of your microwave, but wear and tear is inevitable. Over time, all coatings degrade. Here are some of the most common reasons why microwave interior coatings fail, explaining their impact in detail.
-
High Heat and Overheating: Microwaving food for too long or using inappropriate containers can cause the coating to blister and peel. The extreme heat generated can weaken the coating’s bond. If the coating is thin, or it experiences repeated overheating cycles, cracks and splits will start to appear.
Using the microwave for extended periods, beyond the cooking instructions, can damage the interior coating. Always follow the guidelines.
-
Food Splatters and Residue: Food splatters and spills create spots of high heat, causing damage and affecting the coating. Over time, these residues can degrade the coating. Leftover food particles can absorb microwave energy, further heating the coating and worsening the problem.
Regular cleaning is important, but even with careful use, food splatters are inevitable. They can be particularly harmful if they contain acidic components like tomato sauce or citrus juices.
-
Age and Wear: Even with careful use, the coating will degrade over time. The constant exposure to heat and moisture, along with the mechanical stress of cleaning, will cause wear. If the microwave is older, the coating is more likely to show signs of damage.
Older microwaves may have used different coating materials, some of which are more susceptible to damage than newer formulas. As a microwave ages, the coating may become less flexible and prone to cracking.
-
Improper Cleaning Methods: Using abrasive cleaners or scouring pads can scratch and damage the coating, opening pathways for moisture and food particles to seep in. Some cleaning products contain chemicals that can react with the coating materials.
Harsh cleaning techniques not only remove dirt but also strip away layers of protection, increasing the rate of wear and tear. Choose mild cleansers.
Knowing these factors can help you prevent future issues and extend your microwave’s life. Understanding the relationship between these causes and how they affect the appliance’s life will allow you to maintain your microwave’s functionality over a longer period.
Safety First: Preparing for the Repair
Before you begin the process of learning how to repair microwave interior coating, safety is the top priority. Microwaves involve electricity and can pose risks if not handled correctly. Proper precautions ensure you can work safely and efficiently. Always disconnect the microwave from the power supply, and never attempt a repair with the power cord plugged in. This is critical for preventing electrical shocks. Additionally, gather necessary materials beforehand to avoid interruptions during the repair.
Essential Safety Measures
Safety should guide every step when working with electrical appliances. Before you start, turn off the breaker and unplug the unit. Here’s a breakdown of the key safety measures. Following these steps minimizes potential risks.
-
Unplug and Disconnect: Before working on the microwave, disconnect the power supply. Find the circuit breaker that controls the microwave, turn it off, and then unplug the unit from the electrical outlet.
This is crucial. Disconnecting the power will avoid any possibility of electrical shock while working on the appliance.
-
Use Protective Gear: When cleaning or handling chemicals, wear appropriate protective gear. Gloves will shield your hands, and eye protection will shield your eyes from debris. Use a dust mask if sanding.
This will protect you from potential irritants and hazards.
-
Ventilation: Work in a well-ventilated area to avoid inhaling harmful fumes. Some coating materials emit fumes, and proper ventilation will minimize exposure. Opening a window or using a fan is recommended.
Ventilation ensures a safer work environment by dissipating fumes.
-
Clean the Microwave Thoroughly: Before handling any repair work, clean the interior of the microwave. Remove any food particles or debris. This ensures that the repair coating will adhere properly.
Thorough cleaning creates a clean surface for repair, improving the adhesion and quality of your repair.
Following these safety measures will allow you to do this repair safely and with confidence. Taking the time to prepare yourself and your workspace can prevent accidents. Always err on the side of caution when dealing with electrical appliances.
Tools and Materials You’ll Need
To repair your microwave’s interior coating, you’ll need a specific set of tools and materials. Having everything ready before you start will simplify the repair process. This includes items for cleaning, removing old coating, preparing the surface, and applying the new coating. The right tools and materials enhance the repair’s effectiveness. Gather them carefully, ensuring you have everything before commencing the work.
Must-Have Items for Coating Repair
Having the correct tools and materials ensures a better repair and saves time. Here’s a list of essential items you will need. Each of these items has a role to play. Preparing these items helps make the process smoother.
-
Cleaning Supplies: You’ll need a mild cleaner, warm water, and a soft cloth or sponge. These are for removing any food particles, grease, or dirt from the microwave’s interior.
Cleaning ensures the new coating can bond to a clean surface.
-
Sandpaper: Fine-grit sandpaper is essential for lightly abrading the surface. This helps the new coating to adhere. Make sure to choose a grit that won’t damage the microwave interior.
This step creates a slightly rough surface that the coating can grip.
-
Masking Tape: Use masking tape to protect areas of the microwave that you don’t want to get coating on, such as the door seal or control panel.
Masking tape helps keep the repair neat and prevents unintentional coating on areas you wish to protect.
-
Microwave-Safe Coating or Paint: Use paint made for microwaves to ensure it can withstand the heat and humidity inside the appliance. There are special paints. Make sure it’s the right choice.
Special coatings ensure your repairs work effectively and do not harm the appliance.
-
Small Brush or Applicator: Use a small brush or applicator to apply the coating evenly. This gives you control over the application. You can use a foam brush.
An appropriate application tool helps apply the coating evenly, leading to a professional-looking finish.
-
Gloves and Eye Protection: Put on gloves to shield your hands and eye protection to protect yourself from any splatters or fumes. Make sure you have gloves that are chemically resistant.
Safety gear is necessary to protect yourself from any dangers related to the repair.
Collecting these materials will set you up for success. This preparation reduces the chance of problems during the process. Always ensure you select materials specifically designed for microwave use.
Step-by-Step Guide to Coating Repair
Now that you’ve prepared your workspace, gathered your tools, and put on your safety gear, it’s time to tackle how to repair microwave interior coating. This step-by-step guide will walk you through the process, from cleaning the interior to applying the new coating. Following each step carefully ensures you get the best outcome and keeps your microwave functional for a longer time.
Cleaning and Surface Preparation
Cleaning and preparing the surface is the critical first stage in this process. Thoroughly cleaning the interior ensures the new coating bonds correctly. This will prevent premature peeling and extend the life of your repair. Improper preparation can cause the new coating to fail quickly.
-
Cleaning the Interior: Use warm water and a mild dish soap to clean the inside of the microwave. Carefully wipe down all surfaces. Be gentle and remove all food residue and grease. Rinse the area thoroughly with clean water, ensuring no soap remains.
This will create a clean surface for a secure bond.
-
Abrading the Surface: Using fine-grit sandpaper, gently sand the damaged areas of the coating. This step creates a slightly rough surface to help the new coating adhere better. This process creates small imperfections for better adhesion.
Sanding promotes adhesion and improves the repair’s longevity.
-
Removing Debris: After sanding, wipe the area with a clean, damp cloth to get rid of any dust or loose particles. Ensure the surface is free of debris that could interfere with the new coating.
A clean surface is essential for a smooth finish.
-
Masking Off Sensitive Areas: Use masking tape to cover any areas you don’t want to be coated, such as the door seal and control panel. This step protects these areas from stray paint or coating.
This avoids unwanted coating on parts.
Correct surface preparation increases the chances of a successful and durable repair. These steps will make sure the new coating adheres properly, and your microwave will function effectively.
Applying the New Coating
Now it’s time to apply the new coating. This section details the correct methods and techniques to get a smooth, even, and durable finish. The right application method ensures your repair is both effective and long-lasting. Proper application is a key factor in how your repair will last.
-
Selecting the Correct Coating: Choose a microwave-safe coating that is designed to withstand high temperatures and humidity. Microwave-safe paints and coatings come in different forms. Select the correct type for your needs.
Using the correct coating will ensure your repairs work well and do not create safety hazards.
-
Mixing the Coating: Stir the coating thoroughly. Make sure the color and consistency are right before starting. If using a paint, follow the manufacturer’s directions for mixing. If needed, thin the paint, and make sure it is ready to be applied.
Mixing the coating well ensures uniform color and even application.
-
Applying the First Coat: Using a small brush or applicator, apply a thin, even layer of coating to the prepared surface. Avoid applying the coating too thick. Multiple thin layers work best.
Thin layers help prevent runs and ensure a strong bond.
-
Allowing to Dry: Allow the first coat to dry completely. Follow the manufacturer’s drying time instructions. The time it takes will vary, but usually, it’s several hours or overnight.
This will allow the coating to set correctly.
-
Applying Second Coat (Optional): If needed, apply a second coat after the first has completely dried. This is often recommended for better coverage and durability. Follow the same procedure as the first application, applying a thin, even coat.
Multiple coats are often recommended for a strong and durable finish.
Proper application is an essential part of the repair process. This will keep your microwave working. By following these steps, you can achieve a good-looking and durable finish. This ensures the best performance and increases the life of your appliance.
Curing and Finishing Touches
The last part of the repair process is allowing the coating to fully cure. Curing ensures the coating achieves its maximum hardness and durability. Completing these finishing touches is important for the microwave’s safety and effectiveness. By following these steps, you will guarantee that the repair is complete and provides long-lasting service.
-
Allowing Complete Curing: After applying the final coat, allow the coating to cure according to the manufacturer’s instructions. This may take several days. During this time, the coating hardens fully.
Complete curing is important for long-lasting protection.
-
Inspecting the Coating: After curing, look over the coated area. Check for any imperfections. Make sure the coating is even and fully adhered. Make sure there are no bubbles, runs, or bare spots.
This step ensures quality.
-
Removing Masking Tape: Once the coating has completely dried and cured, carefully remove any masking tape. Do this slowly to avoid tearing the new coating or damaging surrounding areas. Pull the tape at an angle.
Proper removal will reveal a clean finish.
-
Testing the Microwave: Before regular use, test the microwave by heating a cup of water for a short time. Check for any unusual smells or sparking. Observe the appliance.
This simple test will help you verify the repair’s effectiveness.
These finishing touches are important for the long-term effectiveness of the repair. Complete curing and a final inspection guarantee your microwave works safely. After these steps, your microwave should be ready for use.
Choosing the Right Coating for Your Microwave
Choosing the right coating material can influence the success and lifespan of your repair. Microwave coatings have unique requirements. Several types of coatings are used for repairing microwave interiors. They each have different properties and benefits. The key is to select a coating that is designed for microwave use and that meets the specific demands of your appliance.
Types of Microwave Coatings
Different types of coatings are available. The material should withstand high heat and microwave radiation. Consider these options when selecting the right coating. Knowing your options will guide you to the product that best meets your needs. Here are some of the most common materials and their benefits:
-
Microwave-Safe Paints: Specially formulated paints that are heat resistant and designed to withstand the microwave environment. These paints create a protective barrier that is resistant to moisture. Easy to apply.
Microwave-safe paints are a popular option because they are effective, relatively easy to find, and generally cost-effective.
-
Epoxy Coatings: Epoxy coatings provide a strong and durable finish. They offer excellent resistance to heat, moisture, and chemicals. These coatings have good adhesion to most surfaces.
Epoxy coatings are very durable, which makes them a suitable choice for areas that experience more wear and tear.
-
Ceramic Coatings: Ceramic coatings offer high heat resistance. They are durable. They can provide a smooth and easy-to-clean surface. Ceramic coatings are often used for their non-stick properties.
Ceramic coatings are a high-performance option. They can enhance the microwave’s cooking efficiency.
-
Specialty Repair Kits: These kits contain everything you need to perform the repair, including the coating, applicators, and instructions. Some kits may come with a primer or sealant to provide better adhesion.
Specialty repair kits are practical for do-it-yourselfers. They reduce the need to gather individual components and provide comprehensive instructions.
When selecting a coating, make sure it is microwave-safe, heat-resistant, and suitable for the interior of your appliance. Choosing the right coating will guarantee a long-lasting and effective repair, increasing the life of your microwave. Selecting the correct type of coating is essential for both safety and performance.
Maintaining Your Microwave to Prevent Damage
After successfully repairing your microwave, taking preventive steps can increase its lifespan and reduce the need for future repairs. Maintenance involves simple practices. Regular care and proactive measures help protect the interior coating and other components. Taking preventative measures can prevent costly repairs.
Tips for Microwave Care
These practices keep your microwave working. From cleaning to proper usage, these steps help keep your appliance in good working condition. By integrating these habits into your routine, you can prevent damage and reduce the need for repairs. Here are some of the most effective maintenance practices you can implement:
-
Regular Cleaning: Clean your microwave regularly after each use. Wipe up food splatters and spills immediately to avoid buildup. Use a soft cloth. Do not use abrasive cleaners or scouring pads, as they can scratch the coating.
Routine cleaning is very important to prevent stains and damage.
-
Proper Heating Techniques: Always use microwave-safe containers. Avoid using metal or foil containers. Follow the cooking times and power levels. Do not overheat foods.
Appropriate usage decreases stress on the coating and ensures the microwave functions properly.
-
Ventilation: Make sure your microwave has adequate ventilation. Ensure the vents are not blocked. Proper ventilation prevents overheating.
Sufficient ventilation prevents internal heat buildup and increases the microwave’s lifespan.
-
Inspection: Inspect the microwave interior regularly. Check for any signs of damage, such as cracks, peeling, or rust. Addressing small issues quickly can prevent them from becoming more serious.
Regular inspections can help you find small problems before they grow into large ones.
By following these tips, you can extend the life of your microwave. Making maintenance a routine part of your kitchen habits helps make sure your appliance works well for many years. Consistent care helps prevent damage and makes sure your microwave is ready to serve you.
Frequently Asked Questions
Question: Can I use any type of paint to repair my microwave interior coating?
Answer: No, you should only use microwave-safe paint or a coating specifically designed for microwave interiors. Standard paints are not designed to withstand the high temperatures and radiation inside a microwave.
Question: How often should I clean my microwave?
Answer: Clean your microwave after each use. Wipe up any spills or splatters immediately. This will help prevent food from baking onto the surfaces and damaging the coating.
Question: What should I do if my microwave sparks during use?
Answer: If your microwave sparks, immediately stop using it and inspect the interior. Look for damage to the coating or any metal objects inside. Metal objects can cause arcing. Make sure to remove any objects and then examine and repair the damaged coating.
Question: How long should I let the coating dry and cure?
Answer: Follow the manufacturer’s instructions for drying and curing times. These times may differ depending on the type of coating used. Generally, you should allow several hours or even a full day or two for the coating to fully dry and cure before using your microwave.
Question: Can I use a regular cleaner to clean my microwave?
Answer: Use a mild dish soap and warm water to clean the interior of your microwave. Avoid abrasive cleaners or scouring pads, as these can scratch and damage the coating. Gently wipe down the surfaces.
Final Thoughts
You’ve successfully explored how to repair microwave interior coating and discovered the key steps to take. Remember, it begins with safety, including disconnecting the power and using protective gear. Then, you learned about the importance of cleaning and surface preparation. You also explored the selection and application of the appropriate coating, followed by curing and finishing touches. These steps will guide you through the process, empowering you to maintain your appliance. Keeping up with maintenance practices and choosing the right products will keep your microwave functioning safely and efficiently for a longer period. Following these steps and adopting proactive care will help avoid future problems and extend your microwave’s useful life.
I’m Emma J. Caldwell, the founder, lead writer, and home-cooking enthusiast behind KitchenGuideCo.com. With a background in culinary arts and over a decade of cooking experience in both professional and personal kitchens, I created this platform to demystify recipes, offer smart kitchen gadget reviews, and guide readers through meal prep with confidence and clarity.