You open your dishwasher expecting sparkling dishes, but instead, you find cloudy glasses and plates still covered in food residue. It’s easy to blame the detergent, water temperature, or even the dishwasher brand, but the real problem often lies deeper inside — the spray arms. These rotating arms are the key to distributing pressurized water evenly across every dish and utensil.
Over time, bits of food, grease, and hard-water minerals sneak into the tiny holes of the spray arms. When these holes clog up, water flow weakens, and your dishwasher loses its cleaning power. According to appliance experts, over 60% of poor dishwasher performance cases are directly linked to blocked spray arms. What looks like a minor issue can quietly reduce efficiency and leave your dishes less than spotless.
The good news is that learning how to clean dishwasher spray arms doesn’t require any special tools or professional experience. With simple household supplies like white vinegar, baking soda, and a toothbrush, you can clear away buildup and restore your dishwasher’s full power. Cleaning these arms not only improves cleaning results but also prevents odors, saves energy, and extends your machine’s lifespan.
In this complete guide, you’ll discover the exact steps to deep-clean your dishwasher spray arms safely and effectively. You’ll learn how to remove them, unclog the nozzles, soak away residue, and reassemble everything perfectly. By the end, you’ll know how to keep your dishwasher performing like it’s brand-new — every single wash cycle.
Why Cleaning Dishwasher Spray Arms Matters
The spray arms inside your dishwasher may look simple, but they play one of the most important roles in cleaning your dishes. These rotating arms are designed to spray hot water through small nozzles with high pressure, reaching every corner of the dishwasher tub. Without them, even the most expensive dishwasher wouldn’t be able to clean effectively.
Over time, tiny particles of food, grease, soap residue, and hard-water minerals start collecting inside those holes. When that buildup grows, the water pressure drops, and the jets can’t spray evenly. As a result, dishes come out dirty, cycles take longer, and energy consumption increases. What seems like a minor issue eventually turns into wasted water, time, and electricity — all because of a few clogged holes.
A clean spray arm ensures that every drop of water is used efficiently. The difference can be dramatic: cleaner plates, clearer glasses, and no unpleasant smells lingering after a cycle. You’ll also notice quieter operation and faster drying, since your dishwasher won’t need to work overtime to achieve the same results.
Another benefit of cleaning spray arms regularly is extending your dishwasher’s lifespan. Continuous buildup can strain the pump and motor, forcing them to work harder than necessary. By keeping the arms clean, you reduce internal wear and tear, saving money on future repairs or replacements.
In short, cleaning your dishwasher spray arms is not just about better-looking dishes — it’s about maintaining overall performance and efficiency. This simple task can make your machine run smoother, quieter, and more powerfully for years.
Signs Your Dishwasher Spray Arms Are Clogged
You might think your dishwasher isn’t cleaning well because of detergent or water temperature, but the real reason is often hidden — a clogged spray arm. When those tiny holes get blocked, the entire water circulation system weakens, leaving your dishes dirty and streaky no matter how many cycles you run.
One of the first signs of a clogged spray arm is dishes that come out with food residue or cloudy spots even after a full wash. If your glasses look hazy or greasy, that’s a clear hint that the water jets aren’t reaching them properly. Another noticeable symptom is uneven cleaning — some items in the rack may come out spotless while others remain untouched.
Listen closely during a wash cycle. If you hear unusual grinding, rattling, or irregular spraying sounds, it could mean the spray arms aren’t spinning freely. Sometimes, debris inside the holes causes an imbalance, stopping them from rotating as designed. Also, open your dishwasher after a cycle and check for water puddles on the bottom — restricted water flow can cause poor drainage, too.
You can also visually inspect the spray arms by removing the bottom rack. Look for mineral buildup, small particles, or residue blocking the holes. Hard-water deposits often appear as white or chalky spots around the openings. These tiny obstructions reduce pressure and make your dishwasher far less efficient.
Ignoring these early signs only leads to bigger issues over time. The longer debris stays inside, the harder it becomes to remove, eventually straining the pump and motor. Catching these symptoms early and cleaning the spray arms regularly ensures your dishwasher performs like new with every wash.
Tools and Materials You’ll Need
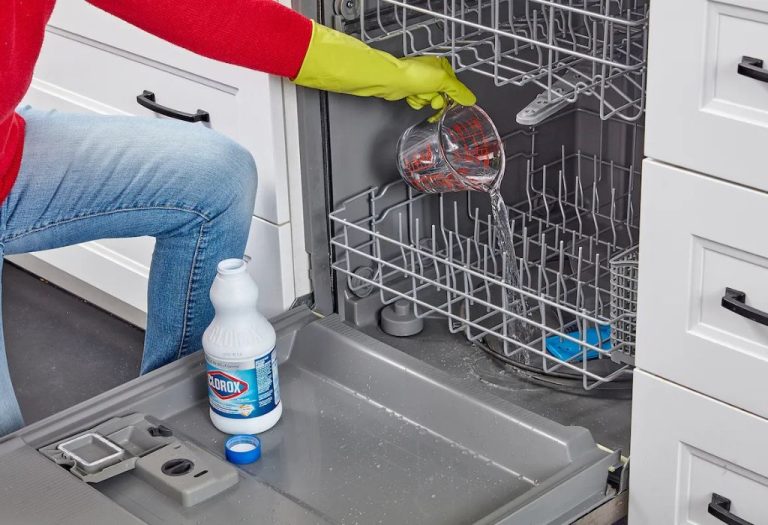
Before you start cleaning your dishwasher spray arms, it’s important to gather a few essential tools. Having everything ready makes the process smoother and prevents you from stopping midway to search for a missing item. Most of these materials are things you already have at home, so there’s no need for any special purchases.
You’ll need white vinegar — a natural cleaner that breaks down grease and mineral deposits. Baking soda is another key ingredient that helps scrub away residue and neutralize odors. A toothpick, needle, or small brush will help you unclog the tiny holes in the spray arms without scratching them. Keep a soft cloth or microfiber towel handy for drying once the cleaning is complete.
Depending on your dishwasher model, you might also need a screwdriver to remove the spray arms. Some models twist off easily, while others are secured with a small screw. Have a small basin or sink ready for soaking the arms in vinegar solution — this step is crucial for loosening hard buildup. Finally, wear rubber gloves to protect your hands from warm water and cleaning residue.
It’s also helpful to have a flashlight nearby if your dishwasher’s interior lighting is dim. This allows you to inspect the spray arm holes closely for any blockages or mineral buildup. Avoid using sharp metal tools that might damage the plastic jets or enlarge the spray holes.
By preparing all these tools in advance, you’ll save time and make the cleaning process quick and effective. With just a few basic household items, you can restore your dishwasher’s full cleaning power and extend its lifespan — no professional service required.
Step-by-Step Guide on How to Clean Dishwasher Spray Arms
Step 1: Disconnect Power and Water Supply
Before touching any part of your dishwasher, always start with safety. Unplug the dishwasher from the power source or turn off the circuit breaker connected to it. This ensures you won’t experience any electrical shocks while handling metal parts or water inside the machine.
Next, switch off the water supply if your dishwasher connects to a dedicated valve. While you won’t be removing major plumbing lines, this precaution prevents leaks or pressure bursts when removing the spray arms. A few seconds spent ensuring safety can save hours of cleanup later.
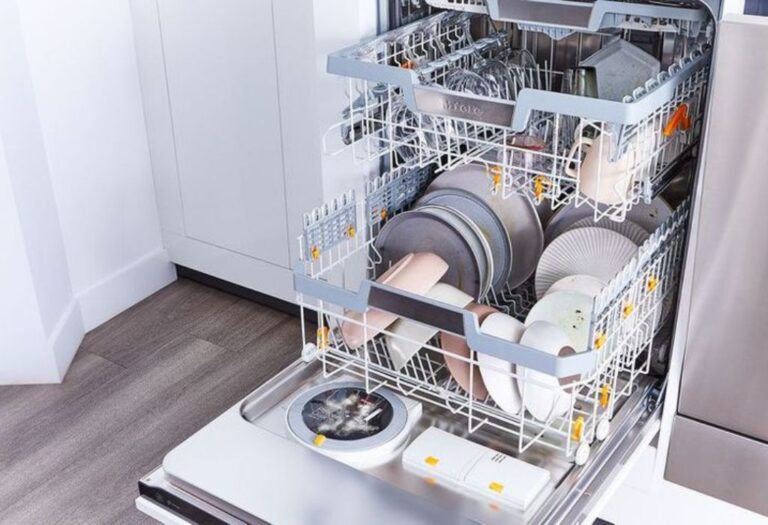
Once everything is safely disconnected, open the dishwasher door fully and remove the bottom rack to create more working space. You should now clearly see the lower spray arm, usually located at the center of the base, and possibly an upper arm mounted under the top rack or on the ceiling.
Step 2: Remove the Spray Arms
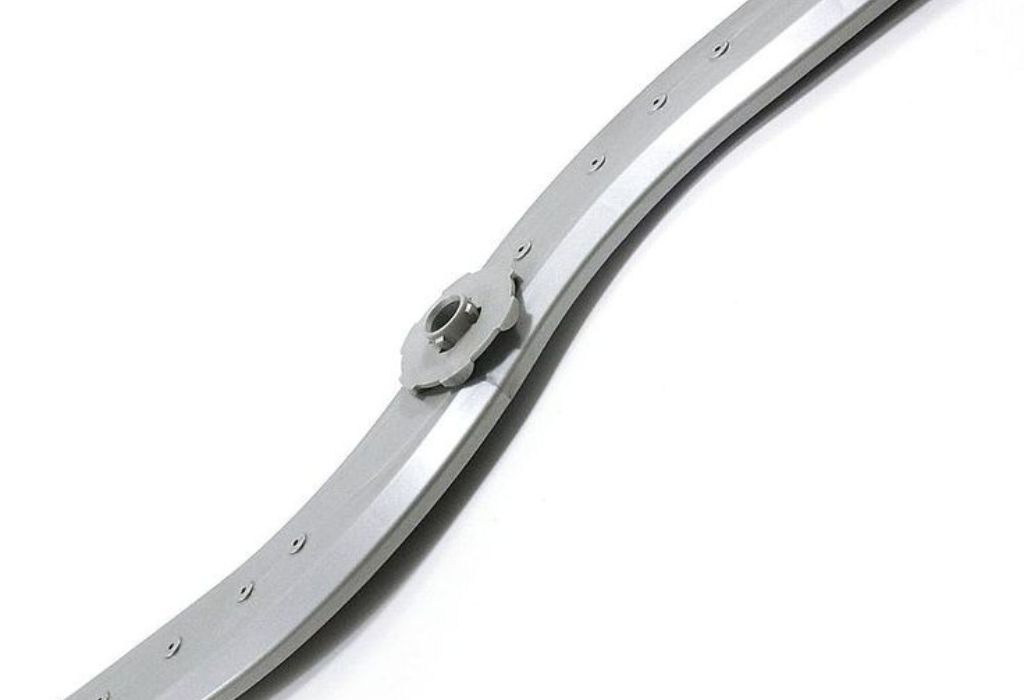
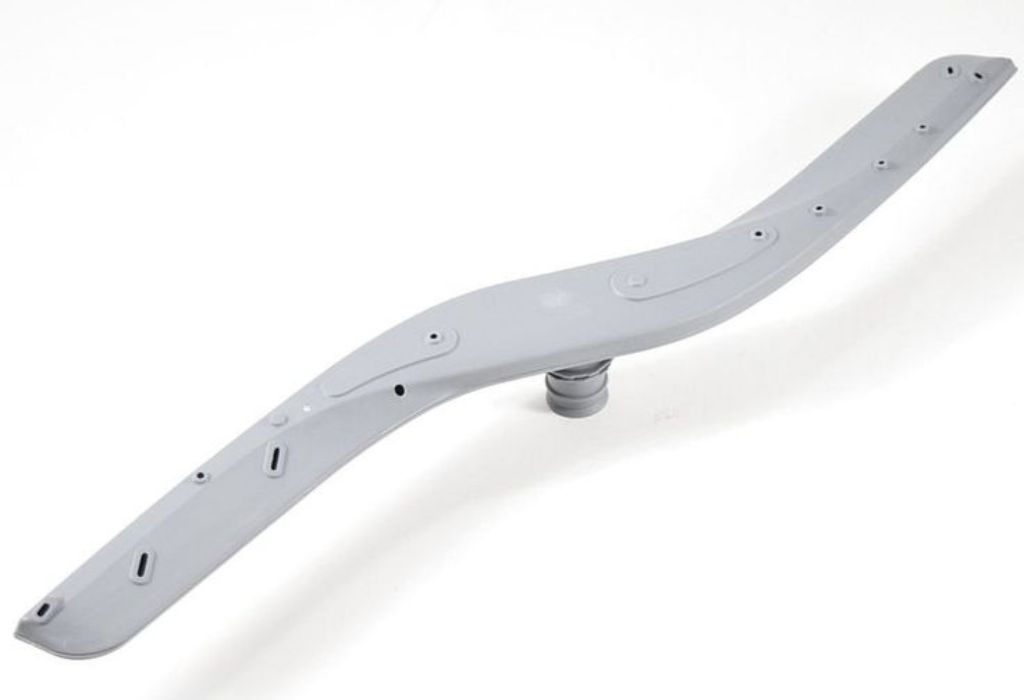
Depending on your dishwasher model, the spray arms may either twist off by hand or require a screwdriver. Most modern dishwashers use a simple locking mechanism — turn the spray arm counterclockwise to loosen it. If yours uses a retaining screw, use a Phillips screwdriver to gently remove it.
Be careful not to use too much force, as spray arms are made of plastic and can crack if twisted harshly. Once detached, check both the top and bottom arms for visible debris or mineral buildup. If you see white or chalky deposits, it’s a sign of hard-water scaling.
Set the removed arms aside in a clean sink or basin. You’re now ready for the next crucial step — inspecting and unclogging the spray holes.
Step 3: Inspect and Unclog the Holes
Once the spray arms are removed, hold each one under good light or use a flashlight. Slowly rotate it and check every small opening along the arms. You’ll likely see bits of food, soap residue, or white chalky spots caused by hard-water buildup.
Use a toothpick, pin, or thin wire to gently remove the debris from each nozzle. Avoid using metal objects that could widen the holes or scratch the plastic surface. After clearing the visible clogs, rinse the arm under warm running water to flush out any loosened particles.
If certain holes still look blocked, repeat the process a few times until water flows evenly through all openings. You can also shake the arm gently to help remove hidden debris inside. A clear spray arm should allow water to pass freely without any resistance.
Once done, set the arms aside for soaking in vinegar — the next step to dissolve leftover grease and mineral residue completely.
Step 4: Soak in Vinegar Solution
After unclogging the holes, it’s time to deep clean the spray arms. Fill a sink or basin with a mixture of equal parts white vinegar and warm water. Vinegar works as a natural descaler that loosens grease, soap residue, and hard-water minerals without damaging plastic.
Submerge both spray arms completely in the solution and let them soak for 30 to 60 minutes. If the buildup is heavy, sprinkle a small amount of baking soda into the mix — the gentle fizzing action will help dissolve stubborn grime more effectively.
During soaking, you can occasionally move or rotate the spray arms to ensure the vinegar reaches every hole and joint. For extra cleaning, use a soft brush to scrub the surfaces lightly while still submerged.
Once the soaking time is complete, remove the arms and rinse them thoroughly with warm water. This step ensures all vinegar, baking soda, and loosened debris are washed away before reinstallation.
Step 5: Rinse and Dry
After soaking, it’s time to rinse off all the loosened residue. Hold each spray arm under warm running water, turning it slowly so the water flows through every nozzle. This helps flush out any remaining debris or vinegar solution left inside the holes.
Use a soft brush or old toothbrush to gently scrub the arms one last time. Focus on the areas around the nozzles and joints, where grease and soap scum often collect. If you notice any lingering mineral spots, wipe them off with a damp cloth dipped in a bit of vinegar.
Once completely clean, shake off excess water and dry the spray arms using a microfiber towel or soft cloth. Make sure no moisture remains inside before reattaching them. Allowing them to air-dry for a few minutes helps prevent water spots or odor buildup later.
Step 6: Reattach and Test
Now that your spray arms are fully cleaned and dried, it’s time to put them back in place. Align each arm carefully with its mounting post and push or twist it until it clicks securely. If your model uses a screw, tighten it gently — firm enough to hold but not so tight that it cracks the plastic.
Spin each arm by hand to make sure it rotates freely. It should move smoothly without wobbling or scraping against the dishwasher base. If it feels stuck or uneven, remove and adjust it again before running any cycle. Proper alignment ensures even water distribution during washing.
Once reattached, run a short rinse cycle or quick wash with no dishes inside. Watch and listen — you should hear a consistent spray pattern and smooth rotation. Check afterward to confirm there’s no residue or standing water inside.
How Often Should You Clean Spray Arms?
Just like any other kitchen appliance, your dishwasher needs routine maintenance to perform at its best. The spray arms, in particular, should be cleaned regularly since they handle the toughest part of the job — spraying high-pressure water filled with detergent and food particles through narrow nozzles.
For most homes, cleaning the spray arms every two to three months is ideal. This frequency keeps the holes free from buildup and ensures consistent water pressure. However, if you live in an area with hard water, you may need to clean them monthly. Hard water leaves mineral deposits that quickly clog small openings, even if you rinse your dishes before loading.
Families who use their dishwasher daily or cook oily, starchy foods should also consider cleaning more often. These types of meals leave residue that sticks inside the spray arms and filters faster than you might expect. Doing light maintenance monthly will prevent the need for deep cleaning later.
A quick trick to remember: if your dishes come out cloudy or the spray arms stop spinning freely, that’s your cue for cleaning. You don’t have to wait for major signs of clogging before taking action. Regular upkeep keeps your dishwasher performing efficiently and reduces long-term energy costs.
To extend the time between deep cleans, run an empty cycle with white vinegar once a month. This natural cleaner breaks down hidden grease and scale inside the dishwasher, including the spray arms, filters, and pump.
With a simple routine like this, you’ll maintain powerful spray pressure, spotless dishes, and a fresh-smelling dishwasher all year long.
Common Mistakes to Avoid
Cleaning your dishwasher spray arms isn’t complicated, but a few common mistakes can reduce your efforts or even cause damage. Knowing what to avoid will help you clean safely and maintain your dishwasher’s full performance for years.
The most frequent mistake people make is using harsh chemical cleaners. Products that contain bleach or strong acids can corrode the plastic or metal in your spray arms. Always stick with mild options like white vinegar, baking soda, or gentle dish soap. These natural cleaners are powerful enough to remove buildup without harming your appliance.
Another mistake is using sharp metal tools to unclog spray holes. It might seem effective at first, but pushing with nails, pins, or knives can enlarge the holes and affect the water pressure balance. Once those nozzles widen, your dishwasher may lose its ability to spray evenly. Instead, always use a toothpick or a small plastic brush for safe cleaning.
Many people also forget to clean the filters and bottom basin while working on the spray arms. Food particles from those areas can quickly wash back into the arms, undoing your work. Make it a habit to clean all connected parts — filter, drain, and spray arms — during the same session.
Lastly, improper reinstallation is another common issue. If spray arms aren’t tightened correctly, they can wobble, leak, or fail to spin freely. After cleaning, always spin them by hand to confirm smooth movement before running a cycle.
Avoiding these mistakes makes your cleaning process faster, safer, and more effective. A little care goes a long way in keeping your dishwasher running smoothly and delivering spotless dishes every time.
Alternative Cleaning Methods
Sometimes regular cleaning isn’t enough, especially if your dishwasher has years of built-up residue or hard-water deposits. Luckily, there are several alternative cleaning methods that can help restore your spray arms to peak performance without needing professional service.
One effective option is using dishwasher cleaner tablets. These tablets are specially designed to dissolve grease, soap scum, and scale throughout the machine. Simply place one in the detergent compartment and run a hot wash cycle with an empty dishwasher. It not only refreshes the spray arms but also cleans the interior walls, filters, and pump at the same time.
If your spray arms are still partially blocked, try using compressed air to blast out any hidden debris. This works well for deep internal clogs that simple soaking can’t reach. Hold the arm firmly and spray short bursts through each hole to force out any remaining buildup.
For tougher mineral stains, you can make a paste of baking soda and vinegar. Apply it to the nozzles, wait a few minutes, and rinse thoroughly. This method safely removes calcium and limescale spots while neutralizing odors.
As a last resort, consider professional maintenance if your dishwasher is older or frequently clogs. A technician can inspect the pump, filters, and internal tubing to ensure water flow is unobstructed.
These alternative methods give you flexibility depending on how severe the buildup is. Combining one or two approaches a few times a year will keep your spray arms spotless and your dishwasher working like new.
Preventive Maintenance Tips for Long-Term Performance
Once you’ve cleaned your dishwasher spray arms, the best way to keep them in top shape is by following a few preventive maintenance habits. These small steps help stop buildup before it starts and keep your dishwasher running efficiently for years.
The first habit is rinsing off large food particles before loading dishes. You don’t need to scrub them clean, but removing leftover rice, pasta, or grease prevents debris from reaching the spray arms and filters. Less residue means fewer chances of clogging over time.
Next, make it a routine to clean your dishwasher filter every two to three weeks. The filter traps most food waste before it circulates back through the spray arms. Simply remove it, rinse under warm water, and brush off any residue. Keeping it clear ensures smoother water flow and better cleaning results.
Run an empty hot cycle with white vinegar once a month. This natural cleaner breaks down grease and mineral buildup inside the arms, pump, and pipes. For extra freshness, sprinkle a bit of baking soda on the bottom before starting the cycle — it helps eliminate odors and maintains shine.
Check the spray arm holes regularly by spinning them with your hand. If they feel stiff or don’t rotate freely, it may be time for a quick cleaning. Also, using dishwasher salt or a water softener can significantly reduce hard-water deposits if you live in a mineral-heavy area.
By maintaining these habits, you’ll not only keep your spray arms clog-free but also extend the life of your dishwasher. Regular preventive care means consistent cleaning power, lower energy use, and dishes that sparkle after every cycle.
Troubleshooting After Cleaning
Even after a thorough cleaning, your dishwasher might still show minor performance issues. Don’t worry — this doesn’t mean the cleaning failed. Sometimes, the problem lies in other connected parts like filters, hoses, or the pump. A little troubleshooting can help identify what’s going on.
If your spray arms aren’t spinning freely, remove the bottom rack and check for obstructions. Large utensils or tall dishes can block their rotation without you realizing it. Make sure the arms are properly secured and spin them by hand to confirm smooth movement before running another cycle.
When water pressure seems weak, inspect the filter and inlet valve for buildup or blockages. A clogged filter can limit water flow, reducing spray force. Cleaning the filter with warm soapy water usually restores normal pressure within minutes.
If you still notice dirty dishes, look at the pump or circulation motor. Over time, debris can get trapped inside and affect water distribution. In this case, refer to your dishwasher’s manual or consider professional maintenance for deeper inspection.
Persistent odors after cleaning are another common complaint. Running a short hot cycle with a cup of vinegar or a sprinkle of baking soda on the bottom tray will neutralize smells and sanitize the system.
After addressing these checks, your dishwasher should function like new again. Remember, even small maintenance steps make a big difference in performance and longevity. By understanding these troubleshooting basics, you’ll know exactly what to do whenever something feels off — no need to call for repairs immediately.
When to Replace Dishwasher Spray Arms

Cleaning can solve most dishwasher performance problems, but sometimes replacement is the only long-term solution. Over years of use, spray arms can crack, warp, or lose their tight seal, which prevents water from spraying properly. Knowing when to replace them can save time, money, and frustration.
Start by inspecting the physical condition of each spray arm after cleaning. Look closely for cracks, dents, or melted areas caused by contact with heating elements. Even small fractures can leak water and lower spray pressure dramatically. If the arms no longer sit securely or wobble while spinning, replacement is likely necessary.
Another clear sign is persistent clogging. If you’ve cleaned the holes multiple times but they keep getting blocked, mineral buildup inside the arm might be too deep to remove. Internal scaling limits water flow permanently, and no amount of soaking will restore full performance.
Also, check for discoloration or rust, especially on older metal or hybrid models. Rust particles can contaminate your dishwasher water and leave stains on dishes. Plastic arms that have turned brittle or yellow may also indicate wear and aging.
Replacing spray arms is simple and inexpensive. Most dishwasher brands sell original or compatible replacements online or in appliance stores. Always match the replacement with your model number to ensure perfect fit and balance. Installation usually takes less than ten minutes — twist off the old arm, align the new one, and lock it in place.
Once replaced, your dishwasher will spray more powerfully and clean more evenly than before. Keeping an eye on the spray arms’ condition helps maintain consistent results and prevents unexpected breakdowns during heavy use.
Frequently Asked Question About-how to clean dishwasher spray arms
1. Why do dishwasher spray arms get clogged?
Spray arms often get clogged by food particles, grease, and hard-water minerals that collect in their tiny holes. Over time, these blockages reduce water pressure and prevent your dishwasher from cleaning properly.
2. How often should I clean my dishwasher spray arms?
For best results, clean the spray arms every 2 to 3 months. If you live in a hard-water area or use your dishwasher daily, a monthly cleaning helps prevent buildup and keeps water flowing freely.
3. What’s the best way to remove spray arms for cleaning?
Most spray arms twist off counterclockwise or can be released by unscrewing a small cap. Check your dishwasher manual for specific instructions to avoid damaging the locking mechanism.
4. What can I use to unclog spray arm holes?
Use a toothpick, pin, or thin wire to gently remove debris from each hole. Avoid using sharp metal objects that might widen or damage the nozzles.
5. Can vinegar clean dishwasher spray arms effectively?
Yes. Soaking the spray arms in a mixture of equal parts warm water and white vinegar for 30 to 60 minutes helps dissolve grease, detergent residue, and hard-water deposits naturally.
6. Should I use baking soda with vinegar to clean spray arms?
Adding baking soda boosts cleaning power. It helps scrub away stubborn buildup while the vinegar dissolves minerals, leaving the spray arms fresh and odor-free.
7. How can I tell if my spray arms are clogged?
If dishes come out dirty, water pressure seems weak, or the arms don’t spin freely, they’re likely clogged. Visible white residue or food bits in the holes are also clear signs.
8. Can I clean dishwasher spray arms without removing them?
Yes, but the cleaning will be less thorough. You can run an empty cycle with vinegar or a dishwasher cleaner to flush minor buildup, but deep cleaning requires removing the arms.
9. What mistakes should I avoid when cleaning spray arms?
Avoid using harsh chemicals or metal tools, forcing parts loose, or skipping filter cleaning. These mistakes can damage the spray arms or allow residue to re-clog quickly.
10. When should I replace my dishwasher spray arms?
Replace them if they’re cracked, warped, or don’t spin smoothly even after cleaning. Damaged spray arms can’t distribute water properly and should be swapped for manufacturer-approved replacements.
Conclusion
A dishwasher can only perform as well as its spray arms allow. These small but powerful components are responsible for directing high-pressure water to every dish, glass, and utensil inside. When they become clogged or coated with residue, the entire cleaning process suffers — leaving you with dull results and wasted energy.
By learning how to clean dishwasher spray arms properly, you can keep your machine working at full strength. A simple combination of vinegar, baking soda, and warm water is enough to remove grease, food particles, and mineral buildup. Regular maintenance every few months ensures smooth water flow, better cleaning, and a fresh-smelling interior.
It’s also important to remember that cleaning doesn’t stop at the spray arms. Filters, drains, and interior surfaces need occasional attention too. When all these parts work together, your dishwasher uses less energy and delivers spotless results every time.
If you ever notice recurring problems like weak spray pressure or unclean dishes even after cleaning, inspect for damage. Replacing the spray arms when necessary is an easy, cost-effective way to restore full performance.
In the end, maintaining your dishwasher isn’t about complicated repairs — it’s about consistency. A few minutes of care every few months can save you from costly replacements and keep your kitchen routine effortless.
So, the next time your dishes come out less than perfect, don’t rush to call a technician. Open the door, remove the racks, and start with the basics — clean those spray arms. You’ll be surprised how much difference this small step makes in bringing your dishwasher back to life.
I’m Emma J. Caldwell, the founder, lead writer, and home-cooking enthusiast behind KitchenGuideCo.com. With a background in culinary arts and over a decade of cooking experience in both professional and personal kitchens, I created this platform to demystify recipes, offer smart kitchen gadget reviews, and guide readers through meal prep with confidence and clarity.