You’ve finally bought that sleek, energy-efficient dishwasher you’ve been eyeing for months, but now it’s sitting in your kitchen, still in the box, waiting for you to install it. The thought of connecting wires, water lines, and drain hoses might sound overwhelming at first, especially if you’ve never done it before. But the truth is, learning how to install a dishwasher is much simpler than it seems once you understand the process.
With just a few tools, some patience, and a step-by-step guide, you can save a lot of money by skipping professional installation. Modern dishwashers are designed with DIY installation in mind, making it possible for homeowners to get everything up and running in just a couple of hours. What might look like a complicated setup is really just a series of careful connections that anyone can handle with basic household skills.
Recent surveys show that nearly 40% of homeowners now install their own dishwashers, proving that this once “expert-only” task has become an achievable home project. Manufacturers have made it easier than ever by providing clear instructions, flexible fittings, and pre-designed hookups for water and power. With the right preparation, there’s no need to spend extra money hiring a plumber or electrician.
Think of this as a weekend project that offers immediate rewards. You’ll gain hands-on experience, save installation fees, and enjoy the satisfaction of turning on a dishwasher you installed yourself. The key is to take your time, follow each step carefully, and test everything before finishing.
In this comprehensive guide, you’ll learn how to install a dishwasher step by step, from unboxing and setup to connecting the water, drain, and power lines safely. By the end, your dishwasher will be perfectly fitted, leak-free, and ready to make cleaning up after meals easier than ever before.
What to Know Before Installing a Dishwasher
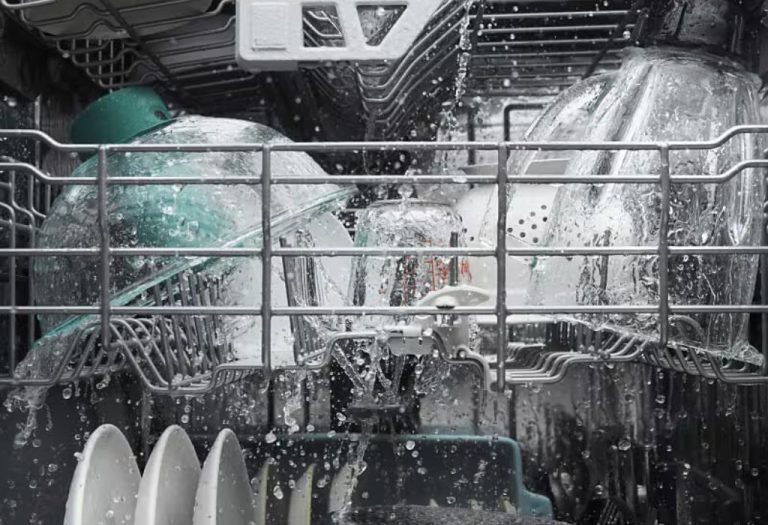
Before diving into the installation process, it’s important to understand what makes a dishwasher work efficiently. A dishwasher connects to your home’s water supply, drainage, and electrical system, which means proper setup ensures smooth operation, leak prevention, and long-term durability. Skipping any small detail can lead to frustrating problems later, like water pooling at the bottom or incomplete cleaning cycles.
The first thing you need to check is whether your kitchen space is ready for installation. Standard dishwashers are typically 24 inches wide and fit under most kitchen counters, but it’s still wise to measure the available space.
Make sure you have at least half an inch of clearance on each side to allow for easy sliding and ventilation. If you’re replacing an old dishwasher, confirm that the existing space and connections match the new model’s requirements.
Next, ensure you have access to the right electrical and plumbing connections. Most dishwashers require a grounded 120-volt outlet and a nearby hot water supply line. The water line should come from under the sink, connecting through a valve that controls the water flow.
Likewise, the drain hose needs a connection to either the garbage disposal or a sink drain with a proper high loop to prevent backflow.
If this is your first installation and your kitchen doesn’t already have a dishwasher hookup, you may need to hire a plumber to install the necessary lines. But for most replacements, the existing setup will work fine.
Just double-check for any worn-out hoses or corroded fittings before starting the installation — replacing them now can save you from leaks later.
By making sure all dimensions, power, and water sources are correctly set up before you begin, you’ll make the installation process much smoother and faster. A little preparation goes a long way toward ensuring your dishwasher fits perfectly and performs flawlessly from day one.
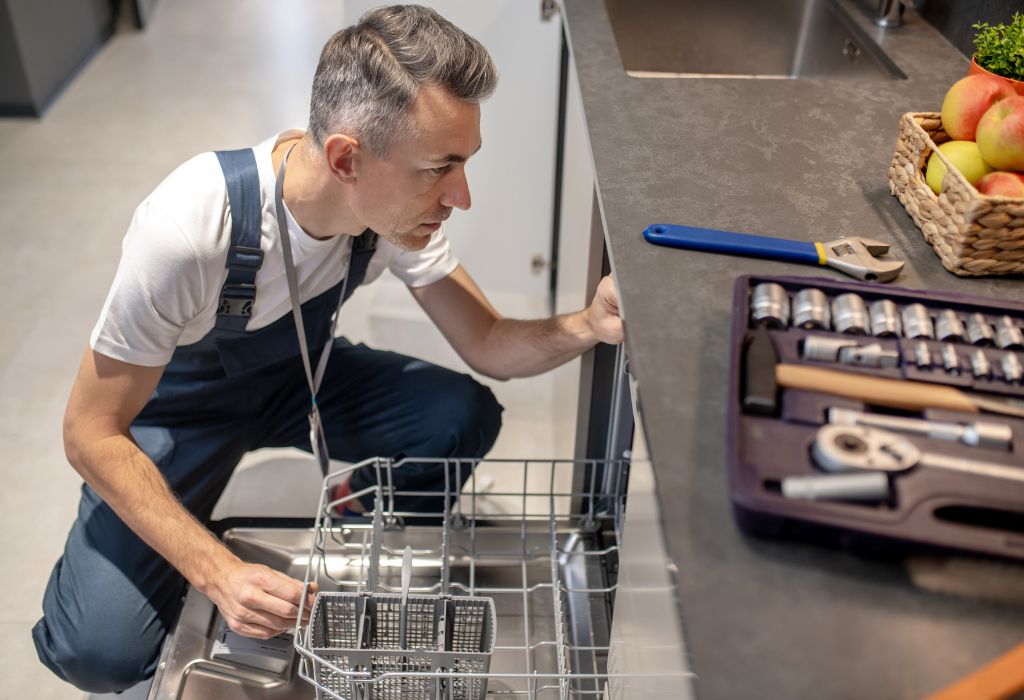
Tools and Materials You’ll Need
Before you start installing your dishwasher, gathering the right tools and materials will save you time and frustration. Having everything on hand ensures a smooth workflow and prevents you from running back and forth in the middle of installation.
You’ll need a few basic hand tools to get started — an adjustable wrench, Phillips and flat-head screwdrivers, and a pair of pliers. These will help you tighten fittings, remove screws, and connect hoses securely.
A level is also essential to make sure your dishwasher sits evenly under the countertop. If the unit tilts forward or backward, it may cause water leaks or poor drainage during the wash cycle.
Next, gather plumbing supplies such as Teflon tape, a small bucket, and a towel. Teflon tape helps seal threaded connections on the water line to prevent leaks, while the bucket and towel come in handy when disconnecting old hoses that might still hold water.
You’ll also need a dishwasher installation kit, which usually includes a water supply line, drain hose, and power cord (if not pre-installed). Most modern dishwashers don’t come with these accessories, so check your product manual or retailer’s recommendations before starting.
A flashlight can make a big difference when working in tight or dimly lit spaces under the sink or behind the cabinet. It helps you spot leaks, align screws, and ensure the connections are tight.
Lastly, don’t forget safety gear — rubber gloves to protect your hands from sharp edges and safety glasses if you’re drilling through cabinetry.
Before you begin, unplug the old dishwasher or switch off power at the circuit breaker. Turn off the water supply under the sink as well. These precautions keep you safe while working around electricity and water connections.
With all your tools ready, you’ll be well-prepared for a clean and efficient installation process — the foundation of a job well done.
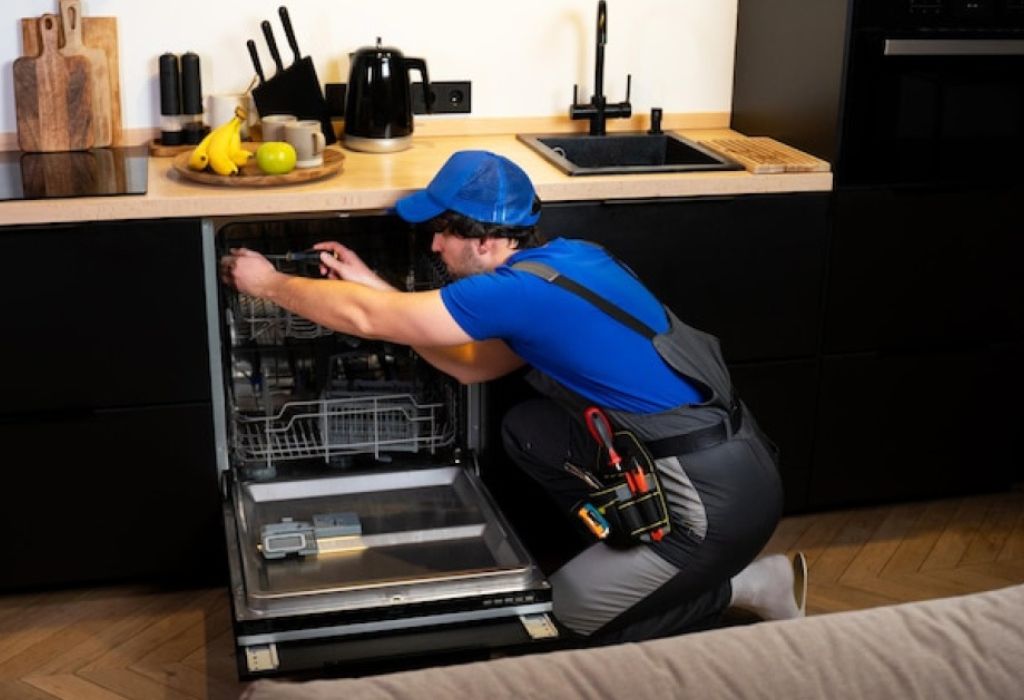
Step-by-Step Guide on How to Install a Dishwasher
Installing a dishwasher becomes much simpler when you take it one step at a time. With the right approach, tools, and patience, you can achieve a clean, professional installation without needing a plumber or electrician. Follow these detailed steps carefully to ensure your dishwasher runs efficiently and leak-free.
Step 1: Turn Off Power and Water Supply
Before you begin, always start with safety. Go to your home’s circuit breaker and switch off the power supply connected to your dishwasher. This prevents any risk of electric shock while handling the wiring or connections.
Next, close the hot water valve located under your kitchen sink to stop water flow. This ensures that when you remove or attach hoses, there are no unexpected leaks or splashes that could damage your flooring. Double-check that both power and water are completely off before you continue.
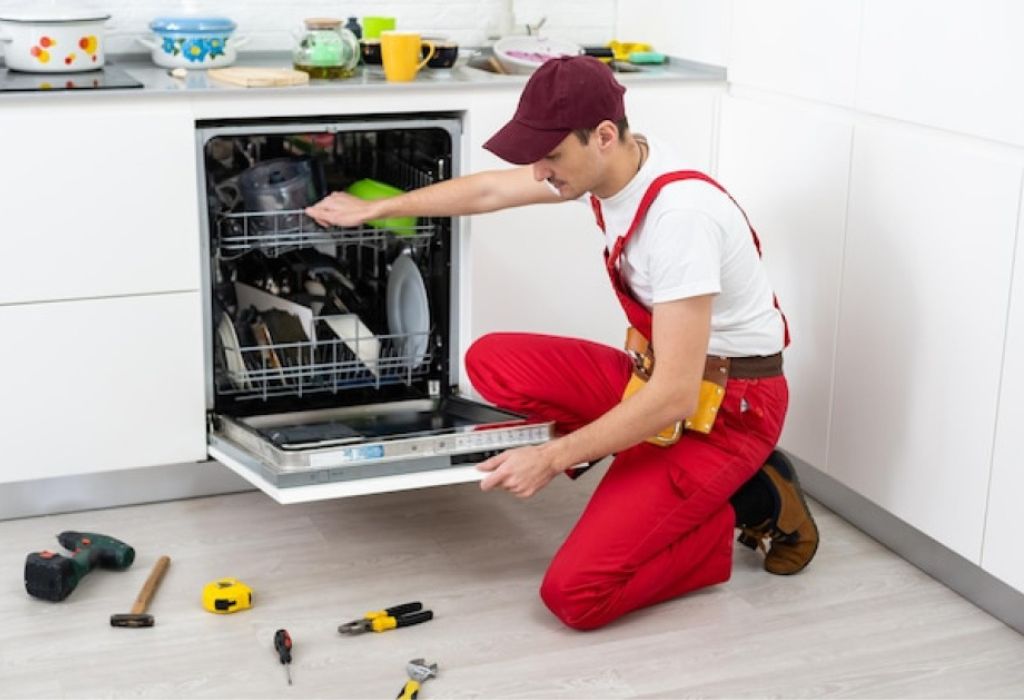
Step 2: Remove the Old Dishwasher (If You Have One)
If you’re replacing an old dishwasher, gently pull it out from under the counter to access the back area. Take your time and avoid yanking it, as hoses and wires may still be attached.
Disconnect the power cord, water supply line, and drain hose carefully. Keep a towel or small bucket handy to catch any remaining water in the lines. Once all connections are free, slide the old unit out completely and clean the surrounding area to prepare for the new installation.
Step 3: Prepare the New Dishwasher
Unbox your new dishwasher and inspect it for any visible dents or damage from shipping. Attach the mounting brackets that will later secure the dishwasher to the countertop. These small metal pieces prevent the unit from tipping forward when you open the door.
Next, connect the drain hose to the back of the dishwasher before sliding it into place. Thread the water line and power cord through the cabinet openings now — it’s much easier to do this before the dishwasher is positioned inside the cabinet space.
Step 4: Connect the Water Supply Line
Locate the water inlet fitting at the bottom of the dishwasher and wrap the threads with Teflon tape. This tape helps seal the connection and prevents leaks once water starts flowing. Attach the water line from the hot water valve under your sink using an adjustable wrench.
Tighten the connection firmly but avoid over-tightening, as that can crack the fitting or strip the threads. Once attached, make sure the line isn’t kinked or twisted, as this could restrict water pressure during operation.
Step 5: Connect the Drain Hose
Attach one end of the drain hose to the dishwasher’s outlet and the other end to the sink’s drainpipe or garbage disposal inlet. The hose must be secured tightly to prevent leaks during the draining process.
If your dishwasher doesn’t use an air gap, make sure you create a high loop with the drain hose by fastening it to the underside of the countertop. This prevents dirty water from flowing back into the dishwasher, keeping your dishes hygienically clean after every cycle.
Step 6: Make the Electrical Connection
Remove the small access panel at the bottom front of the dishwasher to reach the wiring box. Inside, you’ll see three wires — black (hot), white (neutral), and green (ground). Match each color accordingly, connecting black to black, white to white, and green to the grounding screw.
Use wire nuts to secure the connections tightly, then wrap them with electrical tape for extra safety. Once done, close the wiring box and reattach the cover. This keeps the wires safe and protected from moisture.
Step 7: Slide the Dishwasher into Place
Carefully push the dishwasher back into its cabinet space, making sure that the hoses and power cord move freely through their openings without bending or pinching. Move slowly to avoid dislodging any of the connections you’ve made so far.
Once it’s in position, use a level to check that the dishwasher sits perfectly straight. A tilted unit can cause leaks, uneven drainage, and unnecessary noise during operation. Adjust the front legs using a wrench until it’s balanced on all sides.
Step 8: Secure the Dishwasher to the Countertop
After leveling, it’s time to anchor the dishwasher in place. Use screws to fasten the mounting brackets to the underside of your countertop. This step is essential to keep the appliance stable when the door is open and the racks are pulled out.
Make sure not to over-tighten the screws — they should hold the unit firmly without pulling it too tightly against the counter. Check that the door opens and closes smoothly before proceeding to the final step.
Step 9: Turn On Power and Test for Leaks
Once everything is connected, turn the water supply and power back on. Run a short rinse or quick wash cycle to test the installation. Watch closely for leaks around the drain hose, water line, and the area under the dishwasher.
If you notice any dripping, pause the cycle and tighten the connections slightly. When the test cycle completes without any issues, your installation is a success. Your dishwasher is now ready to handle daily cleaning with full efficiency.
Common Mistakes to Avoid During Dishwasher Installation
Even though installing a dishwasher is fairly simple, many homeowners make small mistakes that lead to leaks, noise, or poor performance later. Understanding these common issues ahead of time can save you a lot of frustration and prevent costly repairs down the road.
One of the biggest mistakes is forgetting to turn off the power and water supply before starting. Working with live electrical wires or pressurized water can be dangerous and damaging to your appliance. Always double-check both are off before touching any connection. Safety should always come first during installation.
Another common error is not leveling the dishwasher properly. If the unit tilts even slightly forward or backward, it can cause water to pool at the bottom, leading to poor drainage or leaks. Use a level tool to ensure the dishwasher sits evenly on all sides. Adjust the front legs carefully until the bubble is centered — this small step can make a big difference in long-term performance.
Many people also forget to use Teflon tape on the water inlet connection. Without a proper seal, even a small gap can cause slow leaks that go unnoticed for weeks. Wrapping the threads tightly with Teflon tape ensures a watertight connection and prevents water damage to your flooring or cabinets.
A frequent plumbing-related mistake is skipping the high loop or air gap when connecting the drain hose. The high loop prevents dirty water from flowing back into the dishwasher after a drain cycle. Without it, food particles and grease from your sink can contaminate clean dishes and cause foul odors inside the unit.
Some homeowners also overtighten screws, brackets, or fittings, thinking it will make the installation stronger. In reality, too much force can crack plastic parts, strip threads, or distort the frame. Tighten everything just enough to hold it firmly — not excessively.
Finally, rushing through the final testing stage is another big mistake. Many installers turn the power back on and assume everything works fine. Instead, you should always run a short rinse cycle while inspecting every connection for leaks or vibrations. Watching the first few minutes of operation ensures everything is functioning correctly and allows you to fix small issues immediately.
By avoiding these mistakes and taking a patient, careful approach, you’ll end up with a leak-free installation that lasts for years. A little extra time spent checking details now will save you from dealing with water damage or costly service calls later.
Safety Tips for DIY Dishwasher Installation
When it comes to installing a dishwasher, safety should always come before speed. Working around electricity, water lines, and confined spaces can lead to accidents if you’re not careful. By following a few key safety tips, you can ensure your installation process is both smooth and risk-free.
The first and most important rule is to disconnect all power sources before touching any electrical wires or connections. Dishwashers operate on a 120-volt power supply, which is enough to cause serious injury if mishandled. Always turn off the circuit breaker that controls the dishwasher and verify that the power is off by testing with a voltage detector before beginning your work.
Next, shut off the water supply completely before detaching or attaching hoses. Even a partially open valve can release a strong stream of water, potentially damaging cabinets, flooring, and electrical components. Keeping a small towel or bucket nearby is also wise in case any leftover water drains out of the old lines.
If you’re working in a tight space under the sink, make sure your area is well-lit and clutter-free. Use a flashlight or work light to clearly see fittings and wires before making any connections. Poor visibility often leads to loose fittings, cross-threaded screws, or damaged hoses that can cause leaks later.
Always wear rubber gloves to protect your hands from sharp metal edges or screws while handling the dishwasher. Some parts around the mounting brackets or internal frame can be quite sharp. Safety glasses are also helpful when drilling through cabinets or working with power tools to prevent dust or debris from getting into your eyes.
When connecting the power wires, take time to match each color correctly — black to black, white to white, and green to the ground. Incorrect wiring can cause short circuits or permanent damage to the motor. If you feel unsure about this part, it’s worth consulting an electrician or following the manufacturer’s wiring diagram carefully.
Lastly, before running your first cycle, double-check every connection — water line, drain hose, and electrical wiring — to ensure nothing is loose or leaking. A quick inspection now prevents costly damage later. Running a short rinse cycle allows you to confirm that the dishwasher fills, drains, and powers on properly without any issues.
Installing a dishwasher yourself can be rewarding, but only when it’s done with patience and attention to safety. Taking a few extra minutes to prepare, check connections, and follow these precautions will give you peace of mind and a reliable, perfectly functioning appliance.
How Much Does It Cost to Install a Dishwasher?
One of the biggest advantages of learning how to install a dishwasher yourself is the cost savings. Professional installation can be convenient, but it often comes with a price tag that’s higher than most people expect. Understanding the cost breakdown helps you appreciate how much money you can save by doing it on your own.
On average, hiring a professional to install a dishwasher costs between $150 and $300, depending on your location, kitchen layout, and whether an old unit needs to be removed first. Some companies even charge extra for connecting the water line, drain hose, or power cord. If new plumbing or electrical outlets are required, that price can easily go up to $500 or more.
In comparison, a DIY installation typically costs only the price of supplies. You’ll spend around $40 to $70 on materials such as a dishwasher installation kit, water line, Teflon tape, and a drain hose if your new unit doesn’t include one. Most of these items are reusable or can be kept for future maintenance, making the investment minimal in the long run.
If your kitchen already has the proper hookups, the process is even cheaper. The only cost involved is your time and a few basic tools like a wrench, screwdriver, and level — items most homeowners already own. You can complete the entire job in under two hours, saving yourself the labor cost that professionals charge for the same work.
It’s also worth noting that some appliance retailers offer discounted or even free installation as part of promotional deals. However, these offers often come with restrictions, such as specific delivery times or limited service areas. If you’re comfortable with basic DIY projects, doing it yourself still gives you more flexibility and control over the process.
In short, a professional dishwasher installation offers convenience, but a DIY approach can save you up to 80% of the total cost. With careful preparation, the right tools, and a clear step-by-step guide, you’ll not only save money but also gain the satisfaction of completing the job yourself.
Maintenance Tips After Installation
Once your dishwasher is installed and running perfectly, regular maintenance is the key to keeping it in top condition. Just like any other household appliance, your dishwasher performs best when it’s clean and well-maintained. A few small habits can help you extend its lifespan, prevent costly repairs, and ensure spotless dishes every time.
Start by cleaning the filter regularly, ideally once a week or after every few cycles. The filter traps food particles and debris that could otherwise clog the drain or pump. Simply remove it from the bottom of the dishwasher, rinse it under warm water, and use a soft brush to scrub away any buildup. Keeping the filter clear improves drainage and prevents unpleasant odors from developing.
Next, make it a routine to wipe down the door gasket and interior surfaces. The rubber seal around the door collects grease, detergent residue, and moisture over time, which can lead to mold and mildew. Use a damp cloth with mild dish soap to clean it thoroughly. A quick wipe every few days keeps your dishwasher fresh and prevents odor buildup.
To remove mineral deposits and soap scum, run a monthly cleaning cycle using natural cleaners. Place a cup of white vinegar on the top rack and run a hot wash cycle without dishes. The vinegar helps dissolve grease and calcium deposits inside the machine. For an extra shine, sprinkle baking soda across the bottom and run a short cycle afterward — this combination leaves your dishwasher clean and odor-free.
It’s also important to inspect the spray arms and drain hose periodically. Food particles or hard water buildup can block the spray holes, reducing cleaning power. Remove the spray arms occasionally and rinse them under running water to keep them clear. Likewise, check that the drain hose isn’t kinked or clogged, as this can cause slow drainage or water to back up inside the tub.
Lastly, always run hot water in your sink for a few seconds before starting a cycle. This ensures the dishwasher begins with hot water immediately, improving cleaning efficiency and reducing detergent residue.
By following these simple maintenance habits, you’ll keep your dishwasher running quietly and efficiently for years. Regular care not only enhances performance but also prevents common issues like leaks, odors, and poor drainage — helping your appliance look and work like new.
FAQs About How to Install a Dishwasher
How long does it take to install a dishwasher?
For most homeowners, a standard dishwasher installation takes between one and two hours. If you’re replacing an old unit, it can be even quicker since the water, drain, and electrical lines are already in place.
Can I install a dishwasher myself without professional help?
Yes, most dishwashers today are designed for DIY installation. As long as your kitchen already has a proper water line, drain hose connection, and power source, you can install it yourself by following a detailed guide carefully.
Do I need a plumber or electrician to install a dishwasher?
Not necessarily. If your existing connections are in good condition, you can handle both plumbing and electrical steps on your own. However, if you need new wiring or pipes, it’s safer to hire a professional for that part.
What tools do I need to install a dishwasher?
You’ll need basic tools like an adjustable wrench, screwdrivers, pliers, a level, Teflon tape, and a flashlight. These are enough for tightening fittings, leveling the unit, and checking connections during setup.
Do I need to use Teflon tape on the water line?
Yes. Wrapping the water inlet threads with Teflon tape helps create a watertight seal, preventing leaks once the dishwasher starts running. It’s a small step that makes a big difference in avoiding future problems.
Where should I connect the dishwasher drain hose?
You can connect the drain hose to either the garbage disposal or the sink drain. Make sure to include a high loop or air gap to prevent dirty water from flowing back into the dishwasher.
Why is the high loop or air gap important?
The high loop keeps wastewater from backing up into the dishwasher. Without it, contaminated water can re-enter your appliance, leaving dishes dirty and causing unpleasant odors.
Should I connect my dishwasher to hot or cold water?
Dishwashers should always be connected to the hot water supply. Hot water helps dissolve detergent, remove grease, and sanitize dishes effectively during the wash cycle.
How do I make sure my dishwasher is level?
Use a bubble level and adjust the front legs with a wrench until the unit sits evenly from side to side and front to back. A level dishwasher prevents leaks and ensures proper water drainage.
What if I find a small leak after installation?
If you see minor dripping from the hose connections, turn off the water, tighten the fittings slightly, and restart the cycle. For persistent leaks, reapply Teflon tape and check the rubber washers for damage.
Can I reuse my old dishwasher’s water line and drain hose?
It’s better to replace them with new ones. Old hoses may have cracks, buildup, or weakened seals that could cause leaks later. Most dishwasher installation kits come with new hoses that are easy to attach.
Why does my dishwasher make a loud humming noise after installation?
A slight hum is normal when water flows through the pump, but a loud vibration may mean the unit isn’t level or the drain hose is touching the cabinet. Adjust the legs and reposition the hose to reduce noise.
Do I need to run the dishwasher empty after installation?
Yes. Running an empty test cycle helps check for leaks, proper water drainage, and secure connections before loading dishes. It’s the final step to confirm your installation is successful.
What if my dishwasher won’t turn on after connecting everything?
Check the circuit breaker and make sure the power is restored. Also, ensure that the electrical connections inside the access panel are secure and properly matched by color.
How often should I check my dishwasher connections?
Inspect the water line and drain hose every few months. Look for signs of moisture, corrosion, or loose fittings. Regular checks help prevent sudden leaks and extend your appliance’s lifespan.
Final Thoughts
Installing a dishwasher on your own might seem like a big task at first, but as you’ve seen, it’s completely achievable with the right guidance and a little patience. By taking your time and following each step carefully, you can set up your dishwasher safely, efficiently, and without the expense of professional help.
A properly installed dishwasher doesn’t just save you time in the kitchen — it also ensures cleaner dishes, lower energy bills, and fewer maintenance problems in the long run. The key is doing things the right way from the start: securing connections tightly, keeping everything level, and testing for leaks before your first full cycle. Those small details make all the difference between a reliable installation and one that causes trouble later.
Beyond installation, regular maintenance is what keeps your appliance performing like new. Cleaning the filter, checking for buildup, and running a monthly vinegar rinse are simple habits that prevent blockages and bad odors. A few minutes of care can add years to your dishwasher’s lifespan.
So, whether this is your first installation or a replacement upgrade, you’ve now learned how to install a dishwasher the right way. With confidence, attention to detail, and safety in mind, you can enjoy a perfectly running machine that makes kitchen cleanup effortless. Every time you press that “Start” button, you’ll know you did it yourself — and did it right.
I’m Emma J. Caldwell, the founder, lead writer, and home-cooking enthusiast behind KitchenGuideCo.com. With a background in culinary arts and over a decade of cooking experience in both professional and personal kitchens, I created this platform to demystify recipes, offer smart kitchen gadget reviews, and guide readers through meal prep with confidence and clarity.