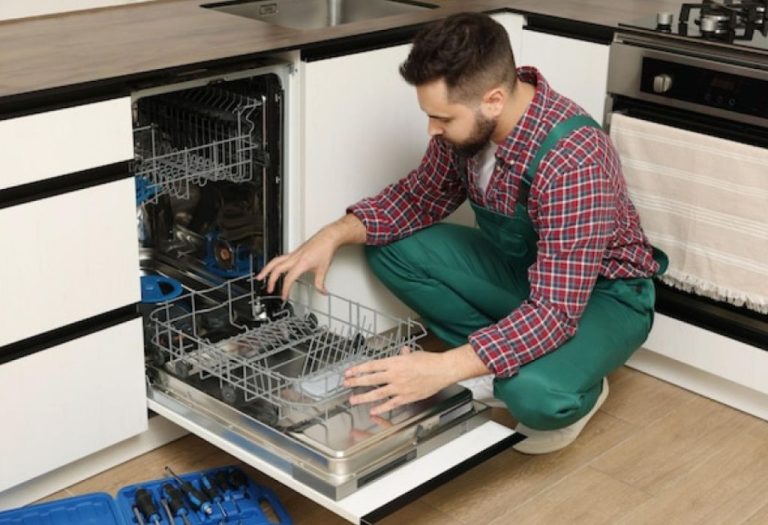
A dishwasher air gap might seem like a small and insignificant part of your kitchen, but it’s one of the most important components in ensuring proper drainage and hygiene.
If your dishwasher isn’t draining efficiently or you’ve noticed a foul smell coming from the sink after a wash cycle, the culprit could be the absence—or failure—of an air gap.
This small cylindrical fitting, typically mounted near your sink faucet, plays a vital role in preventing dirty sink water from backing up into your clean dishwasher. Without it, contaminated water could easily find its way into the machine during a clog, leading to serious sanitation concerns.
According to plumbing codes in most U.S. states, having a functional air gap is mandatory for all dishwashers. It acts as a physical barrier between your kitchen’s drainage system and your dishwasher’s internal water lines.
In this detailed guide, we’ll walk you through how to install a dishwasher air gap for proper drain—covering every step from preparation and installation to maintenance and troubleshooting.
Whether you’re replacing an old one or installing it for the first time, this guide ensures you’ll get a clean, leak-free setup that meets safety standards.
Understanding What a Dishwasher Air Gap Does

Before you begin, it’s essential to understand the air gap’s purpose and how it works.
The dishwasher air gap serves as a simple yet effective anti-backflow device. When your dishwasher drains, wastewater is pumped through a hose to the air gap, where it passes through a small open space before entering the sink’s drain or garbage disposal.
That small opening—the “air gap”—is what prevents contaminated water from flowing backward. If your sink or drain pipe ever becomes clogged, dirty water cannot siphon back into the dishwasher because the air gap physically breaks the flow path.
Without an air gap, your dishwasher could pull bacteria-laden water into the next cleaning cycle, exposing dishes to harmful germs. Even if your dishwasher has a built-in check valve, an external air gap adds another layer of security and is required by many plumbing codes.
Pro Tip: If you’re replacing an old dishwasher, inspect whether an air gap already exists. If not, adding one will greatly improve drainage and help your setup pass inspection.
Why Air Gaps Are Better Than High Loops
Some dishwashers use a “high loop” in the drain hose instead of a traditional air gap, but the two aren’t equal in performance or safety. Understanding the difference helps you appreciate why most plumbing experts — and building codes — favor air gaps.
A high loop simply raises the dishwasher’s drain hose up under the countertop before dropping down to the sink drain. It slows backflow slightly but doesn’t eliminate the risk entirely. If your sink or garbage disposal ever gets clogged, dirty water can still siphon back into the dishwasher through the hose.
An air gap, on the other hand, completely separates the dishwasher’s internal drain line from the home’s plumbing. It introduces a physical air break that prevents any cross-contamination, even during major clogs. That’s why many states legally require it for all new dishwasher installations.
Additionally, air gaps provide visual feedback — if there’s a drainage issue, you’ll notice water spitting from the air gap vent, signaling a partial blockage. High loops offer no such warning until you find dirty water sitting in the bottom of your dishwasher.
Pro Tip: Even if your local code allows high loops, consider installing an air gap. It offers superior protection, lasts longer, and provides immediate troubleshooting indicators when something goes wrong.
Tools and Materials Needed for Installation
Having the right tools and parts on hand will make your air gap installation smoother and faster.
Here’s what you’ll need:
- Adjustable wrench and pliers
- Phillips screwdriver
- Drill and 1⅜-inch hole saw (if new hole required)
- Rubber gasket or plumber’s putty
- Stainless-steel hose clamps (2–4 pieces)
- Two flexible drain hoses (5/8-inch and 7/8-inch diameter)
- Flashlight or headlamp
Before you start, turn off the power to the dishwasher and shut off the water supply under the sink. This prevents any accidental leaks or electrical hazards while working in a confined area.
Place a towel and shallow pan under the sink to catch residual water from disconnected hoses. It’s a small precaution that can save you from unnecessary cleanup.
Pro Tip: Label the hoses during disconnection—knowing which one connects to the dishwasher and which one connects to the drain will prevent confusion later.
Choosing the Right Location for the Air Gap
The air gap must be installed above the flood level of the sink. This height difference ensures it can properly break the water flow in case of a drain backup.
Most modern sinks come with a pre-drilled hole beside the faucet, designed for accessories like soap dispensers or air gaps. If you have one, that’s the perfect place to mount the air gap.
If your sink doesn’t have an extra hole, you can drill one through the countertop using a 1⅜-inch hole saw. Stainless-steel or granite countertops require special drill bits—go slowly to avoid chipping the surface.
Ensure the location allows easy access from beneath the sink for hose connections. Avoid spots near tight corners where the hoses could bend sharply.
Pro Tip: If you’re replacing a soap dispenser with an air gap, check that the hole diameter is compatible. Most dispensers and air gaps use the same standard size, making this swap quick and easy.
Connecting the Dishwasher Drain Hose to the Air Gap
Locate the dishwasher’s drain hose—it’s usually a flexible plastic tube running from the back or bottom of your appliance.
Feed this hose up through the cabinet wall toward the air gap location. Connect it to the smaller inlet barb on the air gap (typically 5/8-inch). Push the hose firmly onto the fitting, then secure it with a stainless-steel clamp to prevent leaks.
Ensure the hose runs smoothly without kinks or sagging. A clean, upward path from the dishwasher to the air gap helps maintain consistent water pressure during draining.
If the hose is too long, trim it to remove unnecessary slack—but leave enough length to move the dishwasher if needed for maintenance.
Pro Tip: If your dishwasher sits far from the sink, use a longer commercial-grade drain hose but maintain a steady upward slope to prevent backflow.
Connecting the Air Gap to the Sink Drain or Garbage Disposal
Next, connect the larger outlet barb (7/8-inch) on the air gap to the sink’s drain or garbage disposal.
If you have a garbage disposal, check for a small knockout plug inside the inlet where the hose connects. Use a screwdriver and hammer to gently remove it before attaching the hose. Forgetting this step is a common mistake that blocks drainage completely.
Slide the hose over the disposal inlet or branch tailpiece and tighten it with a hose clamp. Make sure the hose is free from sharp bends or loops that can trap debris.
Finally, test the fit by gently tugging on both hoses—they should stay firmly in place without slipping off.
Pro Tip: Run warm water through your sink for a few seconds before testing the dishwasher. This confirms your disposal and drain pipes are clear for proper water flow.
Sealing and Securing the Air Gap on the Countertop
Once both hoses are connected, it’s time to secure the air gap on the sink deck.
Insert the air gap body through the countertop hole, ensuring the rubber gasket or plumber’s putty is placed beneath the flange to seal it against moisture. From below the sink, slide on the mounting nut and tighten it by hand, then snug it with pliers—just enough to hold it securely without cracking the plastic.
Attach the decorative cap on top. This cap should have small openings to allow air to escape—never seal it completely. That open vent is what ensures the air gap functions correctly.
Pro Tip: If water ever leaks or sprays from the air gap cap during operation, it’s a sign of a clogged hose. Clean it immediately to restore full drainage.
Testing the Dishwasher Air Gap for Proper Drainage
Now it’s time to check if everything works as expected.
Restore power to the dishwasher and run a rinse or drain-only cycle. Watch closely as the dishwasher pumps water into the air gap. You should see water flow smoothly through the hoses and into the sink drain without leaks.
Look under the sink to confirm all hose joints remain dry. If water drips from the fittings, tighten clamps slightly or reapply Teflon tape to the threaded parts.
During the drain cycle, observe the air gap vent on top of your sink. There should be no water escaping from it. If you notice gurgling or splashing, there may be an obstruction in the drain hose.
Let the dishwasher complete its cycle, then check that the tub is empty and no standing water remains.
Pro Tip: Keep a flashlight under the sink during the first test run—it helps you detect small leaks before they cause hidden cabinet damage.
Common Mistakes to Avoid During Air Gap Installation
Even simple installations can go wrong without attention to detail.
One of the most common mistakes is reversing the hose connections. Always connect the smaller barb to the dishwasher and the larger barb to the drain system. Mixing them up will prevent proper water flow.
Another error is leaving the knockout plug in the garbage disposal inlet. If it’s not removed, water will back up into the air gap and flood your countertop.
Avoid overtightening hose clamps, which can cut into the plastic hose and create leaks later. Tighten just enough to hold the hose securely.
Finally, never cover or seal the air gap vent at the top—it must remain open to function.
Pro Tip: After installation, pour a cup of water into the air gap’s top vent to ensure the path is clear. If it drains slowly, clean or adjust the hoses.
Maintaining Your Dishwasher Air Gap
Once your air gap is installed, regular maintenance will keep it working perfectly for years.
Every few months, remove the chrome cap and clean the internal openings with a small brush or pipe cleaner. Food debris can accumulate inside, leading to slow drainage or unpleasant odors.
Flush the hoses with warm water and vinegar to break down grease or soap scum buildup.
If you ever see water coming out of the air gap during a cycle, it’s a sign of partial blockage. Clean it immediately before it leads to bigger drainage issues.
Pro Tip: Sync your air gap cleaning with dishwasher maintenance. When you clean the filter and spray arms, take a few extra minutes to check the air gap too.
How to Clean and Maintain a Clogged Air Gap
Over time, food particles, grease, and detergent residue can build up inside your air gap hoses and fittings. When that happens, you might see water spilling from the air gap vent or notice your dishwasher draining more slowly than usual. Thankfully, cleaning it is quick and easy.
Start by removing the chrome cap on top of the air gap. Lift it off gently to reveal the inner plastic cylinder. Pull that inner piece straight up and inspect it — you’ll likely see bits of debris or soap scum inside.
Rinse the cylinder under warm running water, using a small brush or pipe cleaner to scrub away any buildup. Then, pour a cup of white vinegar through the air gap opening and let it sit for a few minutes. The vinegar will dissolve grease and mineral deposits that block smooth drainage.
Next, reconnect the inner cylinder and run your dishwasher on a short rinse cycle. Observe the vent; if water still comes out, there may be a clog in one of the hoses. In that case, detach both hoses and flush them with hot water until clear.
Regular cleaning — even just once every few months — keeps the air gap working efficiently and prevents unpleasant odors.
Pro Tip: To avoid frequent clogs, scrape off large food particles from dishes before running the dishwasher. This minimizes debris traveling through the drain line and into the air gap.
Signs Your Dishwasher Air Gap Needs Replacement
While air gaps are built to last for years, they’re not indestructible. Continuous exposure to water, detergents, and steam can wear down internal components or cause small cracks that lead to leaks. Knowing when to replace your air gap can save you from bigger drainage issues later.
The most obvious sign is persistent leaking even after thorough cleaning. If water continues to escape from the vent every time you run the dishwasher, the internal check valve may be damaged or the fittings warped.
Another indicator is visible cracking or corrosion on the air gap body or metal cap. Once the outer housing weakens, it can no longer maintain a proper seal, allowing air or water to escape.
You may also notice a moldy or musty odor around your sink area. This usually means water has been sitting inside the air gap chamber due to poor drainage, which bacteria quickly exploit.
If cleaning doesn’t fix the issue and the hoses are clear, it’s best to replace the entire air gap assembly. They’re affordable, easy to install, and available in various finishes to match your kitchen decor.
Pro Tip: When replacing, always choose an air gap with high-quality rubber seals and corrosion-resistant fittings — these prevent early wear and extend your system’s lifespan.
Dishwasher Air Gap FAQs: Everything You Need to Know for a Perfect Drain

Do I really need a dishwasher air gap?
Yes, a dishwasher air gap is required by most plumbing codes because it prevents dirty sink water from backing up into your dishwasher. It’s the most reliable backflow prevention method available.
What happens if I don’t install an air gap?
Without an air gap, wastewater can siphon back into the dishwasher during a clog, contaminating your clean dishes with bacteria and debris. It can also cause drainage problems over time.
Is an air gap better than using a high loop?
Yes. A high loop offers partial protection by lifting the drain hose under the countertop, but it doesn’t stop backflow during a major clog. An air gap provides a complete physical barrier.
Where should I install the dishwasher air gap?
The air gap should be mounted on the sink deck or countertop near the faucet, positioned above the flood level of the sink to function correctly.
Can I install an air gap myself?
Yes, it’s a beginner-friendly DIY project if you have basic plumbing tools. Just follow the proper steps: connect the dishwasher hose to the air gap, then link it to the sink drain or garbage disposal.
How big of a hole do I need for an air gap?
Most dishwasher air gaps fit into a 1⅜-inch hole, which is the standard accessory hole size found on most sinks or countertops.
What kind of hose do I need for an air gap?
You’ll need two hoses — a 5/8-inch hose from the dishwasher to the air gap and a 7/8-inch hose from the air gap to the garbage disposal or sink drain. Both should be flexible and heat-resistant.
Why is water coming out of my air gap vent?
If water spills from the air gap, it means there’s a partial clog in the drain hose or garbage disposal inlet. Clean both hoses thoroughly to restore normal flow.
Can I use plumber’s putty around the air gap?
Yes, you can apply plumber’s putty or a rubber gasket under the air gap flange to prevent water from leaking onto your countertop. Just don’t seal the top vent — it must stay open.
What if my sink doesn’t have a hole for the air gap?
You can drill a new 1⅜-inch hole using a hole saw or repurpose an existing hole used for a soap dispenser. Make sure the location is easy to access from underneath.
Do all states require a dishwasher air gap?
Not all, but many do — including California, Washington, Minnesota, and others. Even where it’s optional, it’s still highly recommended for safe drainage and peace of mind.
How often should I clean my air gap?
Inspect and clean your air gap every three to six months. Remove the cap, rinse the internal parts, and flush the hoses with warm water or vinegar to prevent clogs.
Can a dishwasher work without an air gap?
Technically, yes — if you use a high loop. But it’s not ideal. A dishwasher without an air gap is more likely to face drainage problems or contamination if the sink drain backs up.
How long does a dishwasher air gap last?
A good-quality air gap can last 10 years or more with regular cleaning and maintenance. If it cracks or leaks frequently, replacement is inexpensive and easy.
What’s the easiest way to unclog an air gap?
Remove the top cap and inner sleeve, then clean both with warm water and vinegar. If the clog persists, disconnect the hoses and flush them with hot water until clear.
Conclusion
Installing a dishwasher air gap for proper drain isn’t just about following a plumbing rule — it’s about protecting your home’s health, hygiene, and appliance performance.
This small yet critical device ensures that wastewater never flows backward into your dishwasher, preventing contamination and keeping your kitchen sanitary. Many homeowners underestimate the value of an air gap until they face problems like foul odors, backed-up sinks, or slow drainage. Installing one now saves you from costly repairs later.
By understanding how the air gap works and following the correct installation process — from selecting the right location to connecting the hoses securely and testing for leaks — you can ensure your dishwasher runs efficiently for years. The key is precision, not speed. Take your time to measure, secure, and test each connection properly.
A well-installed air gap not only meets plumbing code requirements but also boosts your dishwasher’s overall performance. Water drains faster, cycles complete smoothly, and you avoid the risk of cross-contamination that can occur in systems without a proper backflow prevention mechanism.
Beyond installation, regular maintenance makes a lasting difference. Cleaning the vent and flushing the hoses every few months keeps your drainage system clear of grease, soap, and debris. This simple habit prevents overflow, eliminates odors, and extends the lifespan of your entire dishwasher setup.
If you ever notice water spurting from the air gap cap or sluggish draining, don’t panic — it’s usually a minor clog that’s easy to fix. A quick rinse, hose check, or cap cleaning can restore perfect drainage within minutes.
In the end, this small chrome fixture near your faucet silently safeguards your kitchen’s cleanliness and your family’s health. By investing just a little time and effort in installing and maintaining it properly, you ensure that every wash cycle finishes fresh, efficient, and worry-free.
I’m Emma J. Caldwell, the founder, lead writer, and home-cooking enthusiast behind KitchenGuideCo.com. With a background in culinary arts and over a decade of cooking experience in both professional and personal kitchens, I created this platform to demystify recipes, offer smart kitchen gadget reviews, and guide readers through meal prep with confidence and clarity.