Figuring out how to cook brown rice in a rice cooker can be a little tricky at first. It often takes longer than white rice, and getting the right water ratio is important. Some people find the texture is not quite right. But don’t worry! This guide will make the process super easy. We’ll break down everything you need to know step-by-step so you can make perfect brown rice every time. Let’s get started!
What Makes Cooking Brown Rice Different?
Brown rice is a whole grain, which means it still has the bran and germ. These parts give it a nutty flavor and chewy texture, but they also mean it takes longer to cook than white rice. Because the bran layer is tougher, water takes more time to soak in. Plus, the extra fiber means you might need slightly more water. These small differences can lead to big changes in the outcome. It’s not hard at all, though. With just a few simple tweaks, your brown rice will come out perfect.
The Benefits of Choosing Brown Rice
Switching from white rice to brown rice provides benefits that promote overall health. Brown rice is a source of essential nutrients, offering a variety of vitamins and minerals. The fiber content of brown rice aids in digestive health, providing bulk and encouraging the regular movement of the digestive tract. Furthermore, brown rice assists in maintaining stable blood sugar levels. Eating brown rice has been associated with lowered chances of heart disease and may reduce the risk of certain cancers.
- Nutrient Powerhouse: Brown rice is a good source of magnesium, selenium, and manganese, all key nutrients for different body functions. These assist your body in doing various things, from energy production to strengthening bones.
- Fiber Champion: The fiber in brown rice keeps you feeling full longer, which can help with weight control. It also keeps your digestive system moving smoothly, which prevents constipation.
- Good for Your Heart: Research shows brown rice can lower cholesterol levels, reducing the risk of heart disease. Eating it regularly might help keep your heart healthy and working well for a long time.
- Blood Sugar Booster: Brown rice has a lower glycemic index than white rice. This means it releases sugar slowly into your blood, keeping your blood sugar levels stable and preventing energy crashes.
- Versatile in the Kitchen: You can use brown rice in so many dishes! It’s great as a side dish, in salads, in soups, and even as a base for stir-fries.
Key Differences Between Brown and White Rice
Brown rice and white rice differ in how they’re processed. The outer layers of the grain, including the bran and germ, are removed when making white rice. This makes white rice cook faster and have a softer texture. The bran and germ remain on brown rice, providing extra fiber and nutrients. This also impacts the cooking time and how much water you need. The flavor is different too: brown rice has a nuttier, richer flavor than white rice. Choosing brown or white rice impacts your health and how you use it in cooking.
- Nutrient Content: Brown rice has more fiber, magnesium, and selenium.
- Cooking Time: Brown rice requires a longer cooking time.
- Texture: Brown rice has a chewier texture.
- Flavor: Brown rice has a nuttier flavor.
- Processing: Brown rice is minimally processed.
Getting Ready: What You’ll Need
Before you cook, it’s essential to have the correct ingredients and tools. This makes the whole process smoother and helps make sure you get the best possible results. Knowing what you need in advance prevents any last-minute surprises. This part of the process gets you set up to make delicious brown rice.
Essential Tools and Ingredients
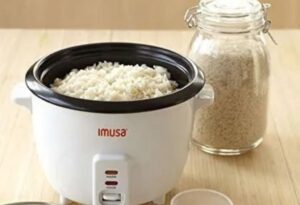
You probably already have many of the items you will need. A rice cooker is, of course, the most important thing. You will also need measuring cups for the rice and water. A measuring cup is the standard for measuring rice, and it is usually included with your rice cooker. The rice you will use is the other essential ingredient. Brown rice comes in many varieties, so find what you like. Finally, you can use water straight from the tap. With these items, you are ready to start cooking!
- A Rice Cooker: Make sure it’s clean and ready to go. You can find rice cookers at most stores that sell kitchen appliances.
- Brown Rice: Any kind of brown rice will work. Look for long-grain, short-grain, or even brown basmati.
- Water: Regular tap water is fine. Some people use filtered water for better-tasting rice.
- Measuring Cups: Use the measuring cup that came with your rice cooker for the most accurate results.
- Optional: Salt, butter, or other seasonings for flavor.
Types of Brown Rice You Can Use
The type of brown rice affects the cooking time and the texture of the finished product. Long-grain brown rice is the most common kind, and it cooks up fluffy. Short-grain brown rice is stickier and more tender, so it is often used in sushi and risotto-like dishes. There are also less common varieties like brown basmati rice, which has a distinct nutty flavor and aroma. When choosing, consider what you like to eat and the dish you plan to create. Different types can be easily substituted, so find your favorite.
- Long-Grain Brown Rice: This is a popular choice because it cooks up fluffy and the grains separate nicely. It’s good for side dishes and is easy to use.
- Short-Grain Brown Rice: This type is stickier, making it great for dishes where you want the rice to hold its shape, like in sushi or rice bowls. It has a slightly chewier texture.
- Brown Basmati Rice: This has a delightful, nutty flavor. It’s aromatic and cooks up a bit drier than other kinds, which makes it perfect for dishes from the Middle East and India.
- Other Varieties: Look for special varieties, such as sprouted brown rice. They often cook faster and have a milder flavor. Experimenting with different types of brown rice is fun.
Step-by-Step: Cooking Brown Rice in a Rice Cooker
Now, let’s get into the step-by-step process of cooking brown rice in your rice cooker. Following each step precisely will help you prepare delicious rice. The exact measurements and timings can vary slightly depending on your rice cooker model and the type of brown rice. By keeping these basics in mind, you will consistently make delicious, perfectly cooked brown rice every time.
Rinsing and Soaking the Rice
Rinsing brown rice removes excess starch and any debris. Soaking it before cooking is important because it can speed up the cooking process and improve the texture. It also helps the rice cook more evenly. This step is a small adjustment that leads to better results, so make it a part of your routine. Rinsing and soaking is like giving your rice a head start, guaranteeing a better outcome.
- Rinsing: Put the brown rice in a fine-mesh sieve or bowl. Rinse it under cold water until the water runs clear. This removes extra starch, which stops the rice from getting too sticky.
- Soaking (Optional, but recommended): Place the rinsed rice in a bowl and cover it with cold water. Let it soak for 30 minutes to an hour. Soaking helps the rice cook more evenly and reduces cooking time.
- Draining: If you soaked the rice, drain off the water before you put it in the rice cooker.
The Rice-to-Water Ratio and Cooking Process
The water ratio for brown rice is slightly different from white rice. The general rule is about 1 part of brown rice to 1 1/2 to 1 3/4 parts of water. This can vary by rice cooker and type of rice. The most important thing is to follow your rice cooker’s directions if it has any, and then adjust it as needed. After measuring and adding the rice, start your rice cooker using the normal setting. Most rice cookers will automatically turn to the “warm” setting when the rice is done.
- Rice-to-Water Ratio: Start with a ratio of 1 cup of brown rice to 1 1/2 cups of water. You might need to adjust this slightly based on your rice cooker and the kind of rice.
- Adding the Ingredients: Put the rinsed and drained (or just rinsed) rice into the rice cooker. Add the water. If you want, you can add a pinch of salt.
- Cooking Time: Close the lid and turn on your rice cooker. Most models have a brown rice setting, which you should select if available. Otherwise, use the standard rice setting. Cooking time will vary, usually between 45 to 60 minutes.
- Let it Rest: Once the rice cooker has finished cooking, let the rice sit for about 10 minutes with the lid closed. This lets the steam finish cooking the grains and makes the rice fluffy.
Flavor Enhancements and Tips
You can add flavor to your brown rice during the cooking process. Adding salt to the water helps season the rice from the inside out. Some people add a little butter or olive oil. Other flavor options include herbs like bay leaves and thyme, or a vegetable broth instead of water. Experimenting with different seasonings can add excitement. These small additions can greatly improve the flavor and the final dish.
- Salt: Add a pinch of salt to the water before cooking. This simple step can really boost the flavor of the rice.
- Butter or Olive Oil: Add a teaspoon of butter or olive oil for added richness and to stop the rice from sticking.
- Herbs and Spices: Try adding a bay leaf, a sprig of thyme, or a pinch of your favorite spices to the water. They add aroma and interesting flavor.
- Broth Instead of Water: Use vegetable or chicken broth instead of water. This adds depth of flavor to the rice.
- Experiment: Don’t be scared to try other ingredients or combinations!
Troubleshooting Common Problems
Sometimes, even after following the instructions, you may run into problems. Rice can come out too hard, too mushy, or not quite right. Learning what to do when things do not go as expected will improve your skills. Here are some of the most common issues and how to fix them.
Rice Too Hard or Undercooked
If your brown rice is still too hard after the cooking cycle is done, there are a few things you can do. The most common cause is not enough water or too short a cooking time. It can also be a problem with the rice cooker itself. Don’t worry, even if this happens, you can often fix it. Here’s how.
- Add More Water: If the rice is still hard, add a few tablespoons of water. Then, turn the rice cooker back on for another 10 to 15 minutes. Check it again.
- Check the Ratio: Make sure you are using enough water relative to the amount of rice. Try using slightly more water next time.
- Soaking: Soak the rice before you cook it. Soaking helps the rice absorb more water, making it cook more evenly.
- Rice Cooker Issues: If this happens frequently, there may be a problem with your rice cooker.
Rice Too Mushy or Sticky
If your rice is mushy or too sticky, there are steps you can take. Most of the time, this happens because there is too much water or the rice was cooked for too long. However, there are a few simple solutions. This can be fixed easily. Here’s how to manage it.
- Less Water: Try using slightly less water next time. Start with a ratio closer to 1 cup of rice to 1 1/2 cups of water.
- Let it Rest: Once it’s done cooking, let the rice sit in the rice cooker with the lid on for about 10 minutes. This lets the steam evaporate, which helps reduce excess moisture.
- Fluff with a Fork: Use a fork to gently fluff the rice after it has rested. This separates the grains and stops them from sticking together.
- Cooking Time: If your rice cooker has a “keep warm” setting, the rice can become mushy if left on that setting for too long.
Unevenly Cooked Rice
Sometimes, your rice might be cooked unevenly, with some parts hard and others mushy. This usually means that the water did not distribute evenly throughout the rice. This can happen with any type of rice. There are also a couple of ways you can fix the unevenness when it does not go the way it is supposed to. Fortunately, it is easy to correct.
- Rinse Properly: Rinsing the rice well before cooking helps remove excess starch. This can keep the rice from sticking.
- Even Distribution: Make sure the rice is evenly spread in the rice cooker before adding water. This ensures even cooking.
- Check Your Rice Cooker: Make sure that your rice cooker is working properly. Some older cookers may not cook rice evenly.
- Try Soaking: Soaking the rice ahead of time helps the grains absorb water and cook more consistently.
Scenario Examples and Comparisons
Sometimes, real-life examples help the concepts come to life. These scenarios show how the steps discussed apply in practice. These comparisons can help you understand how to use different types of rice cookers or adapt your methods. These examples show how to use the information and get the best results.
- Scenario 1: Using a Basic Rice Cooker: Sarah has a simple rice cooker with an on/off switch. She rinses one cup of brown rice, adds 1 3/4 cups of water, and turns on the cooker. After the cooking cycle ends (about 50 minutes), she lets it sit for 10 minutes before fluffing and serving. The rice is perfect.
- Scenario 2: Using a Rice Cooker with Settings: John has a rice cooker with a brown rice setting. He soaks one cup of brown rice for 30 minutes, rinses it, and puts it in the cooker with 1 1/2 cups of water. He selects the brown rice setting. After about an hour, the rice cooker automatically switches to “keep warm,” and the rice comes out great.
- Scenario 3: Troubleshooting Sticky Rice: Emily used too much water and her brown rice was too sticky. Next time, she used less water and let the rice rest for a longer period of time. She also used a fork to fluff it. The rice came out perfect.
| Feature | Basic Rice Cooker | Rice Cooker with Settings |
|---|---|---|
| Settings | On/Off Switch | Multiple Settings (White Rice, Brown Rice, etc.) |
| Ease of Use | Simple, one-step process | More options, but requires understanding of settings |
| Water Ratio Adjustment | Requires more personal adjustment | May have pre-programmed ratios for different rice types |
| Price | Usually less expensive | Typically more expensive |
Frequently Asked Questions
Question: Can I cook brown rice without soaking it?
Answer: Yes, you can cook brown rice without soaking it, but soaking is recommended for better texture and cooking time. Soaking the rice allows it to absorb water, which can result in more even cooking and a softer texture.
Question: How much water should I use for brown rice?
Answer: A general starting point is 1 cup of brown rice to 1 1/2 cups to 1 3/4 cups of water. Adjust this based on your rice cooker and the type of rice.
Question: Can I add salt to the water?
Answer: Yes, adding salt to the water while cooking is a good way to season the rice. Add about 1/4 to 1/2 teaspoon of salt per cup of uncooked rice for best results.
Question: How long does brown rice take to cook in a rice cooker?
Answer: Brown rice usually takes about 45 to 60 minutes to cook in a rice cooker. The exact time will depend on the type of brown rice and your rice cooker model.
Question: What if my brown rice is still hard after cooking?
Answer: If your brown rice is still hard after the cooking cycle, add a little more water (a few tablespoons), turn the rice cooker back on for another 10 to 15 minutes, and then check it again.
Final Thoughts
Cooking brown rice in a rice cooker is simpler than it seems. The essential steps are rinsing the rice, using the correct water ratio, and letting the rice rest after cooking. Remember, most problems can be solved with slight adjustments. You can also experiment with flavor enhancements like salt, butter, or even broth. By mastering these key techniques, you will enjoy perfectly cooked brown rice as a regular part of your meals. With a little practice, you’ll be able to create great-tasting, healthy rice every time. So, go ahead and get cooking!
I’m Emma J. Caldwell, the founder, lead writer, and home-cooking enthusiast behind KitchenGuideCo.com. With a background in culinary arts and over a decade of cooking experience in both professional and personal kitchens, I created this platform to demystify recipes, offer smart kitchen gadget reviews, and guide readers through meal prep with confidence and clarity.