Figuring out how to fix rice cooker thermostat can feel tricky, especially if you’re new to appliance repairs. These small kitchen helpers are used often, so issues with their temperature regulation are common. Don’t worry, many problems have easy solutions. We’ll explore the basics and show you how to troubleshoot common issues step-by-step. Get ready to learn how to keep your rice cooker working perfectly.
What a Rice Cooker Thermostat Does
The thermostat is the heart of your rice cooker. It’s a small but very important component that regulates the cooking process. Think of it as the brain that tells the cooker when to turn on the heat, when to reduce it, and when to switch to the “warm” setting. This delicate balance of heating and cooling ensures your rice cooks perfectly, not too soggy or burnt. Without a working thermostat, your rice cooker won’t function correctly, which is why learning how it works is key.
The Thermostat’s Role in Cooking Rice
-
- Temperature Sensing: The primary job of the thermostat is to constantly monitor the temperature inside the rice cooker. It does this by using a temperature sensor, usually a bimetallic strip or a thermistor, which changes its physical properties based on heat. This real-time feedback loop informs the rest of the cooking process.
The sensor is in contact with the cooking pot and the heating element. It detects the heat produced and sends signals to the control unit, which then adjusts the heat output of the heating element. This ensures that the temperature is maintained at the correct level throughout the cooking process.
-
- Automatic Heat Control: Once the rice cooker is switched on, the thermostat will initially engage the heating element to rapidly heat up the water to the boiling point. The thermostat senses the temperature rise inside the pot. As the temperature rises, the thermostat switches the heating element on and off to maintain the right cooking temperature, around 212°F (100°C), the boiling point of water.
This is where the magic happens. The thermostat continuously makes small adjustments to maintain the set cooking temperature, avoiding excessive boiling and scorching. This constant monitoring and adjustment is what delivers perfect rice every time.
-
- Transition to Warm Mode: When the water has been absorbed by the rice, or has evaporated, and the temperature inside the pot increases, the thermostat senses this change. It then triggers the rice cooker to transition to the “warm” mode. In this mode, the heating element maintains a lower temperature to keep the rice warm without overcooking it.
This is where the thermostat transitions to a “keep warm” cycle. This feature uses a much lower power setting to maintain the rice at a safe, consumable temperature. This action is critical because it prevents the rice from drying out or burning while it sits. The system works automatically and prevents overcooking.
Common Rice Cooker Thermostat Problems
Several issues can arise with a rice cooker’s thermostat. These problems can lead to poorly cooked rice or even a completely non-functional cooker. Recognizing the common issues will help you to troubleshoot the appliance. Fortunately, many of these issues are fixable, and this post shows you exactly how to fix rice cooker thermostat problems. The ability to identify these problems can save you money and keep your rice cooker working.
Rice Cooker Fails to Cook Properly
-
- Undercooked Rice: If your rice consistently comes out undercooked or too hard, the thermostat might not be reaching the right temperature to engage the full cooking cycle. This means the rice is not getting enough heat or is not heated long enough to cook thoroughly.
Undercooked rice can be caused by various issues, including a faulty thermostat. This also leads to temperature inconsistency throughout the cooking process. Other potential causes include issues with the heating element or problems with the temperature sensor itself. To solve this, you might need to recalibrate or replace the thermostat.
-
- Overcooked or Burnt Rice: The opposite problem, overcooked or burnt rice, may happen when the thermostat fails to regulate the heat properly, leading to continuous and excessive heating. This can easily result in burnt rice at the bottom of the pot.
The thermostat may be defective, causing it to fail to switch off the heating element when the rice is done. This also results in the rice cooker running for too long, leading to burnt rice. The problem could also arise from a short circuit in the heating element or sensor.
-
- Rice Sticking to the Bottom: This can be another sign that the heating element is not properly controlled. The base of the cooker gets too hot, causing the rice to stick and burn.
This issue usually indicates that the thermostat is not switching off the heat properly. It can also point to a problem with the heating element, or a faulty sensor. Make sure the cooker and thermostat are working correctly. Also, make sure the inner pot is clean.
Rice Cooker Doesn’t Switch to “Warm” Mode
-
- The “Warm” Function Doesn’t Activate: If the cooker doesn’t switch to the “warm” function after cooking is complete, your rice may quickly dry out or get cold. It might also continue to cook and burn. This usually means the thermostat isn’t accurately sensing when the cooking cycle is done.
The “warm” function relies on the thermostat’s ability to recognize when the cooking process is complete and to reduce the heating. If this function fails, the rice may burn because the heating element remains active. The rice might also become cold very fast and dry out. Check the thermostat for damage or malfunction.
-
- Rice Remains Overheated: On the other hand, the cooker might overheat the rice continuously. This indicates a problem with the thermostat failing to reduce heat or switch to the “warm” setting. This can affect the texture of the rice.
This malfunction can happen if the thermostat is stuck in the cooking mode. It can also arise from an issue with the heating element that prevents a switch to the “warm” function. If this happens, your rice might quickly dry out or burn. In such cases, the rice cooker’s thermostat needs attention.
-
- Lack of Proper Heat Distribution: If the thermostat is faulty, the rice may not be kept warm evenly. The rice in some parts of the pot may dry out or even burn, while in other parts, the rice may remain undercooked.
This condition shows that the thermostat is not controlling the heat in the right way. Some parts might receive excessive heat while others do not. This will result in uneven heat distribution throughout the pot. Replacing or calibrating the thermostat may be required.
Checking Your Rice Cooker Thermostat

Checking your rice cooker’s thermostat is a key step in diagnosing the problem. If you know how to fix rice cooker thermostat, you can perform basic tests to determine if the thermostat is working correctly. This is usually the first step to ensuring your appliance works well. These simple inspections will help you to know if there’s a problem.
Visual Inspection and Basic Testing
-
- Visual Check: Start by unplugging your rice cooker and carefully inspecting the thermostat and surrounding components. Look for any signs of physical damage, such as cracks, burns, or loose wires. Also, look for water damage or any indication that the internal components have melted or deteriorated.
Physical damage can be a clear sign that the thermostat is not working properly. Check for any unusual smells as well, such as burning plastic or an electrical odor, which could indicate a problem with the heating element or thermostat. Do not proceed further until the appliance is unplugged.
-
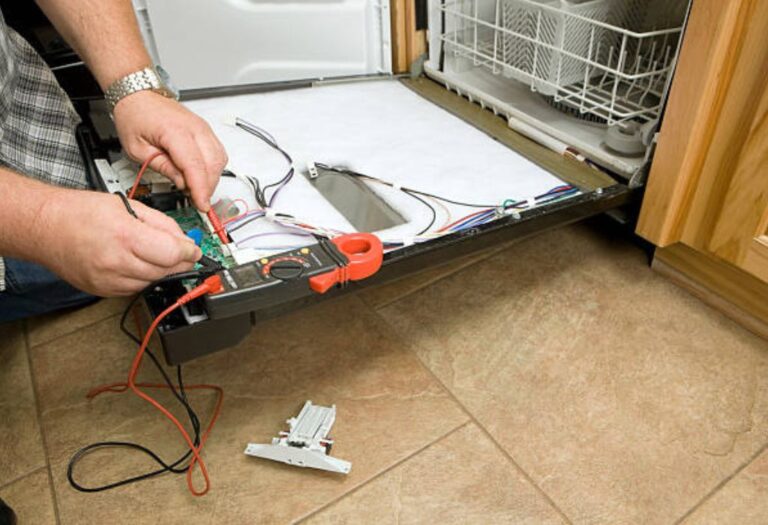
- Continuity Test with a Multimeter: To perform a continuity test, you’ll need a multimeter. Set the multimeter to the continuity setting, usually indicated by a symbol that looks like a speaker or a diode. This test will help you determine if electricity can flow through the thermostat. Unplug the rice cooker, remove the inner pot, and access the thermostat. Place the multimeter probes on the thermostat’s terminals.
If the multimeter beeps or shows a low resistance value, it indicates that the thermostat is allowing electricity to pass through, meaning it is functional. If the multimeter doesn’t beep or shows infinite resistance, the thermostat might be faulty and need replacement. This test can reveal if the thermostat circuit is open, preventing proper operation.
-
- Temperature Sensing Test (Advanced): This test can be conducted with an infrared thermometer or a temperature probe. This test gives you a detailed understanding of the thermostat’s accuracy and functionality. Use an infrared thermometer to monitor the internal temperature during the cooking process. Carefully measure the temperature of the thermostat and the heating element. You can also use a temperature probe connected to a multimeter.
Monitor the temperature changes as the cooker heats up, cooks, and switches to the “warm” mode. Compare these temperature readings with the expected values. If the cooker’s temperature fluctuates erratically or does not reach the right levels, the thermostat is likely faulty. This test helps verify if the thermostat reacts appropriately to heat changes.
Troubleshooting the Thermostat
-
- Calibration Check: Some thermostats can be calibrated to ensure accuracy. Follow the manufacturer’s instructions for calibration. Use a thermometer to cross-check the temperature readings and adjust the thermostat accordingly.
Calibration involves adjusting the thermostat to match the temperature readings provided by another reliable thermometer. If the readings don’t match, you can adjust the thermostat to ensure accuracy. Make sure you unplug the rice cooker before performing any calibration, and follow the instructions given in the manual.
-
- Cleaning the Thermostat: Sometimes, debris can affect the thermostat’s ability to sense temperature correctly. Clean the thermostat gently with a soft cloth or brush, ensuring no moisture enters the electrical components. Remove any dust or food particles to ensure the sensor can work correctly.
Ensure that all the contacts and sensors are clean to ensure good electrical contact and accurate temperature readings. Avoid using harsh chemicals or abrasive materials, which can damage the components. Regular cleaning can prevent the build-up of residue that affects performance.
-
- Checking the Wiring: Inspect the wiring connections for any loose or corroded wires. Tighten the connections and use an electrical contact cleaner to remove any corrosion. Make sure the connections are secure and in the correct place.
The wiring connections are critical to ensuring the correct electrical connection between the thermostat, the heating element, and other components. If the wiring is loose or corroded, it can affect the thermostat’s performance, leading to inconsistent heating or even complete failure. Ensure that the connections are secure to restore functionality.
How to Fix Rice Cooker Thermostat (Step-by-Step)
Now that you know the basics, let’s explore exactly how to fix rice cooker thermostat step by step. This part assumes you’ve identified a thermostat issue through the earlier diagnostic steps. These instructions can help you fix minor problems and restore your appliance to full functionality. Remember to always unplug the rice cooker and take all safety measures before beginning any repair work.
Step 1: Safety First and Preparing Your Cooker
-
- Unplug the Rice Cooker: Before you start, always unplug the rice cooker from the power outlet. Safety is key when working with electrical appliances. This step removes the risk of electrical shock.
Before you start any repair, ensure that the power supply is cut off. This helps to protect you from any electrical hazards. Also, make sure that the cooker is cold before you start to work on it.
-
- Gather Your Tools: You will need a screwdriver (often Phillips head), a multimeter, a replacement thermostat (if needed), and a small brush or cloth for cleaning. Having the correct tools will make the repair process easier and more efficient.
Ensure that all the tools are in good working order. Using the correct tools can make the process faster and avoid potential damage to the appliance.
-
- Empty and Clean the Rice Cooker: Remove the inner pot and any remaining rice. Clean the interior of the rice cooker to remove any debris or residue. This ensures that you have a clean and safe area to work in.
Remove any food particles or liquids. Cleaning the cooker will help to prevent any contamination during the repair process.
Step 2: Accessing the Thermostat
-
- Remove the Outer Casing: Many rice cookers have screws on the bottom or sides that hold the outer casing in place. Use the screwdriver to remove these screws. Carefully detach the outer casing.
Take care not to break any plastic clips or fasteners during this process. Ensure that you have adequate lighting and a clear workspace to access the components inside.
-
- Locate the Thermostat: The thermostat is usually located near the heating element at the bottom of the cooker. It can look like a small disc, a bimetallic strip, or a small cylindrical device. Refer to your rice cooker’s manual if you have any difficulty locating the thermostat.
The thermostat is often placed in close contact with the heating element to sense the temperature accurately. Make sure you recognize the thermostat so you can work on the correct component. Some models might have a protective cover.
-
- Disconnecting and Removing the Thermostat (if Replacing): Carefully detach the wires connected to the thermostat. Use a small screwdriver or pliers if needed. If replacing the thermostat, unscrew or unclip it from its mounting.
Take pictures or make notes of how the thermostat is connected to make the reassembly process easier. Gently pull or pry the thermostat out to avoid damaging other components. Place the old thermostat somewhere safe.
Step 3: Replacing or Repairing the Thermostat
-
- Installing a New Thermostat: If you’re replacing the thermostat, install the new one by following the steps in reverse. Securely mount the new thermostat in place. Reconnect the wires, making sure they are firmly attached.
Double-check that the new thermostat is correctly positioned and that all connections are secure. Ensure that the wires are properly connected and that no wires are loose or disconnected. Always check the manufacturer’s manual.
-
- Cleaning and Reassembling: If you are cleaning the thermostat, use a small brush to remove any dirt or residue. Be gentle to avoid damaging the components. After cleaning, carefully reassemble the cooker. Secure the outer casing with screws.
Make sure all the parts are clean and in their correct position. If the appliance has a rubber gasket, clean it to remove any debris. Place the thermostat back in its position and make sure it is in contact with the heating element.
-
- Testing the Rice Cooker: Before you start cooking, plug in the rice cooker and switch it on. Allow the cooker to heat up, then test if the warm setting works correctly. Ensure that the thermostat is functioning properly by monitoring the heating cycle.
If you have a multimeter, you can do another continuity test to confirm that everything is connected correctly. Make sure that the cooker is heating correctly and that the keep-warm function operates. If the cooker functions correctly, the repair is complete.
Step 4: Troubleshooting After the Repair
-
- First Test Run: After the repair, prepare a small amount of rice to test the rice cooker. Monitor the cooking process to confirm whether the rice cooks properly. Check that the rice doesn’t stick or burn, and that the “warm” mode activates.
Testing the cooker after you have replaced the thermostat will allow you to make sure it’s working properly. This is the last step that will tell you if the repair was a success. Carefully check the texture of the rice after it is cooked.
-
- Check for Leaks: Watch for any leaks if your rice cooker has a steam vent or a lid that can hold water. Ensure that there are no visible leaks during the cooking or warm cycles. Check for any steam leaks or water dripping.
Leaking can be a sign that the components aren’t correctly assembled or that there is a problem with the seal. Leaks can cause electrical issues, so it’s critical to identify and fix them quickly. Any leaks should be addressed immediately.
-
- Seek Expert Help: If the rice cooker still doesn’t function correctly after replacing the thermostat, the heating element, or any other components, there might be another problem that needs attention. Consider taking the rice cooker to a professional appliance repair service.
Sometimes, the issue may be more complex, and a professional’s expertise is necessary. There might be an electrical issue that you’re unable to identify. If the problem persists, do not proceed; seek professional help from an expert.
| Symptom | Possible Cause | Solution |
|---|---|---|
| Rice is undercooked | Thermostat not reaching proper temperature | Replace or recalibrate the thermostat |
| Rice is overcooked or burnt | Thermostat failing to shut off the heating element | Replace the thermostat |
| Rice doesn’t switch to “warm” mode | Thermostat failure or sensor malfunction | Replace the thermostat |
| Rice sticks to the bottom of the pot | Thermostat not properly controlling heat | Check and replace thermostat; ensure the inner pot is clean |
According to a survey from Statista, the rice cooker market is estimated to continue to grow, with a significant increase expected over the next years. As more people own rice cookers, a basic how to fix rice cooker thermostat skill becomes more valuable.
Frequently Asked Questions
Question: What does a rice cooker thermostat do?
Answer: A rice cooker thermostat controls the temperature to ensure rice cooks perfectly without burning or remaining undercooked, switching between cooking and keep-warm modes.
Question: How do I know if the thermostat is bad?
Answer: Common signs include rice being overcooked, undercooked, or the cooker failing to switch to warm mode. A visual inspection or continuity test can confirm suspicions.
Question: Can I fix a rice cooker thermostat myself?
Answer: Yes, many thermostat problems can be fixed at home with the right tools and basic electrical knowledge, following the steps outlined in this guide.
Question: What tools do I need to fix my rice cooker thermostat?
Answer: You’ll typically need a screwdriver, a multimeter, a replacement thermostat (if needed), and a small brush or cloth for cleaning the components.
Question: Where is the rice cooker thermostat located?
Answer: The thermostat is usually near the heating element at the bottom of the cooker, often looking like a small disc or bimetallic strip.
Final Thoughts
Knowing how to fix rice cooker thermostat can save you time and money. While it might seem complex, the process involves simple steps: understanding the thermostat’s role, identifying problems, and performing basic checks. From visual inspections to multimeter tests, you can troubleshoot your rice cooker effectively. This guide offers a comprehensive approach to getting your rice cooker back to its full operation. By following these easy steps, you can tackle common issues. Now you’re well-equipped to keep your rice cooker running perfectly.
I’m Emma J. Caldwell, the founder, lead writer, and home-cooking enthusiast behind KitchenGuideCo.com. With a background in culinary arts and over a decade of cooking experience in both professional and personal kitchens, I created this platform to demystify recipes, offer smart kitchen gadget reviews, and guide readers through meal prep with confidence and clarity.