Most modern kitchens rely on both a dishwasher and a garbage disposal to make cleanup easier after meals. When installing a new dishwasher, many people feel unsure about how to connect the drain hose to their garbage disposal correctly.
This uncertainty often leads to worries about leaks, backflow or strange noises coming from under the sink.
Some homeowners attempt to connect the hose quickly without understanding how the disposal’s drain port works. Others discover leftover water inside the dishwasher after the first use because the hose was installed incorrectly.
These early mistakes create confusion and frustration, pushing people to search for simple and reliable instructions.
A dishwasher relies on smooth water flow to drain dirty water efficiently. When the hose is connected to the garbage disposal, the setup must prevent wastewater from flowing backward into the dishwasher. This requires the correct hose height, proper port preparation and a secure seal at each connection.
People also wonder whether they should use clamps, high loops or air gaps to protect against draining issues.
Learning how each part works helps ensure the dishwasher drains cleanly and the disposal functions without problems. With the right steps, connecting the dishwasher becomes simple and worry free.
The following sections explain exactly how to connect a dishwasher to a garbage disposal safely, prevent leaks and maintain smooth water flow every time you run the machine.
How a Dishwasher Drains Water Through a Garbage Disposal
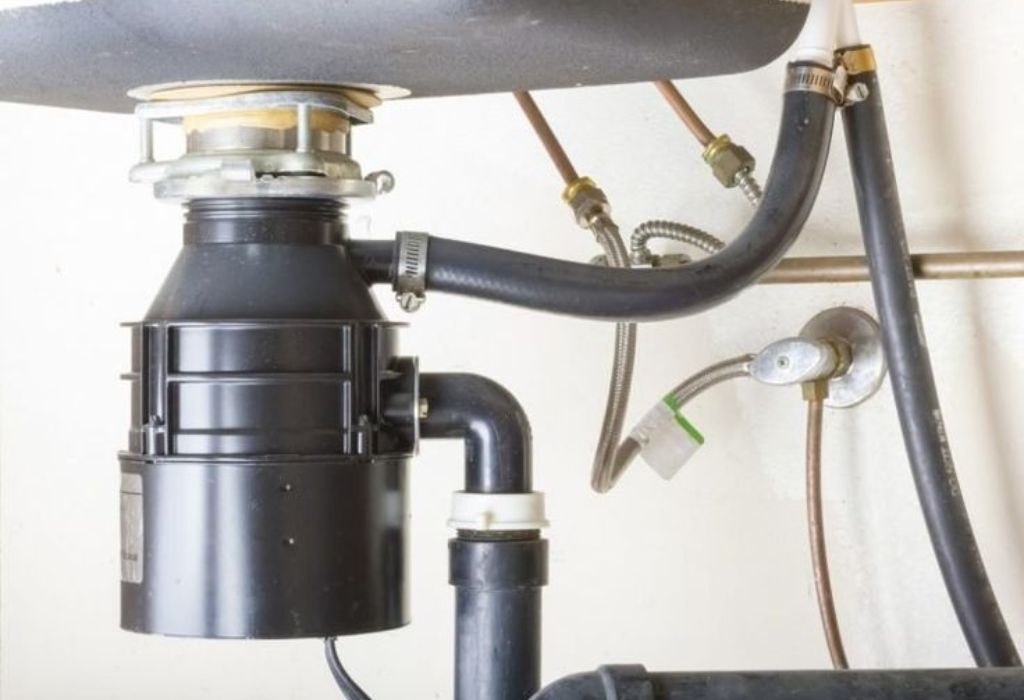
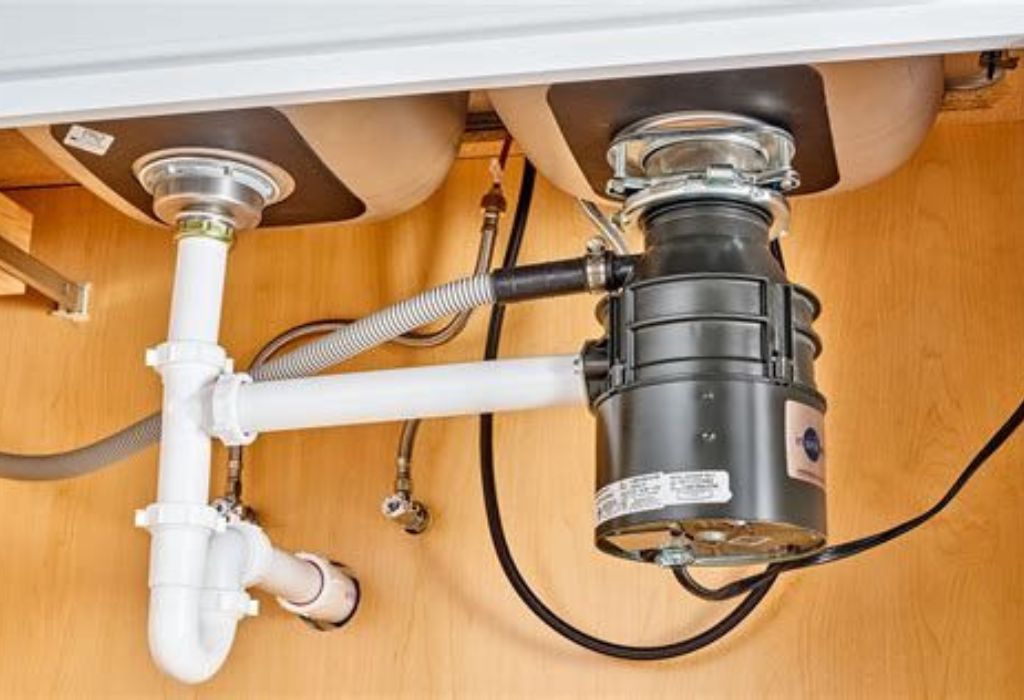
Dishwashers drain dirty water using a pump that pushes the water through a flexible drain hose. This hose routes the wastewater into the garbage disposal’s side inlet port. The disposal then directs the water into the sink’s main drain system.
The garbage disposal’s side inlet is specifically designed to accept dishwasher drainage. During the pump cycle, water flows quickly down this channel. If the port is blocked or incorrectly installed, the water backs up into the dishwasher.
The disposal must be clear of food debris for drainage to work smoothly. Food buildup inside the disposal slows water movement. This slows the dishwasher’s draining speed and may cause standing water inside.
Dishwashers rely on gravity for part of the draining process. If the hose loops downward before entering the disposal, water settles in the low point. This forms a trap that slows draining.
The connection must also prevent backflow. Since the disposal handles food waste, pressure changes inside the drain can push water back toward the dishwasher. A correct high loop or air gap stops this problem.
Understanding this water path helps ensure the dishwasher drains efficiently through the disposal. Each part plays a role in keeping wastewater moving in the correct direction. Proper installation protects both appliances.
Why You Must Remove the Knockout Plug Before Connecting
Garbage disposals include a small internal plug called a knockout plug inside the dishwasher inlet port. This plug must be removed before connecting the dishwasher hose. If left in place, water cannot enter the disposal and flows backward into the dishwasher.
The knockout plug is factory installed to seal the port for households without dishwashers. Removing it opens the channel for drainage. Leaving it sealed prevents water from entering the disposal.
The knockout plug sits a few millimeters inside the port. You can remove it using a screwdriver and a single tap with a hammer. The broken disc falls into the disposal chamber.
After removing the plug, retrieve the broken piece from inside the disposal. Leaving it inside may cause loud rattling noise when the disposal runs. Removing it keeps the disposal safe.
If the plug is not removed, the dishwasher will fill with dirty water at the end of a cycle. This backflow occurs because water cannot pass through the closed inlet. Many homeowners mistakenly replace the dishwasher before noticing the plug issue.
Checking the knockout plug before installation prevents unnecessary repairs. Many installation problems trace back to this overlooked step. Proper preparation guarantees correct water flow.
How to Create a High Loop to Prevent Backflow
A high loop is a simple method used to prevent dirty water from flowing backward into the dishwasher. The drain hose must rise higher than the bottom of the sink before dropping into the garbage disposal. This upward loop acts as a barrier.
Backflow happens when sink water or disposal pressure reverses. A high loop stops this dirty water from entering the dishwasher. It works as a protective shield for the clean appliance.
You can create a high loop by securing the hose under the countertop. A small bracket or clamp holds the hose in place. Once raised, the loop stays fixed and prevents sagging.
Many dishwasher manuals require the high loop method for proper installation. The loop prevents foul odors, food particles and wastewater from entering the dishwasher. It also reduces the risk of drainage blockages.
Some regions require an air gap instead of a high loop. However, the high loop is the most common solution in many households. It is simple, affordable and effective.
A high loop must be higher than the disposal inlet. If it sits too low, it fails to stop backflow. Correct positioning ensures full protection.
Creating the high loop takes only a few minutes but saves many future problems. It keeps the dishwasher safe, clean and functioning smoothly. Most drainage issues disappear once the high loop is installed correctly.
Step by Step Guide to Connecting a Dishwasher to a Garbage Disposal
Start by turning off the power to the garbage disposal. This prevents accidental activation while working under the sink. Always ensure safety before handling any appliance connections.
Locate the dishwasher drain hose coming from the dishwasher. This hose is flexible and usually ribbed. Make sure it is long enough to reach the disposal comfortably.
Create a high loop by raising the hose under the countertop. Secure it with a clamp or screw. This prevents backflow problems later.
Next, locate the garbage disposal’s dishwasher inlet port. Use a screwdriver and a hammer to remove the knockout plug if it is still in place. Retrieve the broken piece from inside the disposal.
Slide the drain hose end onto the disposal inlet port. Push it far enough to create a snug connection. Loose hoses lead to leaks or bad smells.
Secure the hose connection with a metal hose clamp. Tighten the clamp gently until the hose cannot slip off. Avoid overtightening, which may crack the plastic port.
Run the dishwasher through a short cycle while checking for leaks. Look for dripping under the sink and listen for unusual sounds. Proper connection ensures smooth draining every time.
How to Ensure Leak Free Installation Every Time
Check that the drain hose fits tightly around the disposal inlet. A loose fit allows water to leak out during draining cycles. Ensuring a tight seal prevents messy situations.
Make sure the metal clamp is positioned correctly. The clamp must sit evenly around the hose. A crooked clamp causes uneven pressure.
Inspect the hose for cracks or wear. Old or brittle hoses leak even when installed properly. Replacing a damaged hose improves performance.
Verify the knockout plug is fully removed. A partially attached plug restricts water flow. Removing it completely guarantees proper drainage.
Confirm the high loop is secured tightly under the counter. If it slips down over time, backflow may occur. A fixed loop protects the dishwasher.
Check the disposal inlet for cracks or damage. Plastic ports sometimes weaken from age. A damaged port must be replaced to prevent leaks.
Run a full wash cycle after installation. Observe all joints for moisture. A leak free cycle confirms successful installation.
Common Problems When Connecting a Dishwasher to a Disposal
A common mistake is forgetting to remove the knockout plug. This blocks water flow entirely and causes dishwasher flooding. It is the first thing to check during troubleshooting.
Loose hose connections cause slow dripping under the sink. Over time these leaks damage wood and create mold. Proper tightening prevents this.
If the hose dips downward before rising to the disposal, drainage slows. Water becomes trapped in low spots. Correcting the hose height fixes this issue.
Some people push the hose too far into the disposal port. This blocks the flow channel inside the disposal. Proper insertion depth prevents obstruction.
If food debris fills the disposal, water drains slowly. This slow draining pushes wastewater back into the dishwasher. Running the disposal before dishwashing helps.
Using the wrong type of hose clamp causes slipping. Some clamps do not tighten evenly. Choosing the correct clamp ensures secure installation.
Incorrect or incomplete installation often leads to noise or vibration. The hose must sit freely without tension. Proper positioning ensures smooth operation.
How to Prevent Clogs When a Dishwasher Drains Through a Disposal
Clogs usually form when food particles collect inside the disposal’s drain chamber. These particles slow the water coming from the dishwasher and cause backflow. Preventing buildup keeps the drainage path clear and efficient.
Running the garbage disposal before starting the dishwasher helps remove leftover debris. A quick burst ensures blades clear any soft food and opens the flow channel. This allows smoother water movement during the wash cycle.
Avoid disposing of fibrous foods such as onion skins or celery in the disposal. These materials wrap around the spinning parts and reduce drainage efficiency. Keeping these foods out of the disposal prevents slow drain issues.
Grease buildup is another common source of clogs. Pouring grease down the sink causes thick layers that block water movement. Using paper towels to dispose of grease helps keep the disposal clean.
Flush the disposal with hot water after grinding food. Hot water softens debris and flushes it into the main drain. This simple habit keeps the drain setup clear.
Cleaning the disposal with baking soda and vinegar helps break down residue. These ingredients clear unpleasant smells and improve water flow. A clean disposal drains much faster.
Checking the dishwasher filter also prevents clogging. When filters fill with food particles, drainage slows. Regular filter cleaning improves performance of both appliances.
How to Troubleshoot Poor Dishwasher Draining After Connection
If the dishwasher leaves water in the bottom after a cycle, the first step is checking the drain hose. A kinked or sagging hose slows the pump’s ability to push water. Straightening the hose solves many drainage problems.
Next inspect the garbage disposal inlet. If food buildup blocks the side port, the dishwasher cannot drain smoothly. Clearing the disposal improves the flow path instantly.
Ensure the high loop has not fallen. If the loop drops below the disposal inlet, dirty water may flow back toward the dishwasher. Securing the loop prevents reverse drainage.
A clogged dishwasher filter also slows draining. Filters trap food bits from the wash cycle. Cleaning the filter restores proper pump performance.
Spray arms should also be inspected. If spray arms are blocked, the dishwasher may not push enough water through the system, causing improper draining. Cleaning small holes helps restore pressure.
Check the knockout plug area a second time. Occasionally the plug only partially breaks away and restricts flow. Removing any leftover piece opens the path fully.
Running a full hot water cycle clears internal hoses. Hot water dissolves grease and debris. This helps restore full draining strength.
How to Maintain the Garbage Disposal for Long Term Dishwasher Use
Keeping the disposal in good condition ensures the dishwasher drains smoothly every time. A well maintained disposal moves water faster and prevents backups. Regular care keeps the entire drainage system healthy.
Run the disposal daily even if you have not used it for food waste. Daily spinning prevents rust and keeps internal parts moving freely. This keeps the inlet channel open for the dishwasher.
Sharpening disposal blades with ice cubes helps maintain grinding power. Ice cubes break down residue stuck on the walls. Increased grinding power means cleaner drainage passages.
Pouring cold water during disposal use keeps grease solid. Solid grease moves safely down the drain. Hot water melts grease and allows it to stick to pipes.
Avoid grinding bones or hard pits. These stress the disposal and dull the blades. Dull blades lead to poor grinding and drainage slowdowns.
Use citrus peels occasionally for odor control. Citrus oils clean residue and freshen the interior. This improves airflow and keeps the dishwasher connection cleaner.
Check the disposal mounting area for leaks. Loose mounting rings cause water to spill when the dishwasher drains. Tightening the ring prevents future issues.
Maintaining the disposal protects both appliances. Clean grinding improves drainage and reduces the chance of blockages. Long term care ensures smoother dishwasher cycles.
How to Maintain a Dishwasher Connected to a Disposal
Run the disposal regularly to keep the drain path clear. Food buildup blocks water flow from the dishwasher. Regular use prevents clogging.
Clean the disposal with ice cubes and lemon periodically. This removes grease and odors. A clean disposal supports smooth dishwasher draining.
Inspect the hose for signs of wear every few months. If the hose becomes brittle, replace it before leaks occur. Preventative maintenance avoids emergencies.
Make sure the high loop stays in place. Movement from under sink storage may lower the loop accidentally. This increases the risk of backflow.
Avoid grinding large food scraps right before running the dishwasher. These scraps may block the drainage path. Light grinding is safer.
Check clamps occasionally to ensure they stay tight. Over time vibrations loosen them. Tightening them prevents unexpected leaks.
Keeping both appliances clean ensures long term performance. Regular maintenance keeps the water path smooth and problem free. This reduces unexpected drainage issues.
Helpful Answers for Dishwasher to Disposal Connections
Do I have to remove the knockout plug before connecting the dishwasher hose
Yes the dishwasher cannot drain unless the plug is removed.
Can I connect the dishwasher drain without a high loop
You should not because backflow and odors occur without a high loop.
Why is water backing up into my dishwasher
The high loop is missing or the disposal inlet is clogged.
Can I use duct tape instead of a hose clamp
No duct tape cannot hold pressure and will eventually leak.
Is an air gap better than a high loop
Air gaps provide the best protection but high loops also work well.
Why is my dishwasher still not draining after installation
The knockout plug may still be inside or the disposal is clogged.
Can I run both the dishwasher and disposal at the same time
Yes they are designed to work together safely.
Does hose length affect drainage
Yes too long or sagging hoses trap water and slow drainage.
What type of clamp should I use for the drain hose
A stainless steel worm clamp provides the best seal.
Can a loose hose cause bad smells
Yes leaks or loose fittings allow wastewater to escape and smell.
Conclusion
Connecting a dishwasher to a garbage disposal becomes simple when each step is completed correctly.
Removing the knockout plug, securing the drain hose and creating a high loop ensure smooth water flow without leaks or backflow issues. A proper setup protects the dishwasher from contamination and supports efficient draining.
Understanding how the disposal and dishwasher work together helps avoid the most common installation mistakes.
Simple checks such as tightening clamps, clearing food debris and maintaining a secure hose loop prevent many future problems. With proper care the connection remains secure for years.
Once installed correctly, your dishwasher drains efficiently and your kitchen stays clean and odor free. Following safe installation techniques ensures long term reliability and peace of mind every time you run a wash cycle.
I’m Emma J. Caldwell, the founder, lead writer, and home-cooking enthusiast behind KitchenGuideCo.com. With a background in culinary arts and over a decade of cooking experience in both professional and personal kitchens, I created this platform to demystify recipes, offer smart kitchen gadget reviews, and guide readers through meal prep with confidence and clarity.