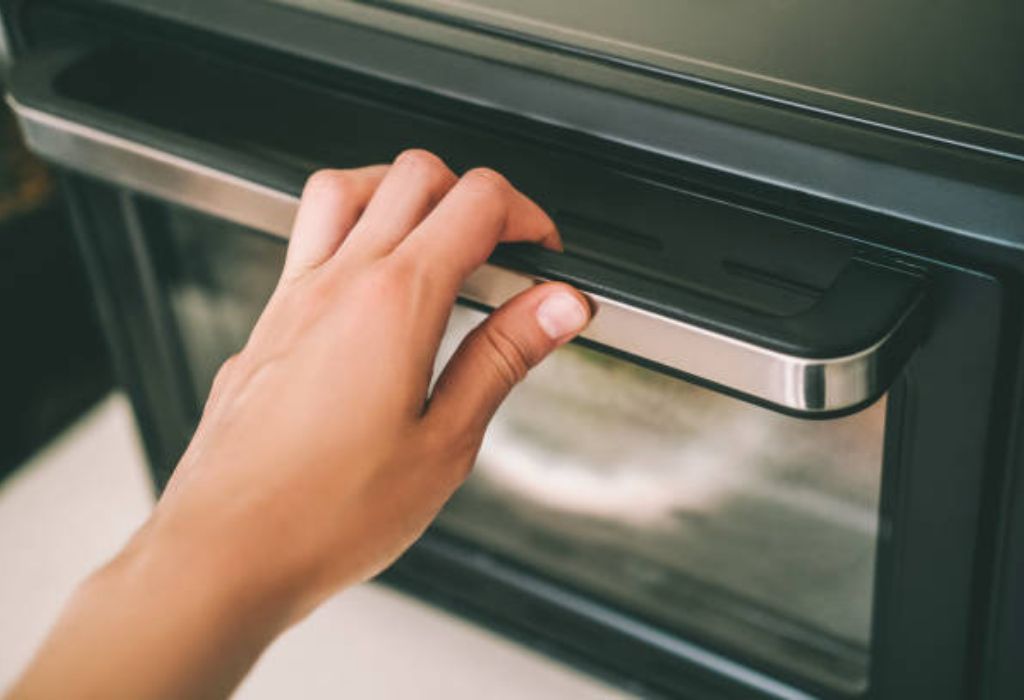
The oven door seal is one of the most overlooked yet most important components in any kitchen oven. It plays a direct role in maintaining internal temperature, improving cooking efficiency, and ensuring safe operation during high heat use.
When the seal weakens or fails, heat escapes, energy is wasted, and food cooking performance drops sharply.
Many homeowners remain unaware of seal problems until they notice uneven cooking, longer preheat times, or rising energy bills.
A damaged seal also increases the risk of external surface overheating around the oven door. This makes regular inspection of the oven door seal a critical home maintenance task.
Checking the oven door seal does not require advanced tools or professional training. With basic observation and a few simple tests, anyone can determine whether the seal is still effective. This guide explains every step in detail so the inspection can be done safely and accurately.
What Is an Oven Door Seal and Why It Matters

The oven door seal, also known as a gasket, is a heat-resistant strip that lines the perimeter of the oven door. Its primary function is to prevent hot air from escaping during cooking. By maintaining a tight seal, it allows the oven to reach and hold proper temperatures.
A properly working seal improves energy efficiency by reducing heat loss. When heat stays inside, the oven does not need to cycle the heating element as often. This lowers electricity or gas consumption during baking and roasting.
The seal also protects surrounding cabinetry and countertops from excessive heat exposure. Without a secure seal, hot air leaks toward the outer frame. Over time, this can damage finishes and adhesives around the oven.
Cooking performance depends heavily on controlled internal temperature. A leaking seal causes uneven heat distribution and inconsistent results. Foods may remain undercooked on one side while overcooking on the other.
Safety is another major reason the seal matters. Escaping heat raises the external temperature of the door glass and surrounding metal surfaces. This increases burn risk, especially for children and pets in the kitchen.
Because of these reasons, the oven door seal is both an efficiency component and a safety feature. Regular inspection ensures long-term performance and safe everyday use.
Common Signs of a Failing Oven Door Seal
One of the most common signs of a worn oven door seal is heat escaping around the door edges. You may feel hot air blowing out from the sides while the oven is running. This indicates weak contact between the door and frame.
Uneven baking results are another warning sign. If foods are browning on one side faster than the other, the internal temperature balance may be compromised. A damaged seal often causes that imbalance.
Longer preheating times suggest heat loss. The oven must work harder to reach target temperature when heat constantly escapes. This leads to higher energy use and longer cooking preparation.
Visible physical damage is also an obvious indicator. Cracks, flattened areas, torn sections, or hardened rubber all signal seal failure. Any break in the continuous gasket surface reduces sealing effectiveness.
Excessive external door heat can indicate internal heat leakage. While some warmth is normal, extreme surface heat usually points to insulation or seal problems. This condition requires immediate attention.
Food smells leaking strongly into the kitchen can also be a sign. A tight seal keeps cooking odors mostly inside the oven cavity. A faulty seal allows smells to escape rapidly.
Can a bad oven door seal cause uneven baking?
Yes, heat escapes through gaps and creates uneven internal temperatures.
Does a damaged seal increase electricity or gas usage?
Yes, the oven works harder to maintain heat when the seal leaks.
Is external oven door heat always a sign of seal failure?
Not always, but excessive heat is a strong warning sign.
Can food smell leaking indicate seal problems?
Yes, strong odor leakage usually means the seal is no longer tight.
Do seal problems get worse quickly if ignored?
Yes, heat damage accelerates once the gasket starts failing.
Visual Inspection Method for Oven Door Seal
The first inspection method is a simple visual check performed with the oven turned off and completely cool. Open the oven door fully and examine the entire length of the seal. Look closely for cracks, gaps, or areas where the gasket has pulled away.
Check for flattened sections where the seal no longer springs back. Compression fatigue reduces the seal’s ability to create pressure against the door. These areas often appear shiny or smooth compared to the rest of the gasket.
Inspect for hardened or brittle texture. A healthy oven seal feels slightly soft and flexible to the touch. A hardened gasket cannot conform properly to the door surface.
Dirt and grease buildup should also be examined. Heavy residue can prevent proper sealing even if the gasket itself is intact. Reinigung may restore performance if no physical damage exists.
Check the corners carefully, as they experience the most stress during door opening and closing. Corner separation is a very common early failure point. Any corner gaps allow direct heat leakage.
If the gasket is held by clips or channels, ensure it is fully seated along the entire edge. A loosened section may simply need repositioning rather than full replacement.
Paper Test to Check Oven Door Seal Tightness
The paper test is one of the simplest ways to evaluate seal effectiveness. Place a strip of plain paper halfway between the oven door and the frame. Close the door firmly but gently on the paper.
Try pulling the paper out slowly. If you feel strong resistance, the seal is pressing tightly against the frame. If the paper slides out easily, that section of the seal may be worn.
Repeat this test at multiple points around the door perimeter. Perform the test along the top, sides, and bottom edges. A healthy seal should grip the paper consistently around the entire door.
If certain areas release the paper easily while others resist, the seal is failing unevenly. This uneven wear pattern often explains inconsistent baking results. It also indicates that full gasket replacement may be needed.
The paper test is non-invasive and safe for all oven types. It helps identify pressure loss without heat exposure. This makes it ideal for routine homeowner inspections.
This test should be performed periodically, especially on older ovens. Early detection prevents heat loss before it becomes severe.
Can I use any type of paper for the seal test?
Yes, normal printer paper works perfectly.
Should the oven be hot during the paper test?
No, the test must always be done when the oven is cool.
Is it normal if paper grips tightly in some areas only?
No, uneven grip means the seal is already failing.
How often should I perform the paper test?
Once every few months is ideal for regular monitoring.
Does paper tearing during the test mean the seal is perfect?
It usually means that section has very strong sealing pressure.
Flashlight Test for Detecting Seal Gaps
The flashlight test helps identify fine gaps that may not be visible in normal lighting. Place a bright flashlight inside the oven cavity and turn it on. Then close the oven door tightly.
Turn off the kitchen lights and observe the perimeter of the oven door from outside. Look closely for any visible light escaping through the door edges. Any visible light indicates a direct gap.
Even narrow streaks of light reveal weak seal contact. These small gaps can still leak significant amounts of heat during cooking. Over time, this contributes to inefficiency and uneven results.
Move your viewpoint around the oven to check all sides and corners. Some gaps only appear at specific viewing angles. Slow and careful observation gives the most reliable results.
Repeat the test after cleaning the seal area if heavy dirt buildup was present. Debris can falsely create visible gaps. Once cleaned, check again for true gasket defects.
The flashlight test is particularly helpful for identifying warped doors. A warped door prevents uniform seal contact even with a healthy gasket. In such cases, door adjustment may be required in addition to seal replacement.
Heat Leak Test Using Your Hand Safely

Another way to detect a leaking seal is by carefully feeling for escaping heat during oven operation. Preheat the oven to a moderate temperature and allow it to stabilize for several minutes. Keep your face away and use your hand cautiously.
Slowly move your hand near the edges of the closed oven door without touching the hot surface. Feel for streams of hot air escaping from any point. Strong airflow indicates localized seal failure.
This test must be done carefully to avoid burns. Never touch the glass or metal directly while the oven is hot. Only detect air movement from a safe distance.
Consistent heat around the entire perimeter without focused hot streams usually indicates a healthy seal. Isolated hot points suggest gaps or compression failure. These hot spots often match areas that fail the paper test.
Repeat this test on different temperature settings. Some seal failures only appear clearly at higher temperatures. This method provides real-world confirmation of seal performance.
This heat detection approach is best used alongside the visual and paper tests. Combined results provide high inspection accuracy.
How to Clean the Oven Door Seal Properly
Cleaning the oven door seal should always be done when the oven is completely cool. Heat-softened gasket material can be damaged easily during cleaning. Waiting until the oven cools ensures both safety and material protection.
Use a soft cloth with warm water for routine cleaning. Gently wipe along the full length of the seal to remove grease and crumbs. Avoid scrubbing hard because this can tear the rubber surface.
For stubborn grease buildup, use a mild dish soap mixed with warm water. Apply the solution with a sponge and clean gently. Rinse thoroughly with clean water to remove soap residue.
Never use oven cleaner directly on the door seal. These chemicals are highly corrosive and break down rubber compounds. Chemical damage often causes early gasket failure.
Avoid soaking the seal in water for long periods. Excessive moisture weakens adhesive channels and metal clips. Light wiping is enough for effective cleaning.
Dry the seal fully after cleaning. Moisture trapped in the gasket channel promotes hardening and decay. Regular drying increases the lifespan of the oven door seal.
How to Know When Oven Door Seal Replacement Is Required
A seal must be replaced when visual damage appears along the gasket surface. Cracks, tears, and missing sections indicate that sealing pressure is no longer reliable. Cleaning cannot restore these physical defects.
Flattened seals that no longer spring back also require replacement. Loss of elasticity prevents the gasket from pressing firmly against the oven frame. This allows continuous heat leakage.
If paper slides out easily during testing at multiple points, seal failure is confirmed. Uneven grip around the door perimeter also signals advanced wear. Partial failures usually spread quickly if not addressed.
Strong external heat around the oven door edges indicates insulation loss. This suggests that both the seal and surrounding insulation may be compromised. Prolonged use under these conditions is unsafe.
Persistent uneven browning during cooking often traces back to a weak seal. Temperature imbalance inside the oven becomes difficult to control. This directly affects baking and roasting outcomes.
When repeated cleaning fails to restore sealing performance, replacement becomes necessary. Aging rubber cannot regain flexibility once the material structure degrades. Timely replacement prevents further energy loss and safety risks.
Can I keep using the oven with a partially damaged seal?
It is possible but not safe or energy efficient.
Will cleaning fix a hardened gasket?
No, hardened rubber must be replaced.
Can seal damage affect oven temperature accuracy?
Yes, leaking heat directly affects temperature stability.
Is one small crack enough to justify replacement?
Yes, even small gaps cause significant heat loss.
Do all oven seals wear out over time?
Yes, all seals age due to continuous heat exposure.
Step by Step Oven Door Seal Replacement Guide
Start by disconnecting power to the oven at the main switch or circuit breaker. This prevents accidental electrical activation during the replacement process. Safety always comes before disassembly.
Open the oven door fully and locate the gasket mounting points. Some seals are held by metal clips while others slide into a channel. Identify the attachment style before removal.
Gently pull the old seal away from the door frame. Work slowly around the perimeter to avoid bending retaining clips. If resistance is high, release each clip individually.
Clean the gasket channel thoroughly before installing the new seal. Remove old debris, grease, and adhesive residue. A clean channel ensures proper seating and full compression.
Install the new seal by pressing it evenly into the channel or hooking it into the clips. Start at the corners for proper alignment. Work gradually along the frame to prevent stretching.
Close the oven door and allow the seal to settle for several hours. Do not heat the oven immediately after installation. This resting period allows the gasket to form its natural compression shape.
Common Mistakes While Reinstalling an Oven Door Seal
One common mistake is installing the seal backwards. Some gaskets have a directional profile that affects sealing pressure. Incorrect orientation reduces heat retention.
Stretching the seal during installation is another frequent error. Overstretched sections shrink later and create gaps. This leads to early seal failure.
Forgetting to clean the gasket channel before installation causes uneven seating. Dirt buildup prevents full contact between the seal and door frame. This reduces sealing effectiveness instantly.
Using glue where clips are required is also incorrect. Adhesives change how the seal compresses under heat. This often causes premature detachment.
Overheating the oven immediately after installation weakens fresh rubber. High heat should be avoided during the first few hours. Gradual heating preserves gasket flexibility.
Mixing generic and model-specific seals creates fitting problems. Mismatched seals rarely align correctly with the door frame. Always use the exact replacement part recommended for the oven model.
Cost of Oven Door Seal Replacement
The cost of a replacement oven door seal varies by brand and oven type. Standard household oven seals usually fall into an affordable price range. Premium built-in or commercial ovens use more expensive gaskets.
Labor cost depends on whether the replacement is done professionally or as a DIY task. Most homeowners can handle replacement without specialized tools. This eliminates service fees.
Professional installation adds to the total expense but ensures correct fit. Service charges vary by location and oven complexity. Built-in wall ovens are usually more labor intensive.
Shipping cost also affects total price for online gasket purchases. Large gaskets sometimes require oversized packaging. This increases delivery fees.
Delaying replacement increases long-term energy cost. Heat loss forces the oven to work harder during every cooking cycle. Over time, wasted energy exceeds the gasket replacement price.
Timely replacement remains the most cost-efficient option. A properly sealed oven saves energy, improves cooking results, and extends appliance lifespan. The financial return outweighs the initial cost.
Is replacing the oven seal cheaper than buying a new oven?
Yes, seal replacement is far more affordable than oven replacement.
Does DIY seal replacement reduce total cost?
Yes, it eliminates labor charges completely.
Are built-in oven seals more expensive?
Yes, they often cost more than standard freestanding oven seals.
Does delaying replacement increase future expenses?
Yes, wasted energy and heat damage raise long-term costs.
Can I reuse the old seal to save money?
No, reused seals cannot restore proper heat retention.
Safety Warnings During Oven Door Seal Maintenance
Always disconnect electrical or gas power before working on the oven. Live appliances create shock and fire hazards. Power isolation is mandatory for safety.
Never test seal integrity with bare hands at extremely high temperatures. Direct contact with hot glass or metal causes severe burns. Use safe distance during heat detection.
Avoid inhaling dust from old seal materials. Aging rubber can release fine particles when disturbed. Proper ventilation is essential during removal.
Do not allow children or pets near the oven during maintenance. Open doors and loose components create injury risks. Secure the work area completely.
Use protective gloves when removing brittle seals. Sharp metal clips and torn rubber edges can cut skin. Gloves reduce injury chances significantly.
Always verify proper door closure after replacement. Misaligned seals prevent full door locking. This creates both heat loss and safety hazards during operation.
Conclusion
Regular inspection of the oven door seal is one of the most overlooked aspects of appliance maintenance. Yet it has a direct impact on cooking performance, energy use, and kitchen safety. A healthy seal preserves stable internal heat and prevents unnecessary heat escape.
Simple checks like visual inspection, paper testing, flashlight testing, and safe heat detection allow early problem identification. Cleaning the seal properly restores performance when dirt is the only issue. Replacement becomes essential once material damage or elasticity loss occurs.
Correct installation prevents future heat leakage and protects surrounding kitchen surfaces from temperature damage. Avoiding common mistakes ensures the new gasket performs as intended. Professional service remains an option for complex installations.
The cost of replacing a seal is minor compared to long-term energy waste from heat leaks. Safety risks also increase with every delayed replacement. Preventive maintenance remains the most effective long-term strategy.
A well-maintained oven door seal ensures accurate cooking temperatures and consistent results. It also extends the appliance lifespan by reducing heating strain. Seal maintenance is therefore a small task with significant long-term benefits.
Consistent attention to this simple component improves overall oven performance and household safety. Every homeowner should include gasket inspection in regular kitchen appliance care. This ensures reliable operation for years to come.
I’m Emma J. Caldwell, the founder, lead writer, and home-cooking enthusiast behind KitchenGuideCo.com. With a background in culinary arts and over a decade of cooking experience in both professional and personal kitchens, I created this platform to demystify recipes, offer smart kitchen gadget reviews, and guide readers through meal prep with confidence and clarity.