I stared at my favorite baseball cap, feeling a genuine sense of loss. It was the perfect shade of faded blue, its curve was just right, and it was my go-to for every sunny day.
But it had crossed a line. A stubborn sweat stain darkened the brim, and it had started to develop a distinct, unpleasant odor that even I couldn’t ignore.
I was trapped in a common dilemma. I knew throwing it in the washing machine was a guaranteed disaster, likely to leave it a crumpled, misshapen ruin.
Hand-washing seemed like a tedious and imperfect solution. I felt like I was facing a hopeless choice between a dirty cap and a destroyed one.
That’s when I discovered a secret weapon hiding in plain sight in my own kitchen. I decided to try cleaning it in the one appliance I never thought I would: my dishwasher.
After a few trials and some initial errors, I perfected a method that worked wonders. I’m going to share my exact, step-by-step process for how to clean baseball caps in dishwasher with you.
This guide is built on my personal experience, designed to save you from the mistakes I made. You can skip the guesswork and get straight to the results, restoring your prized caps to their former glory.
My Journey: Why I Trust My Dishwasher With My Prized Caps
I learned about cleaning caps the hard way, through a few costly mistakes. My first attempt involved tossing a grimy cap into the washing machine with a load of towels.
The result was a complete disaster. The cap came out crumpled beyond recognition, with a wildly misshapen brim and a faded, tired-looking logo.
That experience taught me a crucial lesson. The aggressive agitation of a washing machine is simply too brutal for a structured hat’s delicate form.
I almost gave up entirely until a friend mentioned the dishwasher method. I was incredibly skeptical but desperate enough to try anything.
My first dishwasher attempt was cautious, using a simple placement on the top rack. To my amazement, the cap emerged clean and, most importantly, structurally intact.
The gentle, targeted spray jets proved far more effective and safer than the washing machine’s violent tumbling. I realized the dishwasher provides a controlled, contained environment that a washer simply cannot.
Not All Caps Are Created Equal: Which Ones Can You Actually Wash?
Through my own trial and error, I’ve discovered that material composition is everything when it comes to dishwasher safety. Getting this wrong can lead to heartbreaking results that you can’t reverse.
I’ve created a simple system to help you quickly identify what works and what doesn’t. This will save you from making the same mistakes I did early in my cap-cleaning journey.
The Winners: Caps I confidently Wash in My Dishwasher
Modern polyester and cotton blends are my absolute go-to candidates for dishwasher cleaning. These materials are durable, colorfast, and maintain their shape beautifully through the gentle cycle.
Caps with plastic mesh backs handle the dishwasher environment surprisingly well in my experience. The synthetic mesh is designed for breathability and durability, standing up well to water flow.
Structured caps with firm plastic bills are perfect for this cleaning method when properly supported. The rigid brim maintains its integrity while the dishwasher jets clean those hard-to-reach crevices.
Newer caps with synthetic sweatbands also clean beautifully in the dishwasher. The water effectively flushes out salt and grime from the band without damaging the material.
The “Do Not Wash” List: Caps I Would Never Risk
Wool or felt caps will shrink and become stiff, felted versions of their former selves. I learned this lesson the hard way with a favorite winter cap that became unwearable.
Vintage caps with cardboard bills cannot handle any amount of moisture. The water will instantly warp and destroy the internal cardboard structure beyond repair.
Caps with significant glue, paper inserts, or delicate structural elements will likely fall apart. The heat and moisture break down adhesives and cause paper components to disintegrate.
Caps with delicate embroidery, sequins, or valuable patches should never go in the dishwasher. The threads can loosen, colors might bleed, and glued elements may detach during the cycle.
My Pre-Cleaning Ritual: The 5-Minute Prep That Makes All the Difference
I never skip these crucial preparation steps before any dishwasher cleaning session. They form the foundation for perfectly cleaned caps without any unpleasant surprises.
This quick ritual takes me less than five minutes but saves me from potential disasters. Each step serves a specific purpose in ensuring the cleaning process goes smoothly.
Step 1: The Label Check and Material Verification
The very first thing I do is locate and read the manufacturer’s care tag inside the cap. This little tag provides the most reliable information about how the cap should be cleaned.
If the tag is missing or faded, I rely on my material knowledge and always err on the side of caution. When I’m uncertain about the fabric composition, I choose hand-washing instead of risking the dishwasher.
Step 2: The Crucial Spot Test for Colorfastness
I perform a simple colorfastness test on every single cap, even if I’ve washed similar ones before. This involves dabbing a hidden area, like the inside seam, with a damp white cloth.
If I see any color transfer onto the cloth, I immediately abandon the dishwasher plan. Discovering color bleeding during this test saves me from ruining the cap’s appearance in the wash cycle.
Step 3: The Dry Brush-Off
I take a soft-bristled brush and gently remove all loose surface debris before washing. This step prevents dirt from turning into muddy water that circulates through my dishwasher.
Pay special attention to the sweatband area and any visible stains during this brushing. Removing surface grime beforehand makes the actual washing process much more effective.
My Step-by-Step Dishwasher Method: The Core of the Process
This is the exact routine I follow every single time I clean my caps. Consistency is absolutely crucial for achieving perfect, predictable results every time.
I’ve refined this method through countless washes, and it has never let me down. Trusting this process is what separates a perfectly cleaned cap from a potential disappointment.
Step 1: Securing the Cap – This is Non-Negotiable
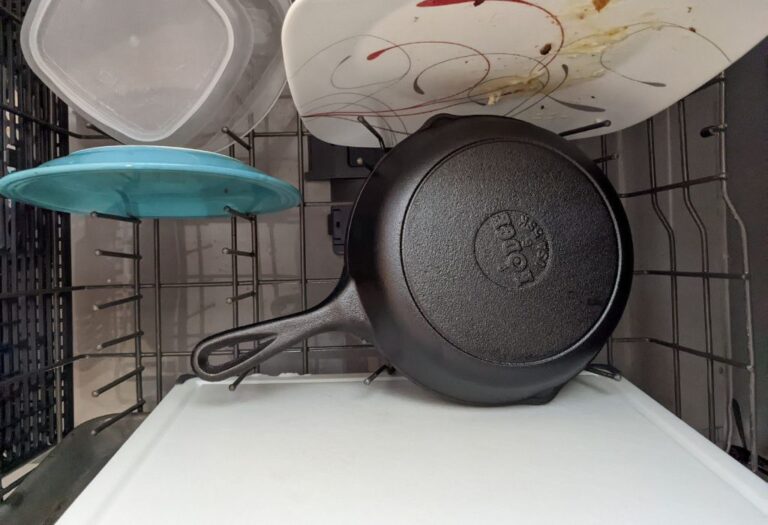
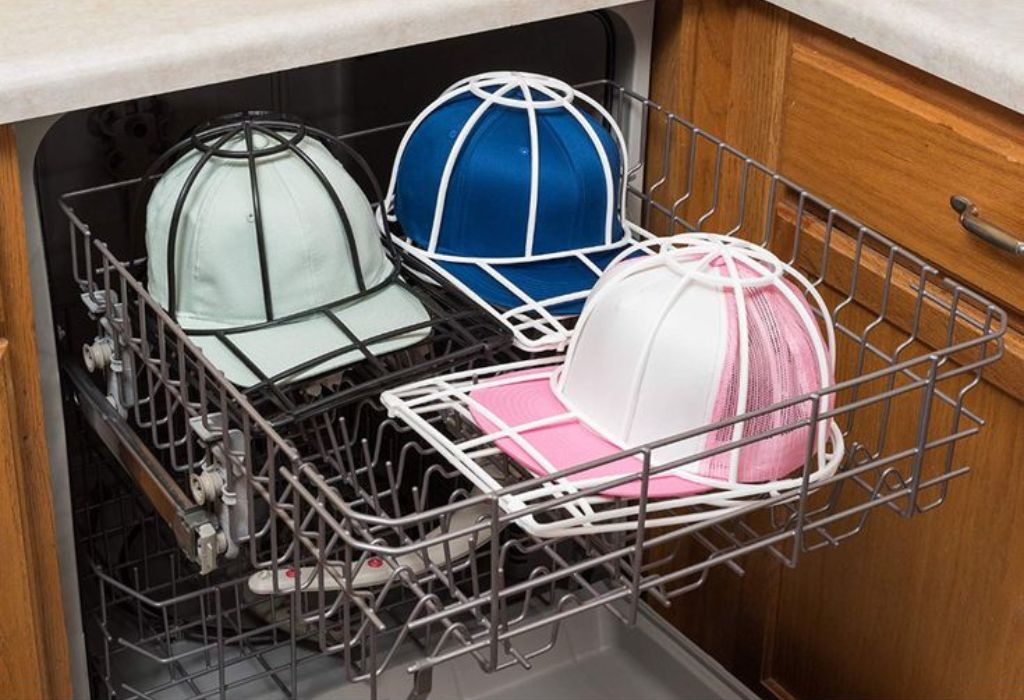
I always place my caps on the top rack of an otherwise empty dishwasher. The bottom rack exposes caps to intense heat and direct spray that can cause damage.
I consider a dedicated hat cage an essential investment for this process. It completely locks the cap’s shape in place throughout the entire wash cycle.
If you don’t have a hat cage, you can carefully nestle the cap between the rack tines. Just ensure the brim maintains its natural curve and doesn’t get bent or distorted.
Step 2: My Detergent Philosophy – Less is More
I use just one tablespoon of mild, powder, or pod dishwasher detergent for cleaning caps. Using more detergent doesn’t make them cleaner—it just leaves more residue.
I want to be very clear about what not to use here. I never use liquid dish soap or laundry pods, as they create overwhelming suds that can damage your machine and leave filmy residue on your caps.
Step 3: Selecting the Perfect Dishwasher Cycle
I always select the gentlest cycle available on my dishwasher, typically labeled “China/Crystal” or “Light Wash.” These cycles use lower water pressure and are much kinder to the cap’s structure.
Using cold water is non-negotiable in my process, as hot water can cause colors to fade and certain materials to shrink. The cold water effectively cleans without risking damage to the cap’s fabric or shape.
The single most important setting I select is the “NO HEAT DRY” or “Air Dry” option. The intense heat of a standard drying cycle is what warps bills, shrinks fabric, and ruins caps beyond repair.
I always double-check this setting before starting the cycle, as some dishwashers default to heat dry. Taking this extra moment ensures all my careful preparation doesn’t go to waste.
Step 4: The Post-Wash Inspection and Immediate Reshaping
I open the dishwasher door as soon as the cycle completes to remove the caps immediately. Letting caps sit inside while damp can cause them to cool and set into an awkward, misshapen form.
While the cap is still damp and pliable, I gently reshape the crown with my hands. I pay special attention to reinforcing the original curve of the bill and smoothing out any imperfections.
This is the perfect time to make minor adjustments to the cap’s shape if needed. The damp fabric is very malleable, allowing me to perfect the curve before it dries completely.
Step 5: The Art of Air Drying for a Perfect Finish
I always let my caps air dry naturally in a well-ventilated area away from direct sunlight. Placing them near a heat source or in bright sunlight can cause fading and warping.
To maintain the crown’s perfect shape, I stuff it with a clean, dry towel or a specialized hat form while it dries. This simple trick prevents the crown from collapsing or developing wrinkles as it dries.
I typically allow at least 24 hours for complete drying, though thicker materials may take longer. Rushing this final step can undo all the careful work from the previous stages.
Troubleshooting: Problems I’ve Encountered (And How I Fixed Them)
I once opened my dishwasher to find caps covered in a white, chalky residue. This happened because I used too much detergent, which didn’t fully rinse away during the cycle.
I solved this by running the affected caps through a quick rinse cycle with no detergent at all. Now I always stick to my “less is more” detergent rule and haven’t had the problem since.
Another issue I faced was a slightly warped brim on a favorite cap. The plastic had softened just enough during washing to lose its perfect curve.
I fixed this by laying the damp cap flat on a towel and placing a heavy book on the brim overnight. The gentle pressure restored the brim’s shape as it finished drying completely.
My Alternative Methods for Caps That Aren’t Dishwasher-Safe
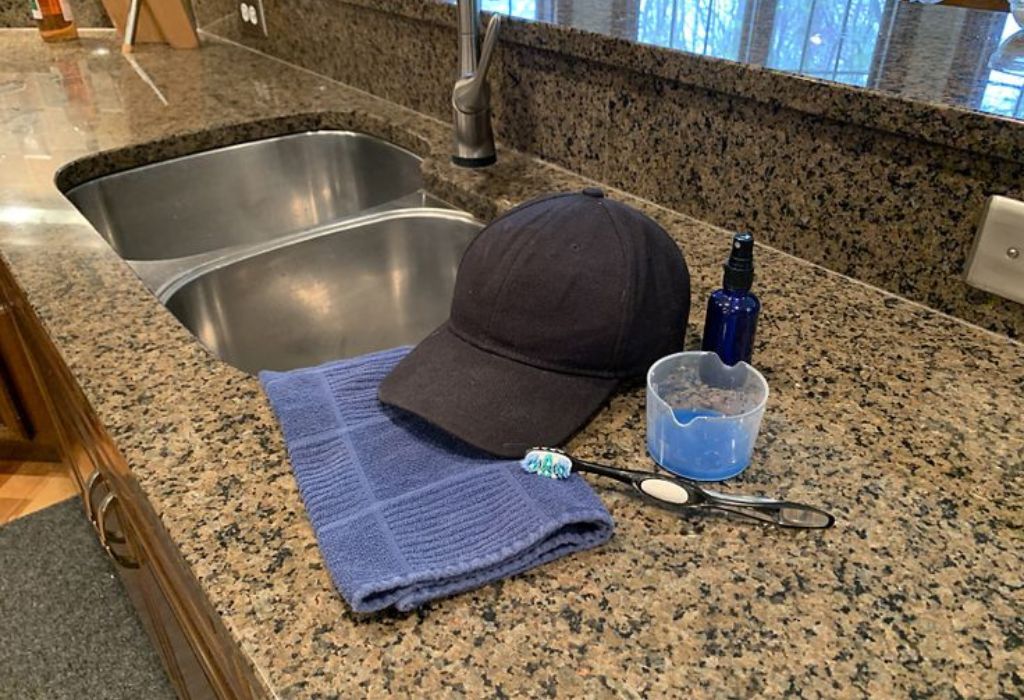
For my delicate or vintage caps, I rely on a gentle hand-washing technique I’ve perfected over time. This method gives me complete control over the cleaning process without risking damage to fragile materials.
I fill a clean sink with cool water and add a small amount of mild laundry detergent or OxiClean. The cool temperature prevents colors from bleeding and protects the cap’s structural integrity.
I submerge the cap and gently agitate it with my hands, paying special attention to stained areas. I never twist or wring the fabric, as this can permanently misshape the crown and brim.
After letting it soak for 30-60 minutes, I rinse the cap thoroughly with cool running water. I continue rinsing until all soap residue is completely gone, which usually takes several minutes.
My Go-To Spot Cleaning Strategy
For small, localized stains, I create a paste using baking soda and water. I gently work this paste into the stain using a soft-bristled toothbrush in circular motions.
The baking soda acts as a gentle abrasive that lifts stains without damaging the fabric. After treating the stain, I rinse the area thoroughly with cool water and let it air dry completely.
For dust and lint on my caps, I’ve found that a simple lint roller works wonders. The sticky surface effectively picks up surface debris without introducing any moisture to the fabric.
I also keep a soft-bristled clothes brush specifically for maintaining my cap collection. Regular brushing helps prevent dirt from building up and keeps my caps looking fresh between cleanings.
Frequently Asked Questions I Get All The Time
Will the dishwasher ruin the curved brim of my cap?
Not if you use a hat cage. The cage protects the curve perfectly throughout the entire wash cycle. It’s the one piece of gear I consider absolutely essential for this process.
Can I wash more than one cap at a time?
Absolutely. I regularly wash 2-3 caps together in my dishwasher. The key is ensuring each cap has its own dedicated space in the hat cage or on the rack without touching other caps.
Do I really need a hat cage, or is it a gimmick?
In my experience, it’s essential rather than optional. It’s the difference between a perfectly shaped cap and one that might lose its form. I consider it a worthwhile investment for protecting my collection.
My cap has a leather strap on the back. Can I still wash it?
I would not recommend putting leather in the dishwasher. The water will damage and crack genuine leather over time. I either remove the strap before washing or choose a different cleaning method.
How often should I clean my caps this way?
I only use this method when my caps are visibly dirty or develop odors. Over-washing can cause unnecessary wear, so for me, that typically means 2-3 times per season for each cap.
What about the sweatband? Does this method really clean that effectively?
Yes, the targeted spray jets do an excellent job of flushing out salt and grime from the sweatband. This is particularly important since the sweatband is often the primary source of odors.
Can I use bleach on a white cap?
I avoid bleach completely as it can weaken fabric fibers and cause yellowing over time. For my white caps, I prefer using a detergent with OxiClean or creating a paste from baking soda and water.
What do I do if the colors start to run during the cycle?
Unfortunately, you need to let the cycle complete before assessing the damage. This is exactly why I’m so adamant about performing the spot test during my pre-cleaning ritual.
Is it safe for the embroidery?
Quality embroidery typically holds up perfectly fine in the dishwasher. However, I’ve noticed that cheaper, printed-on logos can sometimes crack or peel over time with repeated washing.
My cap came out with a weird shape. Can it be saved?
Usually, yes. I lightly mist the cap with water to dampen the fabric, then gently reshape it by hand. I let it air dry with the crown stuffed to maintain the new shape as it dries.
Conclusion
Learning how to clean baseball caps in dishwasher has completely transformed how I maintain my entire collection. It’s a simple, effective process that has saved countless caps from retirement.
Trust this process, respect your cap’s material, and never skip using a hat cage or the no-heat dry setting. Your favorite caps will thank you with many more years of perfect wear.
I remember when I thought a dirty cap was beyond saving, but now I know better. This method has given my most-loved caps a new lease on life, and I’m confident it will do the same for yours.
Start with your least favorite cap to build confidence in the method. Once you see the results for yourself, you’ll wonder why you ever considered any other cleaning technique.
I’m Emma J. Caldwell, the founder, lead writer, and home-cooking enthusiast behind KitchenGuideCo.com. With a background in culinary arts and over a decade of cooking experience in both professional and personal kitchens, I created this platform to demystify recipes, offer smart kitchen gadget reviews, and guide readers through meal prep with confidence and clarity.