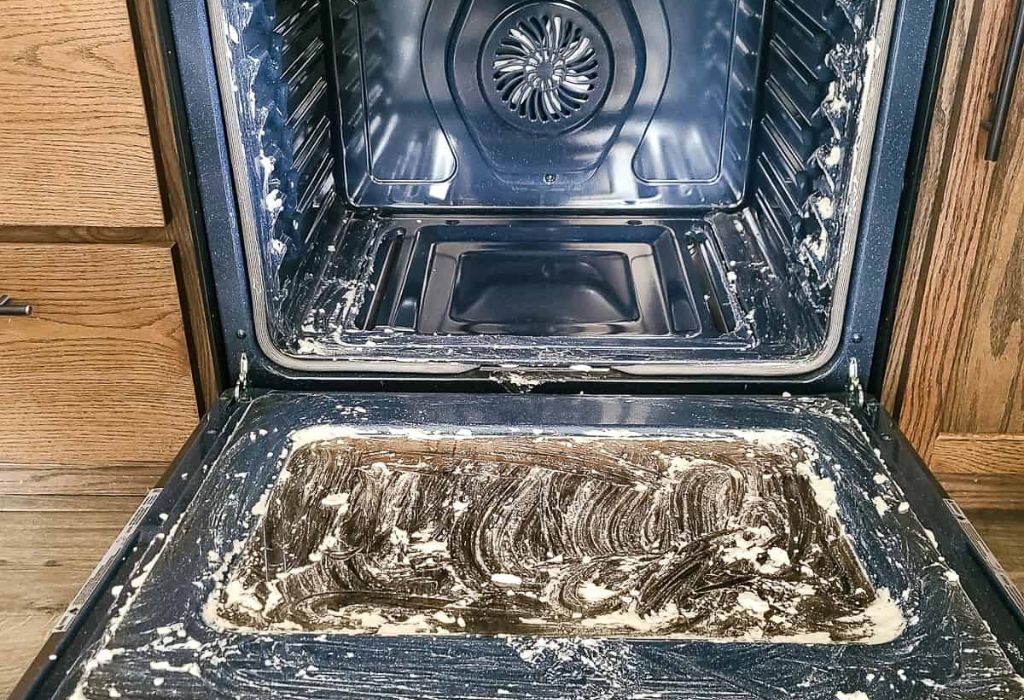
Most people notice their gas oven needs cleaning only when smoke rises during preheating. Sometimes you can even smell burnt grease long before opening the door.
That moment turns everyday cooking into a stressful experience instead of something enjoyable. It becomes clear that cleaning is not just about appearance but also about safe and efficient cooking.
A dirty gas oven can trap heat unevenly and make food cook unpredictably. Grease buildup may also increase fire risks and produce strong odors during baking.
When the oven interior is ignored too long the stains become harder to remove. This leads to frustration and extra time spent trying to scrub what could have been prevented earlier.
Cleaning a gas oven does not have to feel overwhelming or complicated. With the right steps and proper safety precautions the entire process becomes simple.
You can remove burnt residue without using harsh chemicals or damaging the enamel surface. By the end of this guide you will know exactly how to clean a gas oven safely and keep it working efficiently.
Why Cleaning a Gas Oven Matters for Safety and Performance
A clean gas oven allows heat to circulate evenly during cooking. When grease builds up it blocks airflow and causes inconsistent temperature levels. This can lead to undercooked food or burnt edges even with the right settings.
Dirty ovens also produce smoke and strong odors during preheating. Burnt residue heats repeatedly and releases unpleasant smells into the kitchen. This makes cooking uncomfortable and may affect the flavor of meals.
Grease buildup increases fire risk inside the oven chamber. When residue becomes too thick it can ignite under high heat. Regular cleaning helps prevent sudden flare-ups and improves overall safety.
A clean oven uses less energy because the heat transfers more efficiently. Burnt layers absorb heat and force the appliance to work harder. This increases gas consumption and raises monthly utility costs unnecessarily.
Food debris can block the flame ports and weaken the burner flame. Weak flames take longer to heat the oven and slow down cooking time. Cleaning helps maintain strong ignition and stable heating performance.
Keeping your gas oven clean also extends the lifespan of its components. Igniters and sensors function better without buildup interfering. These benefits make routine cleaning essential for both safety and daily cooking results.
Signs Your Gas Oven Needs Deep Cleaning
Smoke coming from the oven during preheating is one of the first warning signs. Burnt grease and food residue start heating up and releasing visible fumes. This usually means the interior needs more than a simple wipe-down.
A strong burnt or sour smell while baking indicates built-up residue. Odors linger even after the oven cools down and the door stays open. These smells can also transfer to food and affect taste noticeably.
If the oven door glass looks cloudy or heavily stained cleaning is overdue. Grease splatters bake onto the glass every time the oven heats. Over time the layer becomes harder to remove with normal methods.
Uneven cooking results are another indicator of hidden buildup. Hot spots form when residue blocks proper airflow and heat distribution. You may notice food burning outside while remaining undercooked inside.
Weak or yellow flames can appear when flame ports are clogged. This reduces heating power and makes cooking slower than usual. Cleaning restores proper flame color and stable ignition performance.
If the igniter struggles or takes longer to light cleaning may be necessary. Grease can interfere with the sensor or delay spark timing. These signs mean it is safer to deep clean before further use.
Safety Precautions Before Starting the Cleaning Process
Always turn the oven off completely and allow it to cool before cleaning. Working on a hot surface increases burn risk and makes chemicals evaporate quickly. Cooling prevents accidental injury and protects sensitive components.
Disconnect the oven from the gas supply if deep cleaning is required. This prevents accidental ignition while handling internal parts and burners. Use the shutoff valve located behind or near the appliance.
Make sure the kitchen is well ventilated during the entire process. Open windows and turn on exhaust fans to remove fumes safely. Proper airflow reduces irritation from cleaners and trapped odors.
Wear protective gloves to avoid skin irritation from grease and cleaning products. Long sleeves prevent accidental scrapes while reaching into the oven cavity. Eye protection helps avoid splashes from liquid solutions.
Never spray water directly onto burners igniters or electrical parts. Excess moisture can damage components and cause malfunction during ignition. Use a damp cloth instead of pouring or spraying liquids.
Read the manufacturer manual before using any cleaner inside the oven. Some coatings can be damaged by harsh chemicals or abrasive pads. Following proper precautions ensures safe cleaning without harming the appliance.
How to Turn Off Gas and Prepare the Oven
Before cleaning a gas oven the first step is shutting off the gas supply. Locate the shutoff valve behind the appliance or near the wall connection. Turn the valve so it sits perpendicular to the pipe to stop gas flow.
Allow the oven to cool completely before touching any internal parts. Cleaning a hot oven can cause burns and make grease more difficult to remove. Waiting also prevents fumes from reacting with heat during the process.
Remove any loose food debris using a soft brush or dry cloth. This prevents crumbs from spreading across the oven while cleaning. Sweeping out dry residue makes the next steps easier and more effective.
Take out all pans baking sheets and stored items inside the oven. Many people keep trays inside but cleaning must be done in an empty chamber. Leaving items inside increases mess and limits access to corners.
If your oven has a removable bottom panel lift it carefully according to instructions. Grease often collects underneath this area and needs special attention. Cleaning hidden spaces helps improve airflow and heating performance.
Keep a bowl of warm water nearby for dampening cloths during cleaning. Avoid using excessive liquid because it may affect burners and igniters. Preparing the workspace ensures a safe and smooth cleaning process.
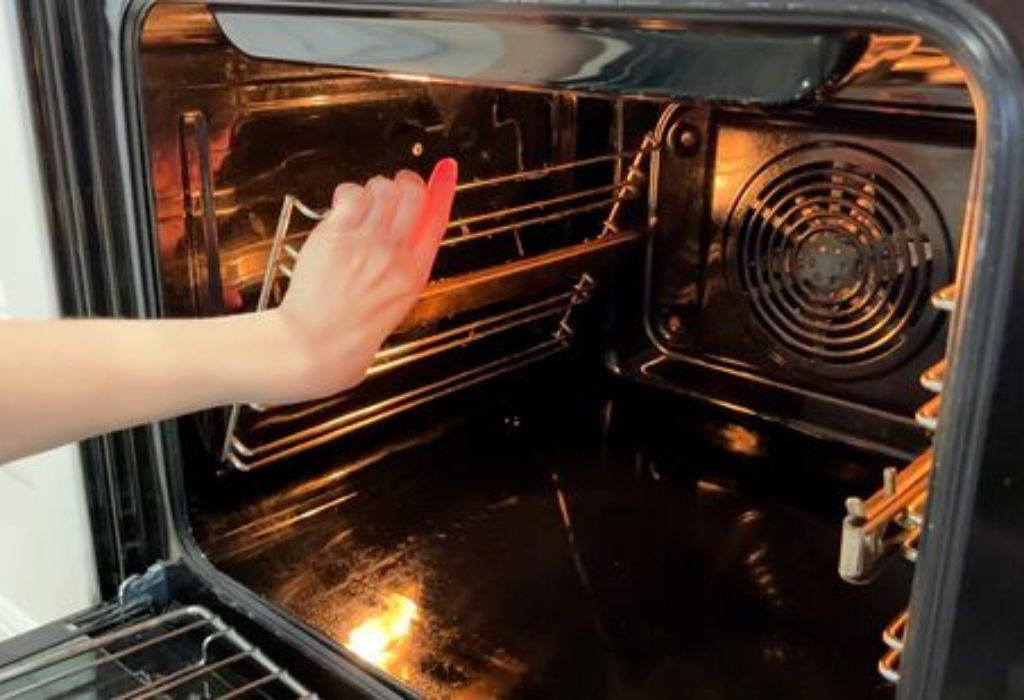
Removing Oven Racks and Detachable Parts
Start by sliding out the oven racks completely using both hands. Pull them gently to avoid scratching the enamel surface or damaging the rails. Place the racks on a protected surface such as a towel or mat.
Check if your gas oven includes detachable side supports or rack holders. Some models allow these parts to be unclipped for deeper cleaning. Removing them provides better access to walls and hidden buildup.
Take out the broiler tray or lower compartment if your model has one. Grease and crumbs often collect in this section without being noticed. Cleaning these areas helps prevent smoke and unpleasant odors later.
Avoid forcing any part that feels stuck or difficult to remove. Use the manual to confirm which components are designed for detachment. Forcing pieces can break clips or void the manufacturer warranty.
Soak removable parts in warm soapy water to loosen grease. Let them sit for at least twenty to thirty minutes for best results. This softens residue and reduces scrubbing effort during cleaning.
Label or photograph complex components before disassembling. This helps you remember exact placement during reassembly later. Organized removal prevents mistakes and ensures the oven works correctly afterward.
Cleaning Gas Oven Racks Using Different Methods
Soaking oven racks in warm water and dish soap is the simplest method. This helps break down grease without using harsh chemicals immediately. A sponge or soft brush can remove most residue after soaking.
For tougher stains sprinkle baking soda generously across the rack surface. Spray vinegar lightly to create a foaming reaction that lifts burnt spots. Let the mixture sit for fifteen to twenty minutes before scrubbing.
If racks are heavily coated they can be cleaned inside a bathtub. Line the tub with an old towel to prevent scratches on the surface. Fill with hot water and add a cup of dishwashing detergent or laundry soap.
Leave the racks to soak overnight for maximum grease removal. The next morning residue should wipe away with minimal effort. Rinse thoroughly and dry completely before placing back into the oven.
Avoid using steel wool or sharp metal tools on chrome-plated racks. Abrasive materials can scratch the coating and cause rust in the future. Always choose non-scratch pads or nylon brushes for safe cleaning.
After cleaning check each rack for smooth sliding motion. Dirt or soap residue can affect alignment and stability during cooking. Proper maintenance ensures even heat distribution and safer oven use.
How to Clean the Interior Without Damaging Enamel
Use a soft cloth or non-abrasive sponge when cleaning the oven interior. Harsh scrubbing tools can scratch the enamel coating permanently. Once damaged the surface becomes harder to clean and may trap grease.
Apply a paste of mild dish soap and warm water to loosen residue. Spread it gently across the walls and allow it to sit for several minutes. This softens buildup without exposing the enamel to strong chemicals.
Wipe the interior using slow circular motions instead of hard pressure. Scrubbing aggressively can wear down the glossy protective layer. Gentle movement helps lift grease while maintaining the smooth finish.
Avoid using oven cleaners not approved for gas oven enamel. Some contain chemicals that discolor the interior or weaken coating over time. Always check product labels before applying anything inside the chamber.
Never scrape burnt food using knives or metal tools. Sharp edges can chip enamel and expose metal beneath the surface. Once exposed rust may develop and spread across the interior.
Rinse the surface with a damp cloth to remove leftover cleaner. Make sure no residue remains that could release fumes during heating. Allow the oven to dry completely with the door open before reassembling parts.
Natural Cleaning Methods Using Baking Soda Vinegar and Steam
Baking soda is a gentle yet effective cleaner for gas oven interiors. Mix half a cup with water to make a thick spreadable paste. Apply it evenly to greasy sections and let it rest overnight.
The paste absorbs stubborn residue without scratching the enamel surface. When it dries the particles loosen burnt layers naturally. This reduces the need for heavy scrubbing the next day.
Spray vinegar lightly over the baking soda for a foaming reaction. The bubbles lift grease and soften carbon buildup along the walls. Wipe the area clean using a damp cloth once the reaction stops.
Steam cleaning is another safe chemical-free method for deep cleaning. Fill an oven-safe bowl with water and place it inside the chamber. Heat the oven at low temperature for fifteen to twenty minutes.
Steam softens dried stains and helps remove sticky residue easily. After cooling wipe surfaces using a microfiber cloth for a smooth finish. This method works well for routine maintenance between deep cleanings.
Avoid mixing vinegar with commercial cleaners at the same time. Combining products can create fumes that irritate eyes and skin. Natural methods remain safest for regular use inside a gas oven.
Removing Stubborn Grease and Burnt-On Residue Safely
Stubborn grease often forms around the bottom and corners of the oven. These areas collect drips that burn repeatedly during cooking cycles. Over time the residue hardens and becomes difficult to remove.
Apply a thicker layer of baking soda paste directly on burnt spots. Let it sit for several hours to soften the hard surface underneath. Patience makes removal easier and prevents unnecessary scrubbing damage.
Use a plastic scraper instead of metal tools when lifting residue. Plastic does not scratch enamel or leave marks behind. Work slowly and remove buildup in small sections at a time.
For extremely tough areas use a warm steam process before scraping. Heat loosens carbon layers and reduces cleaning effort significantly. Repeat steaming if the residue still feels too solid to lift.
Avoid using ammonia or bleach inside a gas oven interior. These chemicals release strong fumes when exposed to heat. They can also corrode metal parts and harm the enamel surface.
After cleaning check that all residue and paste have been removed. Any leftover cleaner may burn and create smoke during the next use. A clean surface ensures safe operation and better cooking performance.
Cleaning Gas Burners Igniters and Flame Ports
Always make sure the gas supply is turned off before cleaning burners. This prevents accidental ignition and keeps the process completely safe. Allow the oven to cool fully before touching internal components.
Remove the burner covers gently using both hands for stability. Place them on a flat protected surface to avoid scratches or damage. Check for food particles or grease around the openings and edges.
Use a soft brush or toothbrush to clean the flame ports carefully. These tiny holes allow gas to flow evenly during ignition and heating. Clogged ports create weak or uneven flames that slow cooking times.
Avoid using water directly on igniters or electrical parts. Excess moisture can interfere with spark production and cause malfunction. Instead use a slightly damp cloth and wipe the surrounding area gently.
For stubborn buildup apply a mild dish soap solution to burner covers. Let them soak for a few minutes to loosen grease without scrubbing aggressively. Rinse thoroughly and dry completely before reinstalling the parts.
Once reassembled check the flame color after turning gas back on. A clean burner produces a strong blue flame with even distribution. Yellow flames indicate further cleaning or professional inspection may be needed.
Deodorizing the Oven and Eliminating Lingering Smells
Lingering odors often come from burnt grease that remains after cooking. These smells intensify when the oven reheats during the next session. Cleaning the interior is the first step before treating the odor.
Place an oven-safe bowl filled with white vinegar inside the chamber. Heat at low temperature for fifteen to twenty minutes to release vapors. Vinegar neutralizes odors naturally without leaving strong chemical scents.
Another method uses lemon slices in a shallow water tray. Heat the oven gently to allow citrus steam to circulate inside. This leaves a fresh smell and helps loosen light residue on surfaces.
Activated charcoal can be placed inside the oven while it is off. Charcoal absorbs stubborn odors that remain even after cleaning. Leave it overnight and remove before the next cooking cycle begins.
Avoid using strong deodorizing sprays inside the oven. These products can leave residue that burns and releases fumes later. Natural solutions are safer for both the appliance and indoor air quality.
Maintaining regular cleaning prevents odors from returning quickly. Wiping spills immediately reduces burnt buildup and improves freshness. Consistent care keeps your gas oven smelling clean and ready for use.
How to Clean the Oven Door and Glass Panel
Start by wiping the outer door surface with a mild soap solution. Use a soft cloth to avoid scratching the finish or leaving streaks. Dry the exterior completely to maintain a polished clean appearance.
For the inner glass panel remove loose crumbs using a dry cloth. Grease often splatters onto the glass and bakes repeatedly over time. Cleaning this area improves visibility and reduces smoke during cooking.
Apply a paste of baking soda and water directly onto the glass. Let it sit for fifteen to twenty minutes to soften burnt spots. Wipe gently using circular motions until residue begins to lift.
Avoid using razor blades or sharp tools on the glass surface. These can leave scratches and weaken the panel structure permanently. Damaged glass may become more likely to crack under heat.
Some oven doors have removable panels for deeper cleaning. Check the manual to confirm whether your model allows disassembly safely. If removable clean both sides carefully before reinstalling the panel securely.
Finish by polishing the glass with a microfiber cloth for a streak-free result. Make sure no cleaner residue remains that could burn later. A clear clean glass door improves cooking visibility and overall appearance.
Mistakes to Avoid While Cleaning a Gas Oven
Never clean the oven while it is still warm or recently used. Heat can cause cleaners to evaporate quickly and release strong fumes. Working on a cooled oven reduces burn risk and improves safety.
Avoid using abrasive pads or steel wool on enamel surfaces. These materials scratch the coating and create rough patches inside. Once damaged the enamel becomes harder to clean in the future.
Do not spray water directly onto burners or igniters. Excess liquid can prevent ignition or cause electrical malfunction. Use a lightly damp cloth instead of pouring or spraying liquids.
Never mix commercial cleaners with vinegar or ammonia. Combining chemicals can create harmful fumes and damage internal surfaces. Stick to one cleaning method at a time for safe results.
Do not force removable parts that seem stuck or difficult to detach. Applying pressure may break clips or bend metal supports. Always consult the manual before removing unfamiliar components.
Avoid turning the gas back on before the oven is completely dry. Moisture near flame ports can cause sputtering or weak ignition. Waiting ensures safe operation and prevents unnecessary damage.
How Often You Should Clean a Gas Oven Based on Usage
Light users who bake occasionally should clean every three to four months. This prevents small spills from turning into hardened burnt layers. Routine wiping after cooking keeps maintenance easier between deep cleanings.
Moderate users who cook several times a week need monthly cleaning. Grease and drips build up faster depending on what foods are prepared. Regular attention reduces smoke and unpleasant odors during preheating.
Heavy users or large households should clean every two to three weeks. Frequent roasting and baking produce more residue over time. Consistent cleaning helps maintain reliable temperature and faster cooking performance.
If smoke appears during cooking clean the oven immediately. Waiting longer makes removal difficult and increases fire risk. Addressing early signs prevents damage and unpleasant smells inside the kitchen.
Wipe spills as soon as the oven cools after cooking. Quick cleaning stops residue from burning repeatedly during later use. This simple habit keeps the oven fresh and easier to maintain.
Adjust the cleaning schedule based on what you notice inside. Every kitchen is different depending on cooking style and frequency. Observing the oven condition helps determine the best routine.
Final Safety Checks Before Turning the Gas Back On
Ensure all parts are fully dry before restoring the gas supply. Moisture near burners or igniters can cause sputtering or delayed ignition. Dry surfaces help the oven operate smoothly during heating.
Check that burner covers and racks are positioned correctly. Misaligned components can disrupt airflow and affect flame stability. Proper placement ensures even heat and safe temperature control.
Inspect the flame ports for any remaining residue or blockage. Clean holes allow gas to flow evenly during ignition. Weak or yellow flames may indicate further cleaning or professional attention.
Open windows and allow fresh air to circulate before lighting the oven. Ventilation removes any lingering cleaning vapors or moisture. This prevents irritation and keeps the environment safe while testing.
Turn on the oven and observe the flame color closely. A healthy flame burns blue with steady movement along the burner. If the flame appears uneven shut off the gas and reassess.
Perform a quick test preheat to confirm smooth operation. Listen for normal ignition sounds and check that heat rises consistently. Completing these checks ensures the oven is ready for safe daily use.
What People Ask About Cleaning Gas Ovens
Is it safe to use commercial oven cleaners in a gas oven?
Some commercial cleaners are safe but only if labeled for gas ovens. Always avoid products with harsh chemicals that can damage enamel. Check the manual before applying any cleaner inside the chamber.
Can I clean a gas oven without turning off the gas supply?
It is not recommended because cleaning may disturb burners or igniters. Turning off the gas prevents accidental ignition during the process. This step ensures maximum safety for the user.
How long should oven racks soak before scrubbing?
Most racks need at least twenty to thirty minutes in warm soapy water. Heavier grease may require overnight soaking for best results. Longer soaking reduces the need for harsh scrubbing.
What causes yellow flames inside a gas oven?
Yellow flames usually indicate blocked flame ports or improper airflow. Cleaning the burner holes typically restores a blue steady flame. If the issue continues professional inspection may be necessary.
Can vinegar damage the inside of a gas oven?
Vinegar is safe when used in small amounts with baking soda. Avoid combining it with commercial cleaners or strong chemicals. Always wipe surfaces thoroughly to remove residue after cleaning.
Is steam cleaning safe for gas ovens?
Yes steam cleaning is chemical-free and gentle on enamel surfaces. Place a bowl of water inside and heat at low temperature. Allow the oven to cool before wiping the softened residue.
How do I remove burnt sugar from the oven bottom?
Burnt sugar hardens and becomes difficult to scrape directly. Apply a thick baking soda paste and let it sit for several hours. Use a plastic scraper to lift the residue slowly.
Why does my oven smoke even after cleaning?
Leftover residue may still remain on hidden surfaces or racks. Preheat the oven at low temperature to burn off remaining moisture. If smoke continues inspect for forgotten grease behind panels.
Can I clean the igniter with water?
Avoid using water on igniters because moisture interferes with sparks. Use a dry brush or slightly damp cloth around the area. If the igniter is damaged seek professional repair.
How do I prevent grease buildup in the future?
Wipe spills after the oven cools and avoid letting drips bake repeatedly. Use baking trays or liners under foods that splatter easily. Routine maintenance keeps cleaning quicker and safer.
Conclusion
Cleaning a gas oven does not have to feel difficult or overwhelming. With proper preparation and safe cleaning methods the process becomes simple. Turning off the gas and using gentle products protects both the oven and user.
Regular maintenance improves cooking performance and prevents burnt residue buildup. It also reduces smoke odors and fire risks during everyday use. Keeping the oven clean ensures even heating and better meal results.
Natural methods like baking soda vinegar and steam protect enamel surfaces. They soften stubborn stains without scratching or releasing strong fumes. These techniques help maintain the oven in a healthy condition over time.
Reassembling dried parts and performing safety checks are important final steps. Confirming blue steady flames ensures the system is working correctly again. Following these guidelines keeps your gas oven safe clean and reliable for many years.
I’m Emma J. Caldwell, the founder, lead writer, and home-cooking enthusiast behind KitchenGuideCo.com. With a background in culinary arts and over a decade of cooking experience in both professional and personal kitchens, I created this platform to demystify recipes, offer smart kitchen gadget reviews, and guide readers through meal prep with confidence and clarity.