If you’re wondering how to clean microwave sensor, you’re definitely not alone. It’s a common problem because food splatters and steam can easily build up there. This can make your microwave not work as well as it should. Don’t worry, it’s not a difficult task, and we’ll give you simple steps to get the job done quickly. This guide will show you exactly what to do.
Key Takeaways
- You’ll discover why it’s important to keep your microwave sensor clean.
- Learn the easy steps to safely clean the sensor.
- Find out the best cleaning supplies to use.
- Get tips on preventing future messes.
- Understand how a dirty sensor affects your microwave.
- Explore solutions for more serious issues.
Why Cleaning Your Microwave Sensor Is Important
Your microwave’s sensor is like its brain. It’s usually a small, often hidden component that senses the amount of steam released by food during cooking, which tells the microwave how long to cook for. If the sensor is dirty, it can’t “think” properly. This leads to problems like food that’s undercooked, overcooked, or not heated evenly. Cleaning the sensor regularly helps keep your microwave working efficiently and prevents those cooking mishaps.
What Happens When a Sensor Gets Dirty
When the sensor has food splatters, grease, or steam build-up, it sends incorrect signals. This causes the microwave to misinterpret the amount of moisture. Consequently, the cooking cycle can be cut short or extended, resulting in food that’s not ready or burnt. This is not only frustrating but could also affect the performance and lifespan of your appliance.
- Undercooked Food: The sensor might think the food is done before it actually is, leading to undercooked meals.
- Overcooked Food: The sensor might think the food needs more time, causing it to overcook and burn.
- Uneven Heating: The microwave could heat food unevenly, leaving some parts cold and others too hot.
- Reduced Performance: The microwave’s overall performance will decrease.
If the sensor is obstructed, it might not accurately gauge the moisture or steam released from the food. This could be due to a coating of grease or dried food particles. As a result, the microwave could switch off prematurely, leaving your food raw in the middle.
A dirty sensor can give the wrong reading. It might incorrectly believe the food isn’t producing enough steam, prompting the microwave to keep cooking past the point of perfection. This can lead to dry, tough, or even burnt results, especially with delicate foods like vegetables or fish.
If the sensor is blocked or obscured, it can’t properly regulate the microwave’s power based on the food’s condition. This can cause some areas to heat quickly and get cooked too much while other parts remain cold. This is particularly problematic for meals that require uniform heating, such as casseroles or leftovers.
A dirty sensor can make the microwave less efficient. This means the appliance will use more energy without giving you the desired results. Also, persistent problems might strain the microwave’s internal components, potentially shortening its lifespan. Keeping the sensor clean helps ensure the microwave works well and lasts for years.
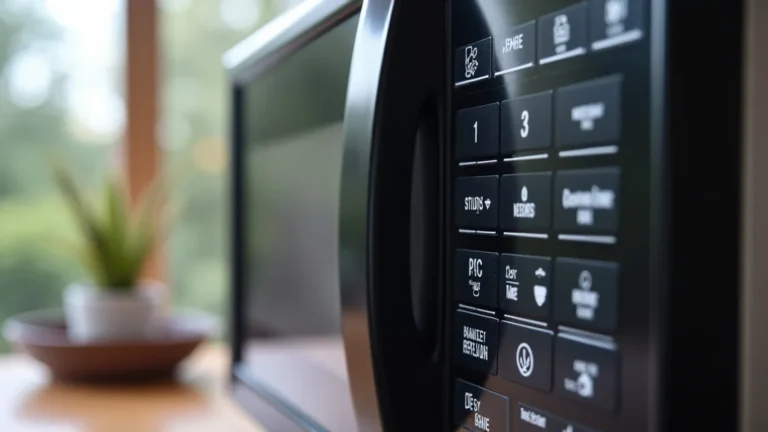
How to Identify a Dirty Sensor
Before you start cleaning, you need to know where the sensor is and if it’s dirty. The sensor is usually located inside the microwave cavity. It might be hidden behind a small plastic cover, on the side wall, or on the top of the microwave. Common signs of a dirty sensor include inconsistent heating, microwave shutting off before the cooking time is up, and visible food splatters or steam buildup around the sensor area.
- Inconsistent Heating Patterns: You’ll notice some areas of food are hot, while others are cold.
- Microwave Shuts Off Prematurely: The microwave stops cooking before the timer is finished.
- Visible Food Splatters or Build-Up: You can see food or grease near the sensor.
- Steam Buildup: Condensation collects around the sensor or its cover.
- Unpleasant Odors: You may notice smells coming from the microwave when heating.
If your microwave is not heating food uniformly, it could signal a dirty sensor. This means the waves aren’t distributing evenly, and part of this can be attributed to the sensor’s state. When the sensor is dirty, it struggles to read the cooking level, leading to uneven heat.
If your microwave turns off unexpectedly before the timer runs out, it could be a clue that the sensor is malfunctioning due to dirt. The sensor might detect too much steam or moisture. Then, it signals the unit to stop before your food is completely heated.
Visually inspect the sensor area. If you find food particles, grease, or condensation near the sensor, it needs cleaning. Food debris obstructs the sensor’s ability to operate. This causes it to provide incorrect feedback about the food’s condition and cooking needs.
A sign of a dirty sensor is steam or condensation gathering around it. As your food cooks, moisture collects against the sensor, trapping dirt and grease. The sensor might be less responsive to cooking as this buildup occurs.
Sometimes, a dirty sensor can lead to a foul smell. The grime and food buildup can harbor bacteria that produce an unpleasant odor. If you smell something unusual when you cook, inspect and clean the sensor as part of your routine microwave care.
Easy Steps to Clean Your Microwave Sensor
Cleaning your microwave sensor is simple and doesn’t require any special tools or skills. Follow these steps to keep your microwave running efficiently. Always unplug the microwave from the power outlet before starting any cleaning task to avoid electric shock.
Gather Your Supplies
Before you begin, gather the necessary supplies. You’ll need some basic items that are likely already in your home. This makes the cleaning process straightforward and convenient.
- A Damp Cloth or Sponge: Use a soft cloth or a non-abrasive sponge.
- Mild Dish Soap: Choose a gentle dish soap.
- Water: Use clean, warm water.
- Optional: White Vinegar: For extra cleaning power.
A slightly damp cloth or sponge is enough to gently wipe away food splatters and grime. Make sure the cloth or sponge is not dripping wet to prevent water from entering the appliance’s inner workings. Avoid using abrasive scrubbing pads that might damage the sensor or the microwave interior.
A small amount of mild dish soap can help lift grease and food stains. Dilute it with water for a gentler cleaning solution. Avoid using harsh chemicals or strong detergents. These might leave residue that can affect the sensor’s function or damage the microwave’s surface.
Warm water is helpful in softening and dissolving food deposits. Ensure the water is clean. Avoid using very hot water, as it can be dangerous and could potentially damage the internal parts of the microwave if used excessively.
White vinegar is a natural cleaner that helps remove stains and deodorize. Mix equal parts of water and white vinegar. This solution effectively tackles tough stains and eliminates lingering odors. Always dilute vinegar with water to avoid damaging the microwave’s surface.
Step-by-Step Cleaning Guide
Once you have gathered your supplies, follow these step-by-step instructions. Cleaning the sensor should only take a few minutes, leaving your microwave clean and working correctly.
- Unplug the Microwave: Disconnect it from the power supply.
- Locate the Sensor: Find where the sensor is inside.
- Prepare Your Cleaning Solution: Mix dish soap and water.
- Gently Wipe the Sensor: Use a damp cloth to wipe the sensor carefully.
- Rinse the Cloth: Rinse the cloth with clean water and wipe again.
- Dry the Sensor: Use a clean, dry cloth to dry the sensor area.
- Reassemble and Plug It In: Ensure all parts are secure and plug back in.
This is the most important step for safety. Unplugging the microwave ensures that no electric current passes through during the cleaning process. This eliminates the chance of any electrical hazards while you are working in or around the unit.
The sensor is usually situated in the interior cavity of the microwave. Look for it on the side wall, top, or behind a plastic cover. Its exact position depends on your microwave model. Know where the sensor is before you start cleaning to avoid damaging it.
Mix a little amount of dish soap with warm water in a small bowl or container. The solution should be soapy but not too thick. If you’re using white vinegar, mix equal parts water and white vinegar in a separate container.
Dip your soft cloth or sponge into the cleaning solution. Then, gently wipe the sensor and the area around it. This removes grease and food residue. Be careful not to apply too much pressure. Avoid damaging the sensor or its components.
After wiping with the cleaning solution, use a fresh, damp cloth. Wipe the sensor to remove any soap residue. This ensures that no cleaning products are left behind. Make sure the cloth is not too wet to prevent moisture from entering the microwave’s internal components.
Dry the area around the sensor with a dry cloth. This step is critical to stop moisture from causing problems. Use a dry cloth to make sure the sensor and the surrounding area are completely dry before you start using the microwave.
Once all parts are dry, put back any covers or panels that you may have removed. Then, plug the microwave back into a power outlet. Make certain everything is properly in place. Then, you can use the microwave once more.
Troubleshooting Tips
Sometimes, a sensor may need more than a simple wipe-down. Knowing how to handle some common issues will help in cleaning the microwave sensor more effectively.
- Stubborn Stains: For tougher stains, make a paste of baking soda and water.
- Sticky Residue: Use a vinegar and water solution to dissolve the residue.
- Lingering Odors: Place a bowl of lemon water inside and microwave.
- Sensor Cover Issues: Clean the cover or check for damage.
- Sensor Malfunctions: Check for a replacement if the sensor is damaged.
To deal with persistent food splatters or grease buildup, make a baking soda paste. Mix baking soda with water until you get a thick consistency. Apply this paste to the stained area. Gently rub the area. This helps to loosen and eliminate stubborn residue.
Sticky residue can build up from sugary spills. To remove this, mix equal parts of white vinegar and water. Use this solution with a cloth to wipe the affected areas. The vinegar dissolves the sticky matter. This allows you to eliminate any stickiness, making cleaning easier.
If you’re dealing with unpleasant odors, place a bowl of water with lemon slices in the microwave. Microwave it for a few minutes until the water boils. This releases steam that helps to refresh and eliminate odors. The lemon neutralizes smells, making your microwave smell clean.
If your microwave has a sensor cover, make sure it is clean. This cover may be removed for cleaning. Inspect it for cracks or damage. A damaged cover may hinder the sensor’s function. Ensure it fits in place. It protects the sensor from damage and enhances performance.
In cases of continued issues after cleaning, the sensor itself may be damaged or malfunctioning. Consult the microwave’s manual. You may need a professional for advice or to get a new sensor. Replacing a sensor can improve the performance of your microwave.
Preventing Sensor Issues in the Future
Keeping your microwave sensor clean can be easy. By making a few simple adjustments to how you use and clean your microwave, you can keep the sensor working correctly. Doing this will save you time and the hassle of cleaning.
Regular Cleaning Schedule
Create a regular cleaning routine to avoid sensor problems. This habit will make maintaining your microwave simple.
- Wipe After Each Use: Wipe up spills immediately.
- Weekly Deep Clean: Perform a more thorough cleaning each week.
- Clean the Sensor Regularly: Wipe the sensor as part of your weekly cleaning.
Get into the habit of wiping the inside of your microwave after each use. A simple wipe-down helps to remove any food splatters, steam, or residue. This keeps the inside of your microwave clean. This prevents the buildup that leads to issues with the sensor. It will also help stop odors from forming.
Schedule a detailed cleaning session once a week. This regular deep clean will help keep everything working efficiently. Follow the cleaning guide for your microwave, paying attention to the sensor area. Doing this will ensure you catch and remove any tough spots or debris.
When you are doing your weekly cleaning, make cleaning the sensor a part of your process. Carefully clean the sensor using a damp cloth. This will ensure that it remains free from any buildup. This habit will help to prevent the sensor from failing or giving inaccurate results.
Cooking Best Practices
How you cook and heat food in the microwave can affect how clean the sensor stays. Some methods help to prevent problems. Knowing these tips will help to reduce cleaning needs and keep your appliance in good working condition.
- Use Microwave-Safe Covers: Cover food to prevent splatters.
- Avoid Overheating: Don’t overcook food, which can cause excessive steam.
- Use Appropriate Containers: Choose containers that won’t cause splatters.
- Defrost Properly: Defrost food correctly to minimize excess moisture.
Use microwave-safe covers or lids when heating food. Doing this helps to stop food splatters and steam from reaching the sensor. This reduces the amount of buildup that requires cleaning. It also helps to keep the interior of your microwave cleaner.
Monitor your food while it is cooking, and avoid overheating. Overcooking produces a lot more steam and moisture, which causes more residue and is more likely to damage the sensor. Use timers or the microwave’s settings to control the cooking. This helps prevent excess steam and maintains the microwave’s good condition.
Select containers that are microwave-safe and have high sides. This is essential to limit splatter and mess during cooking. Avoid using containers that are too small or ones that may cause food to bubble over. This will help to keep the sensor and inside of the microwave cleaner.
Defrost frozen food using your microwave’s defrosting function. Use lower power levels for controlled thawing. This helps to reduce the amount of moisture produced. It lessens the amount of cleanup needed and prevents damage to the sensor.
Maintenance Tips
Simple maintenance practices can greatly prolong the performance of your microwave. These tips include keeping the appliance in good shape.
- Check the Manual: Follow your microwave’s user manual.
- Inspect Regularly: Periodically check the interior for damage or issues.
- Air Dry: Let the microwave air dry after cleaning.
- Proper Ventilation: Ensure good ventilation to prevent moisture buildup.
Refer to your microwave’s user manual for guidance on cleaning and care. The manual often gives model-specific instructions and advice on how to handle the sensor and internal components. Knowing the specific suggestions for your microwave’s upkeep can enhance its lifespan.
Regularly check the inside of your microwave for signs of wear and tear, rust, or damage. Inspect the sensor and its protective cover. Check for any damage that may affect its operation. Addressing issues as they arise can help keep your microwave running well.
After you clean your microwave, let it air dry completely before using it again. Open the door to give the interior and sensor time to dry naturally. This reduces the chance of moisture getting trapped inside and causing corrosion or hindering performance. Also, it helps remove any leftover odors.
Position your microwave in a space that has good air circulation. This helps reduce moisture buildup and prevents condensation. Good ventilation also reduces any odors, keeping the appliance and the sensor in better condition. It also increases its overall lifespan.
Alternative Solutions: What If Cleaning Doesn’t Work
If cleaning the sensor doesn’t solve the problem, there might be other issues. It’s helpful to know what to do if simple cleaning isn’t effective. Then, you can address the issue and restore the microwave’s performance.
When to Call for Professional Help
Sometimes, more serious issues require professional help. Knowing when to call in an expert can save time, effort, and possibly prevent more serious problems.
- Consistent Malfunctions: If the microwave continues to act up after cleaning.
- Electrical Issues: If you suspect any electrical problems.
- Significant Damage: If you see visible damage to the microwave.
If, after thorough cleaning, your microwave is still malfunctioning, it is time to seek professional help. Continued problems can indicate an internal problem, not simply a dirty sensor. A technician can identify the root cause of the issue.
If you notice sparking, burning smells, or other electrical issues, immediately call a professional. Electrical problems in microwaves can be dangerous. A technician is trained to check and repair these types of problems. This ensures your safety and prevents further appliance damage.
If you see significant damage, like cracks, melted parts, or other serious problems, contact a professional. Attempting to fix major damage yourself can be risky. A qualified technician can inspect the damage and advise you on the best course of action.
Potential Component Issues
Besides the sensor, other components can cause microwave problems. Being aware of these parts can help you understand the issue better.
- Magnetron Failure: The magnetron generates microwaves.
- High-Voltage Capacitor Issues: The capacitor stores energy.
- Diode Problems: Diodes are crucial for the electric current.
- Control Panel Issues: The control panel is how you run the microwave.
The magnetron is a vital part of the microwave, responsible for generating the microwaves that heat your food. If the magnetron fails, the microwave may not heat, or it may heat poorly. Replacing a magnetron is usually a task for a professional because it involves high voltages.
The high-voltage capacitor stores energy to power the magnetron. If the capacitor is faulty, the microwave may not operate properly, or it might not work at all. Handling high-voltage capacitors is risky. Repairing or replacing this component should be done by a skilled technician.
Diodes convert AC voltage to DC voltage to operate parts like the magnetron. A defective diode can hinder the microwave’s efficiency and heating capabilities. A skilled technician needs to troubleshoot and replace a malfunctioning diode. This is important for the safety of the unit.
The control panel allows you to enter settings and start the microwave. If the control panel fails, the microwave might not respond to your commands. In this case, repair or replacement of the control panel is usually needed. This is best done by an expert.
| Component | Function | Potential Symptoms |
|---|---|---|
| Magnetron | Generates microwaves | Microwave doesn’t heat, weak heating |
| High-Voltage Capacitor | Stores energy | Microwave fails to start, inconsistent heating |
| Diode | Converts AC to DC voltage | Microwave overheats or doesn’t heat |
| Control Panel | Inputs settings and commands | Microwave doesn’t respond to inputs |
Frequently Asked Questions
Question: Where is the sensor located in my microwave?
Answer: The location varies by model, but it’s typically inside, on the side wall, top, or behind a cover.
Question: Can I use harsh chemicals to clean the sensor?
Answer: It’s best to avoid harsh chemicals. Use mild dish soap and water to avoid damage.
Question: How often should I clean the microwave sensor?
Answer: Clean the sensor as needed, ideally as part of your weekly microwave cleaning routine.
Question: What if the microwave still doesn’t work after cleaning?
Answer: If cleaning doesn’t help, there may be a deeper issue requiring professional repair.
Question: Is it safe to use white vinegar for cleaning the sensor?
Answer: Yes, but dilute it with water to prevent any damage to your appliance.
Final Thoughts
Knowing how to clean microwave sensor is a useful skill that can keep your appliance working at its best. By following these easy steps and establishing a regular cleaning routine, you can prevent many of the common problems. Remember to wipe up spills immediately, use covers, and clean the sensor as part of your weekly maintenance. This helps in maintaining its efficiency. By taking the right steps, you can avoid a range of issues. If the microwave isn’t working as it should, consider other possible causes or seek a technician’s advice. Following the steps in this guide will extend the life of your microwave. Keep it running well for a long time.
I’m Emma J. Caldwell, the founder, lead writer, and home-cooking enthusiast behind KitchenGuideCo.com. With a background in culinary arts and over a decade of cooking experience in both professional and personal kitchens, I created this platform to demystify recipes, offer smart kitchen gadget reviews, and guide readers through meal prep with confidence and clarity.