Cooking breakfast can seem tricky, especially if you’re trying to figure out how to cook oats in a rice cooker. Many people find it tough to get the right texture, sometimes ending up with a mushy or watery mess. But don’t worry! This guide will break down the process step by step, so you can easily enjoy perfectly cooked oats every time. We’ll simplify everything and show you how easy it is to make a healthy and delicious breakfast. Let’s get started and prepare a tasty breakfast!
Choosing the Right Oats and Liquid
Before you begin, selecting the appropriate type of oats is essential. Rolled oats, also known as old-fashioned oats, are often preferred for rice cooker recipes because they cook evenly and absorb liquid well, resulting in a creamy texture. Quick-cooking oats are another option, but they might become too mushy if cooked for too long. Steel-cut oats are not recommended because they require more cooking time and water than a rice cooker typically provides. It’s also important to consider the liquid you’ll use. Water is the simplest choice, but milk (dairy or plant-based) adds richness and flavor. The liquid amount needs adjusting based on the oat type. Understanding these basics sets the stage for success.
Oat Varieties Explained
The type of oats you use greatly affects the final product. Different processing methods change how quickly the oats cook and their texture. Here’s a quick overview:
- Rolled Oats: These are the classic, old-fashioned oats. They’re steamed and then rolled flat, making them cook faster than steel-cut oats. Rolled oats generally offer a satisfying, creamy texture.
- Quick-Cooking Oats: These oats are pre-cooked and cut into smaller pieces, so they cook faster than rolled oats. This convenience can sometimes lead to a slightly mushier consistency. Be mindful of cooking time with these.
- Steel-Cut Oats: These oats are the least processed, having been cut from the whole oat groat. They require a longer cooking time and may not be ideal for a rice cooker unless you adapt the cooking duration.
Choosing the correct oat variety helps get the desired texture. Consider your preference for texture and cooking time when making your selection.
Liquid Choices for Oat Preparation
The liquid you use significantly impacts the oats’ taste and creaminess. Water is a neutral base, while milk can enrich the flavor and texture. Using a 1:2 ratio of oats to liquid is a good starting point, but this can vary depending on the oat type and the desired consistency. For instance, using milk instead of water can add a richer flavor, so adjusting liquid levels might be necessary to avoid over-cooking. You can also experiment with different liquids, like almond milk, soy milk, or even juice, to create unique flavor profiles. Pay attention to how the liquid is absorbed during cooking to determine the perfect ratio for your preferred consistency.
Here’s a comparison table:
| Liquid Type | Flavor Profile | Texture Impact | Notes |
|---|---|---|---|
| Water | Neutral | Lighter, less creamy | Good base for adding other flavors |
| Milk (Dairy/Plant-based) | Creamy, richer | Creamier, thicker | Adds protein and vitamins |
| Juice | Sweet, fruity | Can be thicker | Adds natural sweetness |
Simple Steps on How To Cook Oats in a Rice Cooker

Preparing oats in a rice cooker is a straightforward process. First, measure your oats and liquid. A common starting point is a 1:2 ratio of oats to liquid. Next, combine the oats and liquid in the rice cooker pot. Give them a quick stir to make sure the oats are fully submerged. Then, turn on the rice cooker and let it do its thing. The cooking time will vary slightly depending on your rice cooker model and the type of oats you’re using. Once the cooker switches to “warm,” check the oats. If they seem too thick, add a bit more liquid and cook for a few more minutes. If they are ready, add your favorite toppings and enjoy. Following these steps consistently will provide delicious results.
Step-by-Step Instructions
Here’s a step-by-step approach to make perfect oats in your rice cooker:
- Measure Ingredients: Use a measuring cup to determine the exact quantities of oats and liquid. A usual ratio is 1/2 cup of rolled oats to 1 cup of liquid (water or milk). You can adjust this to your liking.
- Combine Ingredients: Pour the oats and liquid into the inner pot of your rice cooker. Give them a quick stir to make sure the oats are completely wet.
- Start Cooking: Close the lid of the rice cooker and select the “cook” setting. Your rice cooker may have different settings. Follow the instructions for regular rice if there isn’t a specific setting for oats.
- Cooking Time and Monitoring: Cooking time will vary depending on your rice cooker and the type of oats. Generally, rolled oats will cook in about 15-20 minutes, while quick-cooking oats may take a little less time. Monitor the oats closely.
- Check Consistency and Adjust: Once the cooker switches to “warm” or the oats appear cooked, check the consistency. If they seem too thick, add a bit more liquid and allow them to cook for a couple more minutes. If they are ready, fluff the oats with a spoon.
- Add Toppings and Serve: Add your favorite toppings. You can add fruits, nuts, seeds, or a drizzle of honey. Serve immediately.
Troubleshooting Common Issues
Even with simple recipes, things don’t always go as planned. Here are some solutions to avoid the most common problems:
- Oats are Too Mushy: The primary reason for mushy oats is too much liquid or overcooking. The next time, reduce the liquid amount slightly. Check the oats earlier in the cooking process to prevent this issue.
- Oats are Too Dry: If your oats are dry and not fully cooked, you probably used too little liquid. Add a splash more liquid, stir, and allow them to cook for a few extra minutes.
- Oats Burned at the Bottom: This can occur if the liquid evaporates too quickly. Ensure you’re using the correct liquid-to-oats ratio. Also, make sure the oats are stirred before cooking to distribute heat evenly.
- Overcooked Oats: Some rice cookers keep the food warm after cooking, which may continue to cook the oats. If this is the case, consider turning off the rice cooker once the oats are cooked.
Flavor Enhancements and Topping Ideas
Making oats is exciting because you can customize the flavors. Start with a base of oats and liquid, then add sweet ingredients. Experiment with spices like cinnamon or nutmeg for warmth. Fruits like berries, bananas, or apples add natural sweetness and texture. Nuts and seeds add a satisfying crunch. Don’t be afraid to experiment to develop your perfect bowl of oats. The beauty of oatmeal is its adaptability, with the recipe readily adjusting to your taste preferences. Remember that you can always adjust flavors and textures.
Spice and Sweetener Suggestions
Adding spices and sweeteners significantly enhances the flavor of your oats, turning a simple breakfast into something special. Here are some ideas to help you:
- Cinnamon: A classic addition that gives a warming flavor. Sprinkle 1/2 to 1 teaspoon into the oats while cooking. It pairs well with apples and nuts.
- Nutmeg: A little nutmeg gives a subtle, earthy flavor. Use a pinch, and combine it with cinnamon for a richer taste.
- Brown Sugar or Maple Syrup: These are great options for sweetening your oats. Start with a tablespoon or two, tasting and adding more if needed.
- Honey: Honey is an excellent natural sweetener with a distinct taste. A drizzle of honey adds a pleasant sweetness.
- Vanilla Extract: Just a drop of vanilla extract enhances the overall flavor. Add about 1/2 teaspoon during cooking.
Topping Combinations
The fun part is adding toppings. Here are some delicious and easy topping ideas:
- Berry Blast: Fresh or frozen berries like blueberries, raspberries, and strawberries add sweetness and antioxidants. You can also mix in a sprinkle of chia seeds.
- Apple Cinnamon: Sliced apples, a sprinkle of cinnamon, and a drizzle of maple syrup create a classic fall flavor combination.
- Banana Nut: Sliced bananas and a handful of walnuts or pecans offer a good crunch. A drizzle of honey complements this combination well.
- Peanut Butter and Jelly: This is a simple and tasty option. Mix peanut butter and a spoonful of jelly into your cooked oats.
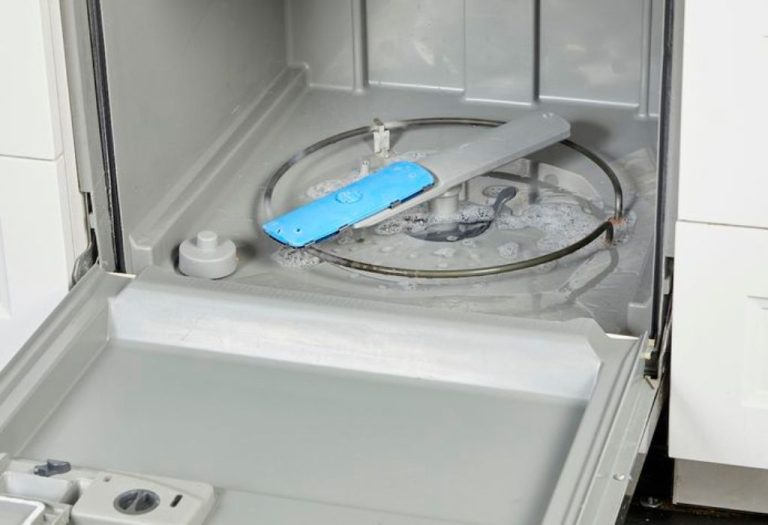
Cleaning and Maintenance of Your Rice Cooker
Proper care of your rice cooker will make it last longer and keep your oats tasting great. Unplug the rice cooker and let it cool before cleaning. The inner pot is usually non-stick and can be washed with warm, soapy water. Avoid using abrasive scrubbers that may damage the coating. The lid and other removable parts can also be cleaned in the same way. Always ensure everything is completely dry before reassembling. Following these simple steps ensures that the cooker operates effectively and keeps your breakfast delicious.
Cleaning the Rice Cooker
Proper cleaning ensures your rice cooker performs at its best and keeps your oats tasting great:
- Unplug and Cool: Always unplug the rice cooker and allow it to cool down completely before cleaning. This prevents burns and damage to the appliance.
- Remove the Inner Pot: Carefully take out the inner pot. Most inner pots are coated with non-stick material.
- Wash the Inner Pot: Wash the inner pot with warm, soapy water. Use a soft sponge or cloth to prevent scratches. Rinse thoroughly to remove all soap residue.
- Clean the Lid and Other Parts: Remove the lid and other removable parts, like the steam vent and condensation collector. Wash these with warm, soapy water and rinse well.
- Dry Everything: Thoroughly dry all parts, including the inner pot, lid, and other removable components, before reassembling. Make sure everything is completely dry to prevent mold or mildew growth.
Long-Term Maintenance
Regular maintenance will help your rice cooker last longer:
- Inspect Regularly: Regularly check the inner pot for any damage or wear and tear. If the non-stick coating is scratched or damaged, it could affect cooking and lead to food sticking.
- Clean the Heating Plate: The heating plate underneath the inner pot should be kept clean to ensure even heat distribution. Wipe it gently with a damp cloth if necessary.
- Prevent Buildup: Clean the steam vent regularly to prevent the buildup of steam. This prevents potential issues.
- Store Properly: When not in use, store the rice cooker in a cool, dry place. Make sure the inner pot is dry and the lid is closed.
Frequently Asked Questions
Question: Can I cook steel-cut oats in a rice cooker?
Answer: Steel-cut oats take longer to cook than rolled oats. You can try it, but you’ll probably need to adjust the liquid ratio and cooking time. It’s easier to achieve perfect results using rolled oats or quick-cooking oats in a rice cooker.
Question: How much liquid should I use to cook oats?
Answer: A general starting point is a 1:2 ratio of oats to liquid (e.g., 1/2 cup of oats to 1 cup of liquid). The correct amount may vary based on the oat type. For instance, rolled oats generally require more liquid.
Question: Can I add fruit and nuts while cooking?
Answer: Yes, you can add some fruits and nuts during cooking. Soft fruits like berries may break down more. Adding some toppings after cooking preserves their texture.
Question: How long do oats take to cook in a rice cooker?
Answer: The cooking time depends on the type of oats. Rolled oats generally take about 15-20 minutes in a rice cooker. Quick-cooking oats might take less, and steel-cut oats may require longer.
Question: What if my oats are too thick or too thin?
Answer: If the oats are too thick, add a little more liquid and cook for a few extra minutes. If they are too thin, you can cook them for a bit longer with the lid off to allow some of the liquid to evaporate. Adjust accordingly next time.
Final Thoughts
Now that you’ve explored how to cook oats in a rice cooker, you’ve discovered how simple it is to whip up a tasty, healthy breakfast. We’ve explored different oat types, the best liquid options, and some simple steps. Don’t forget the fun part: adding your favorite spices, sweeteners, fruits, and nuts to customize your bowl of oats. You also learned the importance of proper cleaning and maintenance. Remember that a bit of practice will make you a master. So, gather your ingredients, set up your rice cooker, and prepare a satisfying breakfast. Enjoy experimenting and creating your favorite oat recipes. Happy cooking!
I’m Emma J. Caldwell, the founder, lead writer, and home-cooking enthusiast behind KitchenGuideCo.com. With a background in culinary arts and over a decade of cooking experience in both professional and personal kitchens, I created this platform to demystify recipes, offer smart kitchen gadget reviews, and guide readers through meal prep with confidence and clarity.