Food dehydration has been used for centuries to preserve harvests, reduce waste, and create long-lasting snacks.
Today many people assume that special dehydrator machines are required to enjoy dried fruits or vegetables, but the truth is any regular oven can do the job beautifully. Learning this simple skill opens the door to healthier snacks and better food storage.
Imagine returning from a farmer’s market with fresh apples, herbs, or berries and realizing they may spoil before you finish them.
Instead of letting them go to waste you could transform them into delicious dried snacks or pantry ingredients within hours. This practical method helps save money while reducing food waste in every home.
Families love dehydrated foods because they are portable, flavorful, and require no refrigeration.
Oven-dried fruits become perfect lunchbox snacks, and dried herbs elevate meals with concentrated aroma. The process is both enjoyable and rewarding once you understand the steps.
This guide explains everything from preparation to temperature control and long-term storage. Each section is designed to help both beginners and experienced cooks dehydrate food safely and effectively. By the end you will feel confident dehydrating your favorite ingredients right in your own kitchen.
What Is Food Dehydration and How Does It Work?
Food dehydration is the process of removing moisture from ingredients to extend shelf life and prevent spoilage. Microorganisms that cause decay need moisture to survive. By reducing water content the food becomes stable and safe for long-term storage.
When food dries the texture changes significantly. Water evaporates slowly and leaves behind concentrated flavors. This transformation makes dehydrated foods perfect for snacking or cooking.
Dehydration also reduces the weight and volume of ingredients. This makes storage easier and more convenient. Travelers and hikers often carry dehydrated foods because of their lightweight nature.
The science behind dehydration revolves around heat and air circulation. Low temperatures gently remove moisture without cooking the food. Proper airflow ensures even drying on all sides.
Fruits, vegetables, and herbs respond differently to dehydration. Some release moisture quickly while others need longer drying time. Understanding these differences helps achieve better results.
Removing moisture also slows down enzyme activity. These enzymes normally cause browning or texture changes during storage. Drying food stabilizes these reactions.
Most foods lose between 70 to 95 percent of their water content when dehydrated. This dramatic reduction is what preserves them naturally. It allows the food to remain edible for months or even years.
Understanding this process is the foundation of successful oven dehydration. Knowing how moisture behaves helps create consistent outcomes. It ensures every batch dries properly and safely.
Benefits of Dehydrating Food in an Oven
Dehydrating food in an oven is practical because it uses equipment already available in most homes. There is no need to purchase a separate dehydrator. This makes the method budget friendly and accessible.
Dehydration significantly extends the shelf life of perishable foods. Once dried they require no refrigeration. This saves space and energy in the kitchen.
The flavor of food becomes more intense during dehydration. Water loss concentrates natural sugars and aromas. This results in richer and more enjoyable snacks.
Using an oven allows you to control the drying environment. You can adjust temperature, tray placement, and moisture release. These factors improve overall accuracy.
Oven dehydration also reduces food waste. Fresh produce that is close to spoiling can be dried and saved. This encourages responsible kitchen habits.
Many people appreciate the versatility of dried foods. They can be used for baking, cooking, snacking, or seasoning. Dried herbs and vegetables add convenience to meal preparation.
Dehydrated foods are healthier than many store-bought snacks. They contain no additives, preservatives, or oils. The natural goodness remains intact.
Overall oven dehydration combines convenience, cost efficiency, and nutritional benefits. It is a simple method that fits into any lifestyle. Anyone can become skilled with just a little practice.
Best Foods to Dehydrate in an Oven
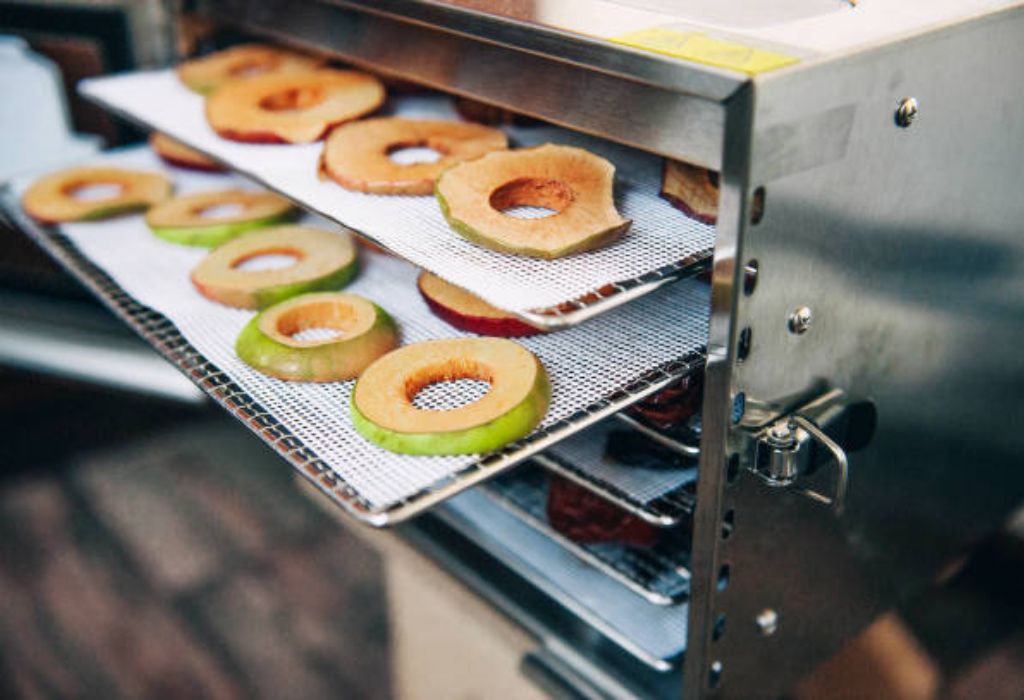
A wide range of fruits can be dehydrated successfully in a home oven. Apples, bananas, berries, and mangoes are popular choices. These fruits produce delicious snacks with concentrated sweetness.
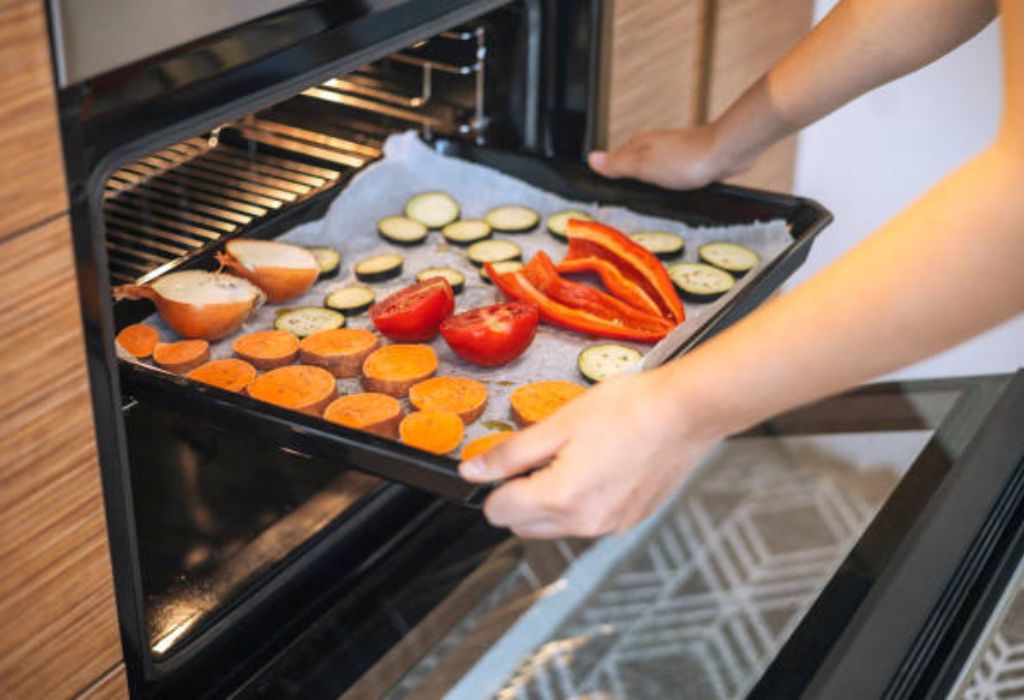
Vegetables are also great candidates for dehydration. Carrots, peppers, tomatoes, and mushrooms dry well at low temperatures. They are perfect for soups, stews, and camping meals.
Herbs benefit greatly from oven drying. Basil, thyme, mint, parsley, and rosemary retain their aroma when dried properly. These herbs become useful year-round for seasoning dishes.
Leafy greens like kale or spinach can also be dehydrated. They dry quickly because of their thin structure. Dried greens are excellent for powders or seasoning blends.
Citrus fruits such as oranges and lemons slice beautifully for drying. They create decorative and flavorful additions to teas. Their crisp texture is also enjoyable for snacking.
Some foods require more caution. Meat jerky can be made in an oven but needs precise temperature control. It must reach safe internal temperatures to prevent bacteria.
Starchy vegetables like potatoes can be dehydrated with good slicing control. Thin slices dry better and remain crisp. Proper preparation ensures the best texture.
Selecting the right foods helps create consistent results. Each ingredient follows its own drying pattern. Knowing these patterns helps you choose suitable options.
Tools and Equipment Needed for Oven Dehydration
The most important tool for oven dehydration is a sturdy baking sheet. It holds the food and keeps moisture contained. Using multiple sheets allows you to dry more food at once.
Cooling racks are also valuable. They elevate the food so air can circulate from below. This improves drying efficiency and reduces uneven results.
An oven thermometer is essential for accuracy. Many ovens fluctuate in temperature, especially at lower settings. The thermometer ensures the heat stays within the safe drying range.
Parchment paper prevents sticking. Fruits and vegetables tend to release sugars as they dry. The paper makes cleanup much easier.
A sharp knife or mandoline helps create even slices. Consistent thickness is crucial for uniform dehydration. Uneven slices dry at different rates and affect overall quality.
Storage containers such as glass jars or airtight bags keep dehydrated foods fresh. They protect from moisture, insects, and odors. Proper storage preserves flavor and texture.
A clean cutting board ensures food safety. Preparing fresh produce on a sanitized surface reduces contamination risk. Good hygiene is important for long shelf life.
These simple tools make oven dehydration straightforward. With proper equipment the process becomes efficient and predictable. This preparation sets the stage for successful results.
Preparing Food Properly Before Dehydrating
Proper preparation is the key to high-quality dehydrated food. Begin by washing all ingredients thoroughly to remove dirt and bacteria. Clean food dries more evenly and safely.
Slicing food evenly ensures consistent drying. Thin slices remove moisture faster and more uniformly. Thicker slices need more time and may stay chewy.
Some vegetables benefit from blanching before drying. Blanching preserves color and improves texture during dehydration. This step is especially useful for carrots and green beans.
Fruits like apples and pears brown quickly. Soaking them briefly in lemon water prevents discoloration. This keeps dried snacks attractive and appealing.
Removing seeds and cores improves texture. Seeds can become bitter after drying. Proper trimming enhances flavor and appearance.
Arrange slices carefully to avoid overlapping. Overlapping traps moisture and slows drying. Every piece needs full airflow for best results.
Patting ingredients dry with a towel removes excess water. This speeds up the dehydration process. It helps reduce drying time significantly.
Good preparation ensures high-quality outcomes. The extra attention leads to better texture, color, and flavor. Every small step matters in food dehydration.
Setting the Right Oven Temperature for Dehydration
Oven dehydration requires low and steady heat. Most ovens work best around 140 to 170 degrees for drying food. Higher temperatures may cook or burn the food.
Many ovens do not offer extremely low settings. If your oven’s minimum temperature is higher use the lowest available setting. Leaving the door slightly cracked also helps release excess heat.
Using an oven thermometer ensures accuracy. Some ovens run hotter or colder than the displayed value. Monitoring heat prevents accidental cooking.
Low heat allows moisture to evaporate slowly. This maintains the natural structure of the food. Gentle drying also preserves flavor.
If dehydration takes too long consider flipping the pieces midway. This improves airflow and heat exposure. Even drying results in better texture.
Avoid sudden temperature changes during drying. Consistent heat prevents case hardening. This issue occurs when the outside dries too fast and traps moisture inside.
Each type of food has its own ideal temperature. Herbs require lower settings while fruits can handle slightly higher ones. Matching temperature to the ingredient improves quality.
Controlling temperature is one of the most important parts of dehydration. Precise heat makes the difference between success and failure. A steady environment guarantees reliable results.
Step By Step Process to Dehydrate Food in an Oven
Begin by lining baking sheets with parchment paper. This prevents sticking and makes cleanup easier. It also protects the food from absorbing metal odors.
Arrange the food slices in a single layer. Leave space between each piece for air circulation. Overcrowding slows down the drying process.
Place the tray in the center rack of the oven. This position provides the most even heat exposure. Middle placement also improves airflow.
Crack the oven door open using a wooden spoon. This helps release steam during dehydration. Moisture escape is essential for proper drying.
Check the food every hour. Rotate trays for even drying. This reduces the chance of uneven texture.
Flip slices halfway through the process. Flipping ensures both sides dry consistently. It is especially important for thicker pieces.
Monitor the texture towards the end. Fruits should feel leathery while vegetables become crisp. Proper drying ensures long storage life.
Once complete let the food cool before storing. Cooling prevents condensation inside containers. This maintains dryness and freshness.
How to Dehydrate Fruits in an Oven
Apples are one of the easiest fruits to dehydrate. Slice them thinly and soak briefly in lemon water. They dry into sweet chewy rings.
Bananas require slow and gentle heat. Thin slices work best for even dehydration. They turn into delicious chips once dry.
Berries need longer drying time due to higher moisture content. Smaller berries dry faster while larger ones may need slicing. Their flavor becomes intensely concentrated.
Citrus slices create fragrant dried decorations or snacks. Thinly slice oranges or lemons for best results. They become crisp and beautiful when dried.
Pineapples dry into sweet tropical treats. Remove the tough core before slicing. Their natural sugars caramelize slightly during drying.
Mango slices produce chewy fruit leather. Cut them evenly for consistent texture. Mangoes retain their vibrant flavor after drying.
Grapes turn into homemade raisins. This process takes longer than other fruits. Patience leads to excellent results.
Fruits offer endless variety for dehydration. Their natural sweetness makes them enjoyable snacks. Oven drying enhances their flavor beautifully.
How to Dehydrate Vegetables in an Oven
Carrots dry best when sliced thinly. Blanching helps maintain bright color. The result is a crisp and flavorful vegetable chip.
Peppers dehydrate quickly due to low moisture content. Their slices shrink and intensify in flavor. They become excellent additions to soups and stews.
Tomatoes make delicious dried flakes or slices. Cherry tomatoes cut in half dry especially well. Their tangy taste becomes more concentrated.
Mushrooms require no pre-treatment. Simply clean and slice them thinly. They dry into lightweight pieces ideal for cooking.
Zucchini dries into crunchy chips. Thin slices work best for quick dehydration. Their mild flavor adapts to many recipes.
Onions dry into flakes or powder. Slice them evenly for best texture. Their aroma becomes stronger as they dry.
Green beans benefit from blanching. This preserves their color and tenderness. Dried beans rehydrate quickly when cooked.
Vegetables add variety and nutrition to dehydrated foods. Their versatility makes them perfect for meal preparation. Oven drying brings out their natural character.
How to Dehydrate Herbs in an Oven
Herbs require very low heat for dehydration. High temperatures destroy their essential oils. Low and slow drying preserves flavor.
Leafy herbs like basil and parsley dry quickly. Spread them evenly on baking sheets. They crumble easily once fully dried.
Woody herbs such as rosemary need slightly more time. Their thicker stems release moisture slowly. Proper airflow is essential.
Remove any damaged leaves before drying. Clean herbs produce cleaner flavors. Proper sorting improves quality.
Some herbs dry better whole than chopped. Whole leaves retain aroma longer. Crushing them later preserves freshness.
Check herbs frequently to avoid over-drying. They can burn quickly if left unattended. Constant monitoring ensures success.
Store dried herbs in airtight containers. Keep them away from heat and sunlight. Proper storage retains aroma for months.
Herbs dry beautifully in ovens with gentle care. Their concentrated flavors enhance any dish. Oven dehydration makes them accessible year-round.
How to Store Oven-Dehydrated Foods
Airtight containers are the best option for storing dried foods. They prevent moisture from re-entering the food. This keeps snacks crisp and safe.
Glass jars preserve flavor better than plastic. They do not absorb odors or chemicals. This helps maintain purity.
Vacuum sealing extends shelf life significantly. Removing air prevents oxidation. This keeps food fresh and stable.
Store containers in a cool and dry place. Avoid direct sunlight and humidity. Proper storage ensures long-term preservation.
Label containers with dates. This helps track freshness. It ensures you rotate older batches first.
For long-term use freeze dried foods temporarily. Freezing kills insect eggs that may be present. This step adds extra safety.
Check food periodically for moisture. If condensation appears dry the food again. Proper monitoring prevents spoilage.
Good storage ensures the hard work of dehydration lasts longer. It protects flavor and texture. This step is crucial for pantry organization.
Common Mistakes to Avoid While Dehydrating in an Oven
One common mistake is setting the temperature too high. High heat cooks the food instead of drying it. This leads to poor texture and short shelf life.
Overcrowding trays slows moisture escape. Too many slices block airflow. Always leave space between items.
Uneven slicing creates inconsistent results. Thicker pieces remain soft while thinner ones dry too fast. Consistency improves quality.
Not flipping food during dehydration causes uneven texture. Both sides need exposure. Turning the slices helps achieve balance.
Using dirty baking sheets affects flavor. Residue burns during long drying sessions. Clean sheets prevent unwanted smells.
Failing to monitor progress increases risk of burning. Dehydration requires regular checking. Overlooked food dries unevenly or scorches.
Storing food before cooling leads to condensation. Moisture ruins dehydrated food quickly. Always cool items fully before storage.
Avoiding these mistakes makes the dehydration process smooth and successful. Each correction improves safety and results. Patience and attention ensure better outcomes.
Cleaning and Maintaining the Oven After Dehydration
Allow the oven to cool completely before cleaning. This prevents burns and makes residue easier to remove. A cool oven is safer to handle.
Remove trays and racks for washing. Warm water and mild soap work well. This removes sticky fruit residue.
Wipe the oven interior with a damp cloth. Avoid harsh chemicals that may damage the surface. Gentle cleaning preserves the oven finish.
Check for any leftover sugar drips. These can burn during later oven use. Removing them prevents odors.
Air out the oven by leaving the door open. This helps remove lingering smells. It keeps the oven fresh.
Inspect heating elements for any stuck debris. Clean them carefully without bending. Protected elements maintain performance.
Make cleaning a habit after each dehydration session. Regular maintenance extends the oven’s lifespan. It ensures safe and consistent operation.
Important Dehydration Questions for Home Cooks
How long does oven dehydration take?
It typically takes between two to eight hours depending on the food type and thickness.
What is the best temperature for oven dehydration?
Most foods dehydrate well between 140 to 170 degrees depending on moisture content.
Should I leave the oven door slightly open?
Yes, cracking the door helps steam escape and improves airflow.
Can all fruits be dehydrated in an oven?
Most fruits can, but high moisture fruits require longer time and thinner slices.
Why did my dehydrated food turn brown?
Browning can happen from oxidation or excessive heat during drying.
Do I need special equipment for oven dehydration?
No, basic kitchen tools like trays, racks, and knives are enough.
Why are some slices still soft after drying?
They may be too thick or not dried long enough, requiring extra time.
Can I dehydrate meat in an oven?
Yes, but it requires careful temperature control for safety.
How long can dehydrated food last?
With proper storage, dehydrated food can last several months to one year.
Can I rehydrate dried fruits and vegetables?
Yes, soaking them in water restores moisture and softens texture.
Conclusion
Dehydrating food in an oven is a simple and effective technique that anyone can learn. It helps reduce waste, create healthy snacks, and preserve ingredients for long-term use. With the right tools and preparation the process becomes both enjoyable and rewarding.
A low and steady temperature plays the most important role in successful dehydration. Combined with proper slicing, careful monitoring, and good airflow the results are consistently excellent. Each step contributes to achieving the perfect texture and flavor.
Storing dehydrated foods correctly ensures they remain fresh and safe for months. Airtight containers, cool environments, and proper labeling support long-lasting quality. These steps protect the effort put into each batch.
Learning to dehydrate fruits, vegetables, and herbs opens the door to countless culinary possibilities. You can create snacks, pantry staples, and cooking ingredients with ease. This approach offers flexibility and empowerment in the kitchen.
Oven dehydration brings together convenience and efficiency. Anyone can master this method with practice and patience. It provides a practical way to enjoy flavorful, nutritious, and sustainable food all year long.
I’m Emma J. Caldwell, the founder, lead writer, and home-cooking enthusiast behind KitchenGuideCo.com. With a background in culinary arts and over a decade of cooking experience in both professional and personal kitchens, I created this platform to demystify recipes, offer smart kitchen gadget reviews, and guide readers through meal prep with confidence and clarity.