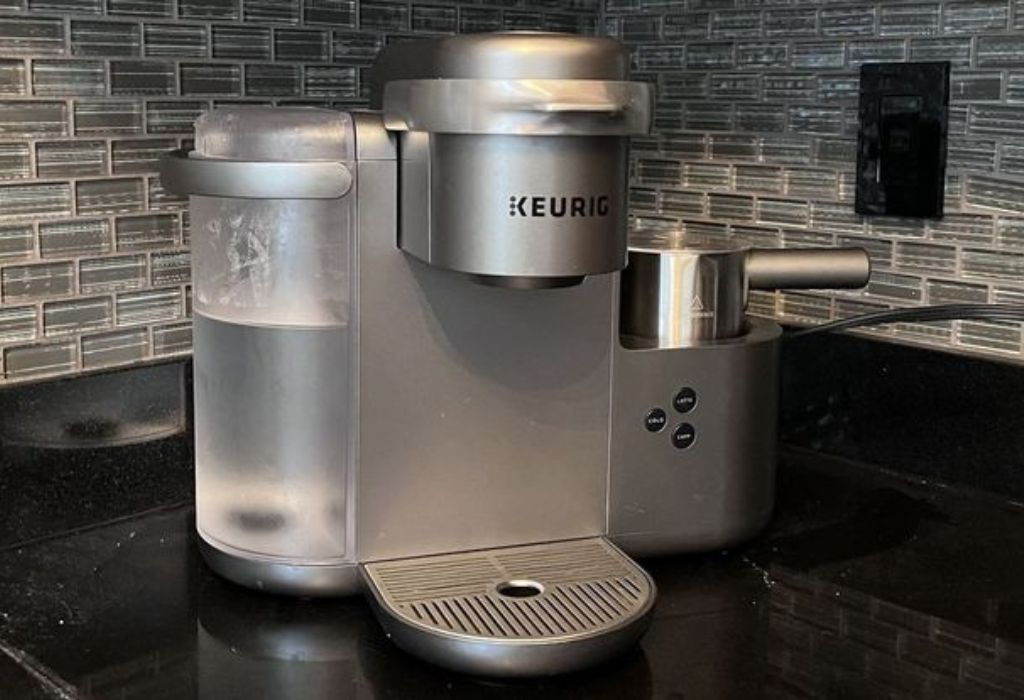
If your Keurig has been brewing slower, producing weaker cups, or making strange noises lately, it is probably trying to tell you something.
Inside every Keurig machine are tiny water lines, heating chambers, and valves that gradually fill with calcium and mineral deposits from everyday water use. This buildup, known as scale, slowly reduces the machine’s ability to heat water efficiently and deliver a smooth, steady brew.
Most Keurig owners don’t notice the problem at first. One day the coffee tastes slightly dull, and a week later the machine begins brewing half cups. Before long, it may sputter, struggle to pump water, or flash a “Descale” warning on the display.
The good news is that descaling — the process of removing mineral buildup — is simple, inexpensive, and dramatically improves your machine’s performance.
Descaling not only restores flavor and brewing speed but also prevents long-term damage that can shorten your Keurig’s lifespan.
Whether you use vinegar, a commercial descaling solution, or a natural homemade option, a proper descaling routine ensures every cup tastes fresh and the machine runs smoothly.
In this guide, you’ll learn exactly how to descale your Keurig, why it matters, how often to do it, and essential tips to keep your brewer clean all year long.
Why Descaling Your Keurig Coffee Maker Matters

Most people think of their Keurig as a simple appliance: pop in a pod, press a button, and coffee appears in seconds. But inside the machine, hot water travels through narrow tubing, a heating chamber, and internal valves that must remain clean for the brewer to work properly.
As water flows through these parts day after day, minerals like calcium and magnesium gradually settle along the inside surfaces.
This accumulation is called scale, and even though you can’t see it, it builds up faster than most people expect.
Scale affects several important parts of the machine. It lines the heating element, preventing it from warming water to the right temperature. It narrows the internal water passageways, slowing water flow and forcing the pump to work harder than it should.
Over time, the machine begins brewing smaller cups, pushing out inconsistent amounts of water, or taking noticeably longer to complete a brew cycle.
Taste is another major reason to descale. When the inside of the machine becomes coated with mineral buildup, the water does not heat properly, and the coffee grounds do not extract the way they should.
This results in weak, flat, or sometimes bitter tasting coffee. Many Keurig owners assume their pods are the problem, but most flavor issues come from scale that has disrupted temperature or flow.
Descaling also protects your investment. A Keurig that is never descaled may develop permanent clogs, overheated parts, or pump failure, all of which can ruin the machine.
Replacement parts for Keurig models are limited, so neglecting maintenance often leads to buying a new unit long before it should have worn out. Regular descaling keeps the machine performing like new and extends its lifespan significantly.
Homes with hard water need descaling more often than others. Hard water contains higher concentrations of dissolved minerals that accelerate buildup dramatically. Even filtered water still has enough mineral content to cause scaling over time.
This is why Keurig recommends descaling every three months, but many households benefit from doing it more frequently.
Beyond performance, a clean Keurig is simply more enjoyable to use. Coffee flows smoothly, the machine runs quietly, and the taste of every brew improves.
Descaling is one of the most important maintenance tasks for any coffee maker, and doing it regularly ensures that every cup you brew will be fresh, hot, and full of flavor.
Signs Your Keurig Needs Descaling
Many Keurig owners don’t realize their machine needs descaling until performance problems become obvious.
Scale buildup happens gradually inside the brewer, so the symptoms appear slowly over time rather than all at once. Knowing the early warning signs helps you descale before the machine becomes clogged or damaged.
One of the first signs is slower brewing. If your Keurig used to brew a cup in under a minute but has gradually become sluggish, mineral deposits are likely restricting water flow.
The pump must work harder to push water through the narrow internal tubes, causing noticeable delays during brewing.
Another common sign is getting smaller cups of coffee than usual. You may choose the 10-ounce size and receive only 6 or 7 ounces, or the machine may stop mid-cycle as if the water supply has run out.
This happens when scale narrows the internal water channels, preventing enough water from reaching the pod.
Many users also notice coffee that tastes weaker, bitter, metallic, or inconsistent. Because scale affects water temperature, the brewing process becomes unpredictable. If the water is not hot enough, the coffee grounds do not extract their full flavor, leading to dull or sour-tasting coffee.
A Keurig that makes unusual noises, such as sputtering, hissing, or grinding sounds, is often struggling against buildup.
These noises come from the pump working harder than normal or from water being forced through mineral-clogged tubes. Sometimes the machine vibrates more loudly as it tries to brew.
Some Keurig models include a “Descale” light that turns on when performance drops below a certain threshold.
This light does not measure hardness directly, it detects brewing inconsistencies caused by flow issues. Even if the light doesn’t turn on, you may still need to descale based on other symptoms.
Another sign is steam instead of water coming out of the machine. When scale blocks the internal water pathways, steam escapes through the needle or vents because the water cannot flow freely. This is a clear indication of serious mineral buildup.
Finally, if your machine hasn’t been descaled in three months or more, it’s time to do it regardless of symptoms.
Even if performance seems fine, scale may be building up internally where you cannot see it. Regular descaling helps prevent long-term damage and keeps every cup tasting fresh.
What You Need Before You Start Descaling
Before you begin the descaling process, you need a few simple items to ensure the cleaning goes smoothly.
The good news is that most supplies are inexpensive and easy to find, and you may already have everything you need at home. Proper preparation makes the descaling process faster, safer, and more effective.
The first thing you need is a descaling solution. You can use Keurig’s official descaling liquid, which is formulated specifically for their machines, or you can use any commercial descaler designed for coffee makers.
These solutions dissolve mineral buildup quickly and safely. If you prefer a natural option, white vinegar works extremely well and is cheaper, but it may leave a temporary vinegar smell that requires extra rinsing.
You will also need a large mug or container capable of holding at least 12 ounces of liquid. This mug will collect the descaling solution as it runs through the machine during the cleaning cycles. A tall ceramic mug or measuring cup works perfectly for this purpose.
A clean water supply is essential because you will be running multiple rinse cycles after descaling.
Make sure your water reservoir is free of debris, old grounds, or mold, especially if you haven’t cleaned it recently. If residue builds up around the reservoir or lid, wash it thoroughly before beginning.
If your Keurig has a removable parts, such as a drip tray, K-cup holder, needle housing, or water tank filter, it’s helpful to clean these separately.
You’ll need mild dish soap, a soft cloth, and a small brush or toothpick to remove coffee grounds stuck in hard-to-reach areas. Although this isn’t part of the descaling process itself, cleaning these components makes the whole machine run better.
You may also need a paperclip or needle cleaning tool if your Keurig has clogged needle punctures. These needles pierce the K-cup and often get blocked by coffee grounds or sticky residue. Cleaning them before descaling ensures proper flow throughout the process.
A flat workspace is helpful for keeping the machine stable while you disassemble and clean removable parts. Lay down a towel in case of spills, because the descaling process involves flushing water and solution through the machine.
Finally, make sure you have enough time to complete the descaling cycle. Depending on your model and the method you use, the entire process usually takes between 20 and 40 minutes. Doing it without interruptions leads to better results.
With these tools and supplies ready, you can move forward confidently. Preparing your workspace and gathering everything you need ensures that each step of the descaling process goes smoothly.
Step-by-Step Guide to Descaling a Keurig Coffee Maker
Descaling your Keurig is a straightforward process, but the steps must be followed in the correct order to ensure the machine is thoroughly cleaned.
This section explains each step clearly so you can safely remove all mineral deposits from inside the brewer. Whether you’re using vinegar or a commercial descaling solution, the overall process is nearly the same.
Step 1: Empty the Reservoir and Remove Any Pods
Begin by turning off your Keurig and removing any K-cup from the chamber. Lift the handle to ensure the brewing area is empty. Pour out any remaining water in the reservoir so you can start with a fresh cleaning solution.
Step 2: Prepare the Descaling Solution
If you’re using a Keurig descaling solution, pour the entire bottle into the empty reservoir and then fill the rest with fresh water.
If you are descaling with white vinegar, fill the reservoir halfway with vinegar and top it off with water. This dilution helps prevent overly strong odor but still provides excellent cleaning power.
Step 3: Start the Descale Brew Cycle
Place a large mug or heatproof container on the drip tray. Power on the machine and select the largest brew size. Allow the machine to dispense the descaling mixture into the mug.
Do not use a K-cup during this step. Replace the mug, dump the collected liquid, and continue running cycles.
Step 4: Continue Brewing Until Reservoir is Empty
Run brew cycles repeatedly until the reservoir is completely empty. This pulls the descaling solution through all internal tubing, heating elements, and valves. If your Keurig includes a “Descale Mode,” follow the on-screen instructions to activate it—this mode slows the flow of liquid for deeper cleaning.
Step 5: Let the Machine Sit (Soak Cycle)
Once the reservoir is empty, leave the machine powered on with the descaling solution inside its internal system. Allow it to sit for 20 to 30 minutes. This soaking period dissolves stubborn scale lodged in tight areas the brew cycle alone cannot reach.
Step 6: Rinse the Reservoir Thoroughly
After the soaking time ends, remove the water reservoir and rinse it under fresh water. You want to remove any remaining vinegar or descaling solution residue. Wipe the interior and exterior surfaces with a clean cloth.
Step 7: Fill with Clean Water for Rinsing
Refill the reservoir with plain water. Run multiple brew cycles — usually 4 to 6 full reservoirs — until the smell and taste of vinegar or descaling solution are completely gone. This is the longest part of the process but also the most important to ensure your next cup tastes clean.
Step 8: Clean the Needle Area and Pod Holder
While the rinsing cycles are running, remove the K-cup pod holder and detach the funnel. Use a paperclip or needle-cleaning tool to remove trapped grounds from the upper and lower needles. Rinse these parts with warm water and mild soap.
Step 9: Clean the Exterior and Drip Tray
Wipe down the machine’s exterior using a damp cloth and mild dish soap. Remove the drip tray and wash it thoroughly. A clean exterior completes the overall maintenance and prevents bacteria buildup.
Step 10: Test a Fresh Brew
Once all the rinse cycles are finished, make a test brew using water only. This ensures there is no lingering descaling solution or vinegar taste. If everything runs smoothly, your Keurig is fully descaled and ready for coffee again.
Following these steps restores your Keurig’s performance, improves brew temperature and flavor, and helps prevent mechanical issues caused by long-term mineral buildup.
How to Descale a Keurig Using Vinegar (Alternative Method)
While Keurig’s branded descaling solution works extremely well, many people prefer using white vinegar because it’s inexpensive, natural, and widely available.
Vinegar is a powerful acidic cleaner that dissolves mineral buildup effectively. If you want a budget friendly or chemical free option, vinegar is one of the best ways to descale a Keurig.
Why Vinegar Works
White vinegar contains acetic acid, which breaks down calcium and magnesium deposits. These minerals form hard, chalky layers inside the Keurig’s pipes, heating chamber, and valves. Vinegar softens and dissolves these layers so they wash away easily during brew cycles.
Step 1: Prepare the Vinegar Solution
Pour white vinegar into the reservoir until it is about halfway full. Then fill the rest of the reservoir with fresh water. This 1:1 ratio is strong enough to clean effectively without causing overpowering odor.
Step 2: Start the Brew Cycles
Place a large mug on the drip tray. Run the largest brew cycle without a pod inserted. Discard the hot vinegar water from the mug and run additional cycles until the reservoir is empty.
Step 3: Let the Vinegar Sit
Once the reservoir is fully drained, let the machine sit powered on for 20–30 minutes. This soaking time allows the vinegar to break down stubborn mineral layers deep inside the machine. The longer the soak, the more effective the cleaning.
Step 4: Rinse the Reservoir
Remove the water reservoir and rinse it thoroughly with warm water. Vinegar has a strong smell, so rinsing helps minimize lingering odor.
Step 5: Run Multiple Fresh Water Rinses
Refill the reservoir with clean water. Run 4 to 6 full reservoirs through the machine, using the largest brew cycle each time. These rinse cycles remove the lingering vinegar taste and smell.
If your coffee still tastes slightly acidic after rinsing, continue running fresh water cycles until the taste disappears completely.
Step 6: Clean the Needles and Pod Holder
Even though vinegar cleans the internal system, it does not remove coffee grounds stuck inside the needles. Remove the pod holder, detach the funnel, and clean both with mild soap. Use a small tool such as a paperclip to clear debris inside the needles.
When to Use Vinegar vs. Descaling Solution
Vinegar works well for routine maintenance, especially if you descale regularly. However, if your machine is severely clogged or hasn’t been descaled in a long time, a commercial descaling solution may be stronger and more effective.
Many people alternate between vinegar and Keurig solution for balanced cleaning. Vinegar provides regular upkeep, while the commercial descaler handles heavier buildup.
Overall, vinegar is a simple, accessible, and highly effective method for keeping your Keurig running smoothly. It restores the taste of your coffee and extends the lifespan of your machine without requiring any expensive cleaning products.
How to Descale a Keurig Without Vinegar (Using Citric Acid or Lemon)
Not everyone likes using vinegar to descale their Keurig. Some people dislike the strong smell, while others prefer a more natural, gentler cleaning option.
Fortunately, you can descale a Keurig using citric acid, lemon juice, or even store bought natural cleaners that work just as effectively as vinegar.
Why Citric Acid Works So Well
Citric acid is one of the most effective mineral dissolvers available. It is commonly used in dishwasher cleaners, kettle descalers, and food grade cleaning products. Because it is odorless and gentle on internal parts, many people prefer it over vinegar.
Citric acid naturally breaks down calcium and mineral deposits without leaving behind fumes. It is also inexpensive, widely available, and easy to store.
How to Make a Citric Acid Descaling Solution
Mix one tablespoon of citric acid with four cups of warm water. Stir until completely dissolved. If you need a larger amount for your reservoir size, simply double or triple the recipe.
Pour the mixture into your Keurig reservoir.
Step-by-Step Descaling Using Citric Acid
Step 1: Start the Cleaning Cycles
Place a large mug under the dispenser and run brew cycles without a pod. Continue until the reservoir is empty. The citric acid solution will travel through internal tubes and dissolve mineral buildup as it moves through the machine.
Step 2: Let the Mixture Sit
Leave the machine powered on and let the citric acid sit inside the internal chamber for 15–20 minutes. This soaking phase removes deeper buildup.
Step 3: Rinse the Machine Thoroughly
Refill the reservoir with clean water. Run 3–5 full rinse cycles to flush out the citric acid. Because citric acid has almost no smell, this rinsing step is faster and easier than vinegar.
How to Descale a Keurig With Lemon Juice
Lemon juice contains natural citric acid and works similarly, although it is slightly weaker than pure citric acid powder. It also leaves behind a fresh scent that many people prefer.
Directions:
Fill half the reservoir with lemon juice and top it off with water. Run brew cycles until the mixture is gone. Then run 3–5 rinse cycles with clean water.
Store Bought Natural Descaling Alternatives
There are several natural or plant based descalers available that are designed specifically for coffee makers. These products often use citric acid, lactic acid, or natural mineral removers.
Some popular options include:
- Urnex Natural Coffee Machine Descaler
- Essential Values Coffee Descaler
- Dezcal Citric Acid Based Cleaner
These products are convenient, safe for your machine, and leave little to no residue.
When to Choose a Vinegar Free Method
You may prefer citric acid or lemon juice if:
- You want to avoid strong vinegar odor
- You want a more gentle descaling solution
- You brew flavored coffees and don’t want lingering smells
- You descale frequently and prefer a mild cleaner
Citric acid based descalers are also ideal for very sensitive machines or for people who want a food safe solution with no lingering aftertaste.
Final Thoughts on Vinegar Free Descaling
Whether you use citric acid, lemon juice, or a natural descaling product, these methods remove mineral buildup effectively while keeping your Keurig safe and functioning.
They are especially useful for people who want a fresher smelling cleaning process and prefer an alternative to vinegar.
How Often Should You Descale Your Keurig?
Many Keurig owners aren’t sure how frequently they should descale their machine, and as a result, they either do it too rarely or only after a problem appears.
In reality, descaling is a preventative maintenance task, not something you wait to do once the machine is already slowing down or showing warning lights.
The ideal descaling schedule depends on how often you use your Keurig and the type of water in your home.
Keurig’s Official Recommendation
Keurig recommends descaling every 3 months, regardless of usage level. This schedule assumes average water hardness and normal daily brewing habits. Following this guideline keeps mineral buildup under control before it becomes thick and damaging.
If You Use Your Machine Daily
If you brew several cups each day, you may need to descale every 2 months. Heavy use means more water flowing through the system and more minerals depositing inside the heating chamber and tubing. The more often you brew, the faster scale accumulates.
Effect of Water Hardness
Water hardness is the biggest factor in determining descaling frequency:
- Soft Water Homes: Descale every 3–4 months
- Moderately Hard Water: Descale every 2–3 months
- Very Hard Water: Descale every 4–6 weeks
Hard water contains more calcium and magnesium, the minerals responsible for scale. If your faucets, showerheads, or kettle collect white crusty buildup quickly, your Keurig does too.
Signs You Need to Descale More Frequently
If you notice any of these, increase your descaling frequency:
- Coffee tastes weak or metallic
- Brew cycles take longer than usual
- You get partial cups
- The machine makes louder noises than normal
- Water sputters instead of flowing smoothly
- The “Descale” light turns on
Even if none of these symptoms appear, scale may already be forming inside.
What If You Use Filtered or Bottled Water?
Filtered water helps, but it does not prevent scale. Most filters remove chlorine and sediment but do not eliminate dissolved minerals. Bottled water varies in hardness depending on the brand.
You should still descale regularly.
What If You Rarely Use Your Keurig?
Even infrequent use can lead to scale because water sits inside the machine and minerals settle over time. If you brew periodically or only on weekends, descale every 4–6 months.
Using Keurig Filters
The charcoal filter that sits in the reservoir helps reduce impurities but does not stop calcium or magnesium from passing through. It keeps water cleaner but cannot replace descaling.
Bottom Line
A consistent descaling schedule is essential for maintaining taste, brewing speed, and the longevity of the machine. Regular maintenance makes your coffee taste better and prevents expensive repairs or replacement.
Cleaning the Exterior, Needles, and Removable Parts
Descaling cleans the internal water pathways of your Keurig, but it does not remove coffee oils, residue, or grounds that collect on the exterior and removable parts.
Over time, these areas can develop sticky buildup, mold, or clogs that affect the flavor of your coffee and the overall performance of the machine. Regular cleaning keeps every part of your Keurig hygienic, efficient, and safe to use.
Cleaning the Exterior Surface
Start by wiping the outer housing with a damp cloth and a small amount of mild dish soap. Coffee splashes and fingerprints can accumulate around the buttons, handle, and side panels, especially if the machine sits near the stove. Avoid harsh cleaners or abrasive scrubbers, as they can damage the finish. Dry the machine with a soft towel to prevent water streaks.
Cleaning the Water Reservoir
The reservoir can accumulate mineral spots, mold, or film over time, especially if water sits inside for days.
Remove the reservoir and wash it with warm, soapy water using a soft sponge. Make sure to clean the cap, lid, and any crevices where mold might hide. Rinse thoroughly to remove soap residue, then let it air dry completely before placing it back on the machine.
Cleaning the Drip Tray
The drip tray is one of the dirtiest parts of any Keurig because it collects spills, coffee drips, and sometimes mold from standing moisture.
Slide out the tray and separate the metal grate from the plastic base. Wash both with warm, soapy water and rinse well. For stubborn stains, soak the parts for 10–15 minutes before scrubbing.
Removing and Cleaning the Pod Holder
The K-cup pod holder contains the needles that puncture the top and bottom of the pod. Over time, coffee grounds, sticky syrup, and oils build up in this area. To clean it:
- Lift the handle to access the pod holder.
- Grasp the holder firmly and pull straight up to remove it.
- Separate the holder from the funnel underneath.
- Wash both parts in warm, soapy water and rinse thoroughly.
Cleaning this area frequently prevents clogs and improves the overall flavor of your coffee.
Cleaning the Keurig Needles
The needles are one of the most important parts to clean. These small metal puncture points pierce the K-cup and can easily become clogged with grounds, preventing water from flowing properly.
To clean the needles:
- Use a straightened paperclip or the official Keurig needle cleaning tool.
- Insert the paperclip carefully into each needle hole.
- Gently move it around to loosen trapped grounds.
- Rinse the pod holder again to wash away dislodged debris.
Be cautious: the needles are extremely sharp.
Cleaning Inside the Brew Head
Wipe the underside of the brew head with a damp cloth. Coffee splashes and steam leave behind sticky residue in this area. A cotton swab or small cleaning brush helps remove buildup around the needle openings.
Cleaning the Machine Base
Dust, spilled coffee, and water droplets often collect under the machine. Lift your Keurig carefully and wipe the countertop beneath it. Cleaning the base prevents odors and helps the machine sit evenly.
Why Cleaning These Parts Matters
Even if the inside of your Keurig is clean, dirt and buildup on the removable parts can:
- Alter the taste of your coffee
- Spread bacteria or mold
- Cause leaks or drips
- Lead to needle clogs
- Make the machine look worn and unhygienic
Combining regular descaling with surface cleaning keeps your Keurig functioning like new and ensures every cup tastes fresh.
Conclusion
Keeping your Keurig clean and descaled is one of the easiest ways to extend its lifespan, improve coffee flavor, and ensure consistent brewing performance.
Mineral buildup happens naturally in every coffee maker, especially in homes with hard water, but regular descaling keeps the internal system flowing smoothly and prevents clogs, slow brewing, and temperature issues.
When combined with simple routine cleaning of the reservoir, needles, and removable parts, your Keurig will continue performing like new day after day.
Descaling doesn’t require special tools or expensive products. Whether you use Keurig’s official solution, white vinegar, citric acid, or lemon juice, the process is quick, effective, and inexpensive.
Following a regular maintenance schedule ensures your coffee stays flavorful and your brewer stays dependable. Even if you only descale a few times a year, the difference in taste, speed, and overall performance is noticeable.
A well maintained Keurig not only makes better coffee but also provides peace of mind. You won’t have to deal with sudden breakdowns, reduced cup sizes, or unexpected machine failures.
With the steps in this guide, you now have everything you need to keep your Keurig running efficiently and enjoy fresh, great tasting coffee every morning.
I’m Emma J. Caldwell, the founder, lead writer, and home-cooking enthusiast behind KitchenGuideCo.com. With a background in culinary arts and over a decade of cooking experience in both professional and personal kitchens, I created this platform to demystify recipes, offer smart kitchen gadget reviews, and guide readers through meal prep with confidence and clarity.