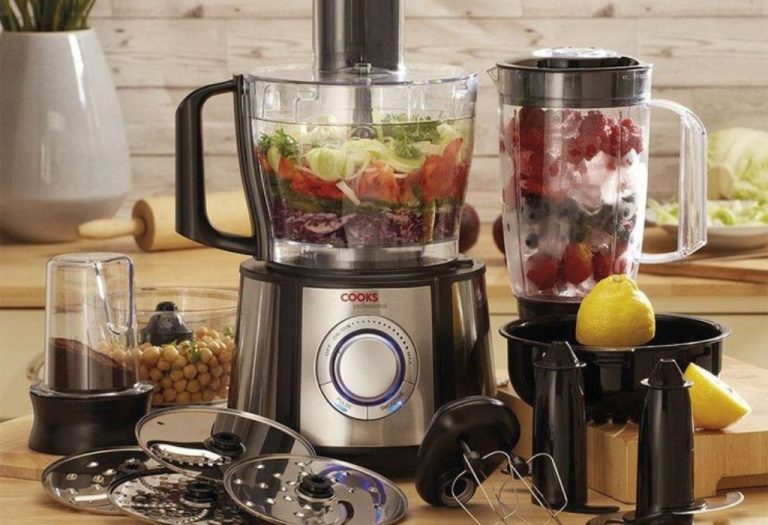
Figuring out how to disassemble juicer safely can seem tricky at first. Many people find it a bit puzzling when they first try, as juicers often have lots of parts. Don’t worry, though! It’s not as hard as it looks. I’m going to show you a simple, step-by-step guide to take apart your juicer without any fuss. You’ll learn the essential things you need to know to get the job done right. Let’s get started!
Prepare Before You Disassemble Your Juicer
Before you even think about taking your juicer apart, you need to get ready. This includes both making sure you have the right tools and creating a safe workspace. A good workspace prevents accidents and makes the whole process smoother. It is a good idea to lay down a towel or a non-slip mat to catch any stray juice or small parts that might roll away. You’ll also want to make sure the juicer is unplugged from the wall. This is a crucial first step for your safety!
Gathering Your Supplies
The first step is to gather everything you will need. This helps you work efficiently and prevents frustration. Having your supplies nearby also allows you to address any unexpected issues easily. You won’t have to keep stopping to find what you need. This saves time and makes the entire process far more enjoyable.
- Owner’s Manual: Always start with the manual. It has specific instructions for your juicer model.
- Soft Cloth or Sponge: To wipe up any spills.
- Small Brush (optional): For cleaning hard-to-reach areas.
- Container for Parts: To keep everything organized.
Your owner’s manual is the best resource for disassembling your juicer because it will offer model-specific details. Many juicers look similar, but the way they come apart can vary. The manual will show you the exact steps needed for your particular juicer. It will also provide you with helpful diagrams and warnings you should be aware of. It’s often the best place to find details about special tools, and it tells you which parts come off first.
A soft cloth or sponge is useful for cleaning up spilled juice. Sometimes, disassembly can get a bit messy, so it’s a good idea to keep your workspace clean. Plus, you will have to wash the parts after you take them apart. A quick wipe down during disassembly will keep you from creating a bigger mess. Keeping a cloth on hand will also help you to keep the juicer itself clean as you go.
A small brush can be a real help for cleaning tight spaces where food particles might get stuck. Many juicers have spots that are hard to reach with your fingers. A brush makes it easier to clean these areas. Look for a brush with soft bristles. This will help you scrub away stuck-on food without damaging any parts. It’s a great tool for ensuring your juicer is thoroughly cleaned.
Having a container ready to hold parts keeps everything organized. As you take your juicer apart, you can put each piece into the container. This prevents small parts from getting lost and keeps everything in one place. Using a container ensures that you can quickly and easily reassemble the juicer after cleaning. Plus, it will save you time and prevent headaches!
Creating a Safe Workspace
A safe workspace is key to a smooth disassembly. This includes making sure you have enough light, a stable surface, and no distractions. A well-organized space makes the process simpler. You should be able to see all the parts clearly and move around easily. It will protect you from accidents and help you focus on the task at hand. Taking a few moments to set things up makes a huge difference in the long run.
- Unplug the Juicer: Safety first! Make sure the juicer is unplugged.
- Clear a Flat Surface: A clear surface provides plenty of space to work.
- Good Lighting: Make sure you have enough light.
This is the most important step for safety. Electricity and water don’t mix. Unplugging the juicer prevents the risk of electric shock. It’s easy to forget this step when you are focused on the task. Always double-check before you start working. Make sure the cord is out of the way. This precaution keeps you safe while you are working.
Choose a flat surface, like a kitchen counter or table, with enough room to spread out the juicer parts. This space prevents you from knocking things over or misplacing any components. A clean surface helps you to see the parts clearly and prevents the area from becoming cluttered. Choose a surface that you can clean easily after you are done.
Good lighting is vital for seeing small parts and recognizing how they fit together. Bright light also helps you spot any damage or issues with the juicer. Set up a lamp or use a well-lit area in your kitchen. This can prevent eye strain and make the whole process easier. Proper lighting prevents mistakes and makes the process safer.
Essential Steps for How to Disassemble Juicer Safely
Now, let’s explore how to disassemble juicer safely. This part walks you through the actual process. It breaks down the steps into simple, easy-to-follow actions. You’ll learn how to take apart the key components of the juicer. This will include the different types of locks and clips you will encounter. Each step has been explained to make sure you do not get confused. The goal is to make the process easy and keep you safe.
Removing the Exterior Parts
The exterior parts are usually the first things to come off. These are the pieces that make up the outer shell of the juicer. They often include the pulp container, the juice spout, and the cover. Taking these parts off first provides access to the internal components. Pay close attention to how these parts fit together and which ones you should remove in which order.
- Remove the Pulp Container: Locate and remove the pulp container.
- Detach the Juice Spout: Detach the juice spout.
- Take Off the Cover: The cover usually sits on top of the juicer.
The pulp container usually sits at the back or side of the juicer. Most of the time, it comes off by simply pulling it away from the main unit. Some containers may have a locking mechanism. Check for any clips or latches that you need to release before removing it. When you have taken the container off, put it aside. This gives you room to access the other parts.
The juice spout directs the juice into your glass. You may need to press a button or rotate the spout to remove it. Some spouts have a small lever. This is to help you remove them. The juice spout often comes off easily without any need for special tools. Detaching the spout is important because it prevents any drips as you take the other parts apart.
The cover protects the juicing components inside. Some covers have a locking mechanism. Others simply lift off. Check your owner’s manual for specific instructions. Make sure that the cover is free of any obstructions. Then, lift it carefully. Place it on the counter to prevent any accidental damage. With the cover off, you can see the inside of the juicer.
Accessing the Internal Components
Once you’ve removed the exterior pieces, you can access the internal components. This includes parts such as the feeding tube, the blade, and the strainer. These are the parts that do the actual juicing. This is where it’s important to be careful. Always follow the instructions in the manual to ensure everything is put back together correctly. Take your time, and you’ll do fine.
- Remove the Feeding Tube: The feeding tube may come off with the cover.
- Detach the Blade or Auger: These parts do the juicing.
- Remove the Strainer: The strainer is inside the juicer.
The feeding tube is where you put the fruits and vegetables. It’s often attached to the cover or the main body of the juicer. In some models, the feeding tube just lifts off. Others may have clips or screws to hold it in place. Check the manual. If there are any screws, use a screwdriver to remove them. Place the tube to the side, taking care not to damage the opening.
The blade or auger is the most important part of the juicer. It breaks down the fruits and vegetables. Depending on your juicer, you will find a blade or an auger. The blade is often a sharp disk with small teeth. The auger is a long, screw-like part. Always be careful when handling this part. It might be sharp, so do not touch the edges.
The strainer filters out the pulp. It has tiny holes that allow the juice to pass through. The strainer can be inside a housing or directly attached to the motor base. Removing the strainer usually involves a simple twist and lift motion. Always check your manual for exact instructions. Once the strainer is out, you can clean it thoroughly to remove any pulp.
Dealing With Locks, Clips, and Screws
Many juicers use locks, clips, and screws to hold the parts together. Knowing how to handle these can make the disassembly much easier. If you do not handle them correctly, you might break something or struggle to put it back together later. Pay attention to how the locks and clips work. Also, keep track of any screws you take out.
- Understand the Locking Mechanisms: Figure out the locks.
- Release Clips Carefully: Don’t break them!
- Keep Track of Screws: Organize all screws.
Juicers often use locks to secure the parts together. These can be various types, from simple latches to more complex designs. Look closely at the juicer to identify how the locks work. Some locks may require you to push a button or slide a lever. Others may use a simple twist-and-lock system. Checking the manual will help you know the type of lock used in your specific model.
Clips hold parts in place. They can be made of plastic or metal. It’s important to release these clips carefully. Do not force anything. Clips might break. Many clips have small tabs that you have to push or lift to release them. Use a small tool, like a flat-head screwdriver, if necessary. Always apply gentle pressure. This makes it easier to prevent damage.
Screws are important for holding parts together. They can be different sizes and types. As you take the juicer apart, make sure you keep track of all the screws. Use a small bowl or a baggie to hold them. This prevents you from losing any screws. Also, it helps when it’s time to put the juicer back together. You will know exactly where each screw goes!
Cleaning and Reassembling Your Juicer
After you disassemble your juicer, the next step is cleaning and reassembling. It is important to make sure each part is clean before putting it back together. Take your time, and follow the instructions carefully. This ensures that your juicer runs correctly and lasts longer. Taking care of your juicer is a great way to enjoy fresh juice for a long time.
Cleaning the Juicer Parts
Cleaning is essential after taking the juicer apart. This includes rinsing all the parts to remove any pulp or residue. It will also help to use soap and water. You will also need to dry everything well before reassembling. This prevents the growth of mold or bacteria. By following the right cleaning steps, you can ensure that your juicer is ready for its next use.
- Rinse All Parts: Remove pulp and residue.
- Wash with Soap and Water: Use gentle dish soap.
- Dry Thoroughly: Let everything air dry.
Begin by rinsing each part under warm running water. This removes the big pieces of pulp and any leftover food. If you can, rinse the parts immediately after juicing. This helps prevent food from drying and sticking. Make sure to rinse all the nooks and crannies. This is important to ensure all the pulp is gone before you use soap.
After rinsing, wash each part with warm, soapy water. Use a gentle dish soap that is safe for your juicer’s materials. Use a soft sponge or cloth to scrub away any remaining residue. You can also use a small brush for getting into tight spots. Avoid using abrasive cleaners or scrub pads that might damage the parts. Always rinse each part thoroughly.
Drying the parts completely is important before reassembling your juicer. You can let the parts air dry. You can also pat them dry with a clean towel. Make sure every part is completely dry. This helps to prevent mold and bacteria growth. Moisture will cause the parts to rust, especially with blades or other metal parts. Ensure the parts are dry before putting them away.
Reassembling the Juicer
Once you have cleaned and dried all the parts, it’s time to put your juicer back together. This is a crucial step to ensure that your juicer is working properly. It is important to follow the steps in the reverse order of disassembly. Take your time. Double-check each connection and ensure everything is properly aligned. Reassembling your juicer correctly will prevent any leaks, and it makes sure that the juicer functions smoothly.
- Replace Internal Components: Put parts back in their place.
- Attach the Exterior Parts: Secure the outer pieces.
- Secure the Locks and Clips: Check everything.
Start by putting the internal components back together. This includes the blade or auger, the strainer, and any other parts that go inside the juicer. Ensure that each part is properly seated and secured. Use the owner’s manual for guidance on the correct placement of each part. Make sure the blade spins freely, and the strainer is firmly in place.
Next, reattach the exterior parts. This will include the feeding tube, the cover, and the juice spout. Ensure that all the clips and locks are properly engaged. Make sure each part fits securely. Double-check that there are no gaps. Check for any leaks before you run your juicer. A good connection prevents messes and ensures the juicer works well.
Make sure all the locks and clips are secure. This includes all the latches, screws, and buttons. Double-check that all these are firmly in place. Ensure there is nothing loose. This step prevents any parts from coming loose while you are juicing. Also, it prevents leaks. Once everything is secured, the juicer is ready for its next use.
Common Issues and Troubleshooting
Even with careful disassembly, you might run into some common issues. Here are a few troubleshooting tips to help you get through any bumps. Whether it’s a stuck part or a problem during reassembly, knowing how to address them can save you time and frustration. If you run into any trouble, these tips can help you find a solution and keep your juicer running well.
Dealing With Stuck Parts
Sometimes, parts can get stuck. This can happen because of dried pulp, or if the parts have not been cleaned regularly. Do not use excessive force when you try to remove stuck parts. This might damage the juicer. Here are a few ways to safely address stuck parts. These tips help you solve these problems with ease and care.
- Soak the Parts: Let the parts soak to loosen them.
- Use Non-Abrasive Tools: Gently pry the part loose.
- Consult the Manual: Check your owner’s manual.
If parts are stuck due to dried pulp, try soaking them in warm, soapy water for a few minutes. This softens the dried residue and makes it easier to remove the parts. Avoid using hot water. Hot water can sometimes damage plastic parts. Soaking the parts will make it easier to disassemble or reassemble the juicer. Take your time. Patience is key!
If soaking doesn’t work, gently try prying the parts apart with a non-abrasive tool. A plastic spatula or a wooden spoon can work well. Avoid using metal tools. Metal tools might scratch or damage the parts. Insert the tool carefully between the stuck parts. Apply gentle pressure. Slowly work the part loose. Do not force anything.
The owner’s manual may have specific instructions for dealing with stuck parts. Your manual might offer special tools or tips. It will provide the best advice for your juicer model. The manual is designed for your juicer. Always follow the manufacturer’s advice. It will help you avoid problems and keep your juicer in good shape.
Addressing Reassembly Problems
Putting the juicer back together might not always be smooth. Here are some of the most common issues. These troubleshooting steps help you solve reassembly problems. They will also help you prevent issues in the first place. Whether it’s a part that does not fit right or an issue with performance, these tips will help you quickly find a solution.
- Check Alignment: Make sure the parts line up correctly.
- Inspect for Damage: Look for any cracks or breaks.
- Test Run (Safety First!): Always test after reassembly.
Make sure all the parts are properly aligned before you secure them. This is very important. Misalignment can prevent the juicer from working or might cause damage. Carefully look at the parts as you put them together. Ensure that all the tabs, slots, and grooves fit together. Refer to your owner’s manual for diagrams and instructions.
Before reassembling, check each part carefully for damage. Check for cracks, breaks, or worn spots. Damaged parts might cause the juicer to function poorly. They could also be a safety risk. If you find any damaged parts, contact the manufacturer or a repair specialist. Do not use the juicer if the parts are broken. This can prevent injury.
After reassembling, do a quick test run. Make sure that the juicer turns on and runs smoothly. Fill the juicer with water. Watch for any leaks or unusual noises. Turn the juicer off immediately if you notice any problems. Unplug the juicer. Check your work. By testing the juicer, you can ensure that it functions well. Also, you can spot and address any issues.
Frequently Asked Questions
Question: How often should I disassemble and clean my juicer?
Answer: It’s best to disassemble and clean your juicer after each use. This ensures that no pulp dries and sticks, which can make cleaning harder over time.
Question: What if a part of my juicer is difficult to remove?
Answer: If a part is stuck, soak it in warm, soapy water for a while. Then, gently try to remove it. Avoid using too much force.
Question: Can I put all the juicer parts in the dishwasher?
Answer: Some parts may be dishwasher safe, but always check your owner’s manual. Blades and certain parts are often not dishwasher safe to prevent damage.
Question: What’s the best way to handle the juicer’s blade?
Answer: Always be careful with the blade. It’s sharp. Try to hold the blade by its edges when cleaning and reassembling.
Question: What should I do if my juicer isn’t working after reassembly?
Answer: First, check to make sure all parts are correctly installed and aligned. Also, make sure that all the locks and clips are secure. If problems continue, review your manual and contact support if necessary.
Final Thoughts
Taking apart your juicer might seem tough at first, but with a simple, step-by-step approach, it becomes very easy. Remember to gather your tools, prepare a safe area, and always consult your manual. As you how to disassemble juicer safely, focus on the order of the parts. Make sure to understand the locking mechanisms. Take your time during cleaning and reassembling. If you face any issues, troubleshoot them carefully. Following these steps ensures your juicer stays clean, functions smoothly, and lasts longer. Now, go ahead and explore your juicer with confidence. Fresh juice awaits!
I’m Emma J. Caldwell, the founder, lead writer, and home-cooking enthusiast behind KitchenGuideCo.com. With a background in culinary arts and over a decade of cooking experience in both professional and personal kitchens, I created this platform to demystify recipes, offer smart kitchen gadget reviews, and guide readers through meal prep with confidence and clarity.