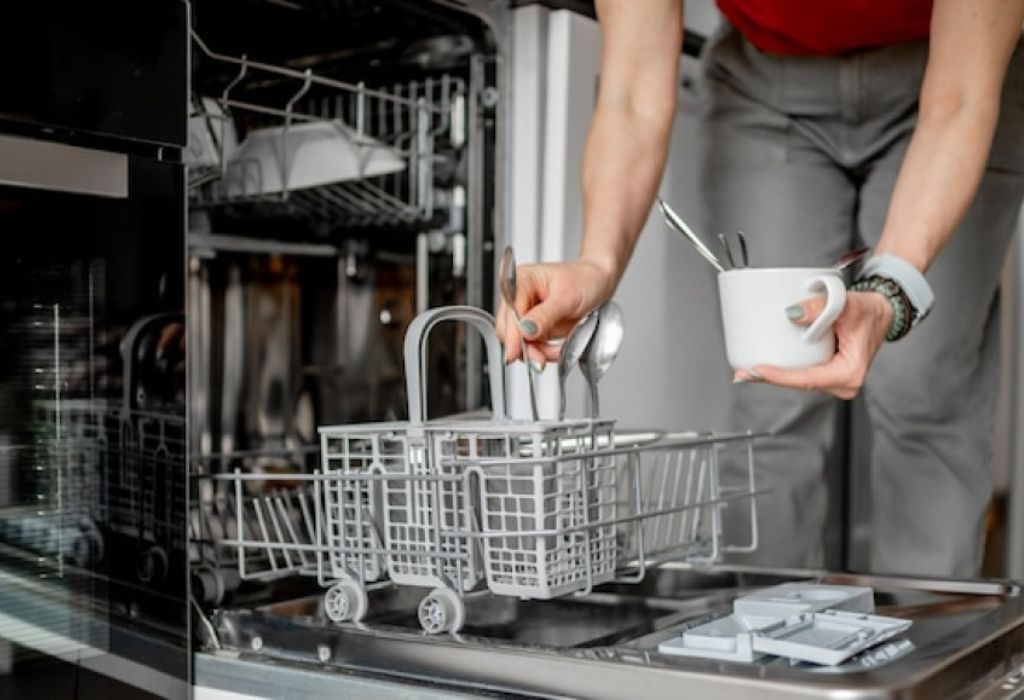
A dishwasher that wobbles or tilts when you open the door can be frustrating — and even dangerous. The solution? Brackets.
Dishwasher brackets are small but powerful pieces of hardware designed to keep your machine firmly anchored to the countertop or side cabinets. Without them, the entire unit can shift or lean forward, risking leaks, damage, and poor drainage.
According to appliance service technicians, loose or missing brackets are among the most common causes of dishwasher misalignment and vibration issues. Proper installation not only keeps your dishwasher secure but also ensures quieter operation and better longevity.
In this complete guide, you’ll learn how to install dishwasher brackets the easy way — with step-by-step instructions, expert tips, and common troubleshooting advice. Whether you’re replacing an old set or installing them for the first time, you’ll get professional-grade results right from your own kitchen.
What Are Dishwasher Mounting Brackets and Why Are They Important?
A dishwasher mounting bracket might seem like a small metal piece, but it plays a huge role in keeping your appliance stable and secure. These brackets anchor the dishwasher to the surrounding cabinetry or countertop so it doesn’t tilt or shift when you open and close the door.
Without them, the machine can lean forward during use, putting stress on plumbing connections and even causing leaks over time.
Mounting brackets are typically made of durable steel and come in a small set that matches your dishwasher model. They connect through pre-drilled slots on the top or sides of the dishwasher frame.
The brackets distribute the appliance’s weight evenly, preventing vibration during operation and keeping the door aligned correctly. Proper installation not only ensures stability but also protects your flooring and cabinets from accidental damage.
There are two main styles of dishwasher brackets: top-mount and side-mount. Top-mount brackets screw directly into the underside of a wooden countertop, making them ideal for laminate or butcher block surfaces.
Side-mount brackets, on the other hand, attach through the cabinet sides—perfect for granite or quartz countertops where you can’t drill from above. Some dishwashers also include universal brackets that fit either setup, giving you flexibility during installation.
When you install your brackets properly, your dishwasher stays perfectly level, functions quietly, and lasts longer. Neglecting this simple step can lead to wobbly placement, water leaks, and even damage to the appliance door hinges.
So while these little metal pieces may not look important, they’re absolutely essential for a professional, safe, and long-lasting installation.
Tools and Materials You’ll Need
Before you start installing your dishwasher brackets, it’s important to gather all the right tools and materials. Having everything ready will save time and prevent mistakes once you begin.
Most of these items are basic DIY tools you probably already have at home, but double-check before starting to avoid delays mid-installation.
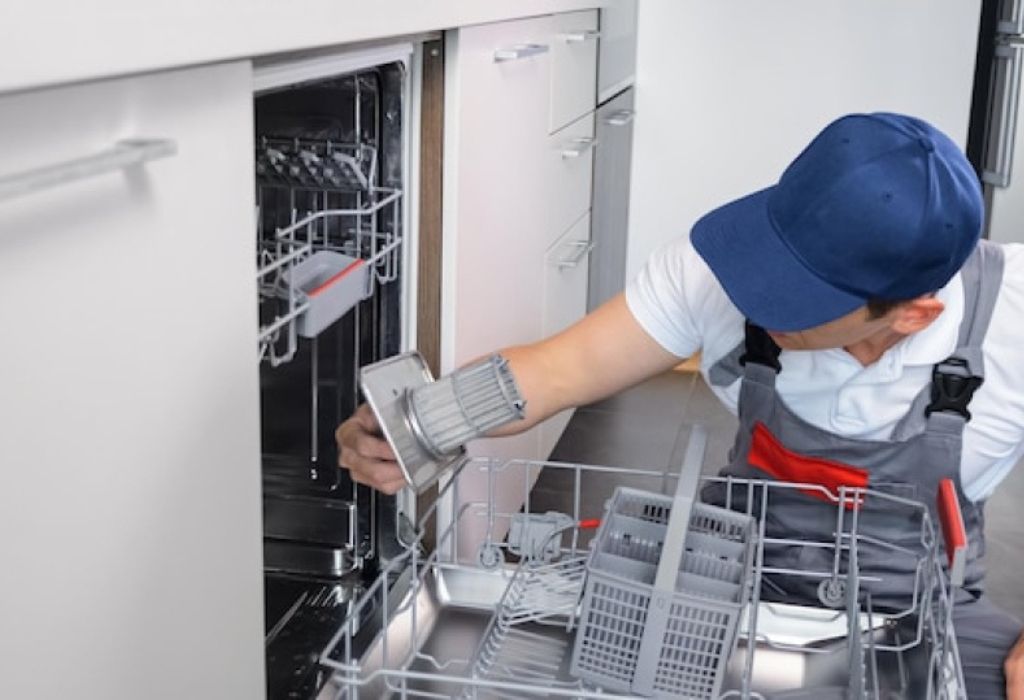
You’ll need a mounting bracket kit, which often comes with the dishwasher, but if not, you can purchase one separately at any hardware store. The kit includes two metal brackets and a few screws. You’ll also need a screwdriver or power drill with a Phillips-head bit to secure the screws.
A measuring tape and level will help ensure accurate alignment, while a pencil or marker is useful for marking drill points.
Keep mounting screws, a flashlight, and safety gloves nearby. If you’re working with granite or quartz countertops, you might also need a side-mount adapter kit or adhesive mounting block, since drilling into stone surfaces isn’t recommended.
Some professionals use double-sided adhesive pads or epoxy to hold brackets securely when screws can’t be used.
Before starting, unplug the dishwasher and turn off the water supply for safety. Remove any packaging that may cover the mounting slots on the dishwasher top or sides.
It’s also a good idea to review your appliance’s installation manual—it often includes a diagram that shows exactly where the brackets should attach.
Preparing your tools in advance makes the whole process smoother. A well-organized workspace means fewer interruptions, cleaner results, and a more stable final installation.
When you’re ready, move to the next step—understanding which type of mounting bracket your dishwasher requires.
Understanding the Different Types of Dishwasher Brackets
Not all dishwashers use the same type of mounting bracket, and understanding which one you need is crucial for a proper installation.
The two main categories are top-mount and side-mount brackets. Both serve the same purpose—to anchor the dishwasher securely—but are designed for different countertop materials and kitchen layouts.
Top-mount brackets attach directly to the underside of the countertop. They’re ideal for wooden or laminate surfaces where you can safely drill pilot holes.
In this setup, the dishwasher slides beneath the counter, and the brackets are fastened upward into the counter’s base. These brackets prevent the unit from tipping forward when the door is open and make it easier to remove or replace the appliance later.
Side-mount brackets are used when you have granite, quartz, or solid-surface countertops. Since you can’t drill into stone, the dishwasher is secured through the side walls into the adjacent cabinets.
This method is just as stable as the top-mount but requires more careful alignment because the brackets need to match the cabinet height perfectly.
For older kitchens or custom cabinetry, universal mounting kits are available. They come with flexible bracket arms that can be installed either from the top or sides depending on your setup. Some kits even include adhesive blocks for difficult surfaces.
Knowing which bracket your kitchen needs saves time and frustration later. If you’re unsure, remove the dishwasher’s top panel to see the mounting slots—top slots mean top-mount, and side holes mean side-mount.
Taking this small step ensures you choose the right method, keeping your dishwasher sturdy, level, and long-lasting.
Step-by-Step Guide: How to Install Dishwasher Brackets the Easy Way
Installing dishwasher brackets isn’t as intimidating as it seems once you follow the right steps carefully. Start by turning off both the power and water supply to the dishwasher. Unplug the cord and close the shut-off valve to prevent accidents.
Then, pull the dishwasher out slightly—about one-third of the way—so you can access the top or sides where the mounting slots are located.
Locate the mounting holes or slots on your dishwasher frame. These are small, metal-lined openings usually near the front edge of the top or sides. Align each bracket with its corresponding slot, ensuring the flat end faces outward. Use the screws provided in the kit to attach the brackets securely to the dishwasher’s frame, but don’t overtighten them yet—you’ll need a bit of flexibility for alignment later.
Next, slide the dishwasher back under the countertop carefully until it’s flush with the cabinets. Use a level to check that the front edge is straight and even with the counter. Adjust the dishwasher’s leveling legs if necessary to achieve perfect alignment.
Once it’s in position, secure the brackets either to the underside of the countertop (for top-mount) or into the cabinet sides (for side-mount).
Use the screws from your kit and tighten them until snug but not over-torqued. This ensures the appliance won’t shift but still allows slight movement for vibration absorption.
Finally, open and close the dishwasher door several times to test for movement. If it rocks or tilts, recheck your bracket screws. Once stable, reconnect power and water, run a short rinse cycle, and confirm there are no leaks. Congratulations — you’ve successfully installed your dishwasher brackets the easy way!
Common Mistakes to Avoid When Installing Dishwasher Brackets

Even though installing dishwasher brackets is a simple DIY task, a few small mistakes can lead to big problems later. One of the most common errors is forgetting to shut off the power or water supply before starting.
This can create safety hazards or minor leaks that become worse over time. Always disconnect both before touching any screws or brackets.
Another mistake is using the wrong screws or materials. Some installers grab whatever screws they find, but not all fasteners are suitable for wood or metal surfaces.
Always use the screws included in your bracket kit or ones recommended by the manufacturer. Using the wrong type can strip the mounting holes or cause the bracket to loosen after a few dishwasher cycles.
Incorrect leveling is another frequent issue. If your dishwasher isn’t perfectly level before mounting the brackets, the door may not close properly, or water might pool at the bottom. Take a minute to use a level tool and adjust the dishwasher’s legs before securing anything permanently.
Some DIYers also tighten the screws too much, which can warp the dishwasher frame or crack cabinet sides. Tighten only until snug and check that the brackets are holding firm without flexing the metal.
Finally, one of the most overlooked problems is installing only one bracket. Both sides must be secured for balanced support; otherwise, your dishwasher can rock forward over time.
By avoiding these small but costly mistakes, you’ll ensure that your installation remains sturdy, noise-free, and long-lasting. Taking an extra five minutes for accuracy can easily prevent hours of future frustration.
How to Replace or Adjust Old Dishwasher Brackets
Over time, dishwasher brackets can become loose, corroded, or bent from repeated use or vibration. Replacing or adjusting them isn’t difficult if you know what to look for.
Start by inspecting the existing brackets for rust, stripped screws, or cracks. If they’re damaged, it’s best to replace them entirely instead of tightening them again.
Begin by turning off the power and water supply just like in a new installation. Carefully slide the dishwasher out a few inches to expose the old brackets. Using a screwdriver or drill, remove the screws securing the brackets to the cabinet or countertop.
Once they’re free, unscrew them from the dishwasher frame and discard them if corroded or bent.
Now take your new brackets and align them with the existing mounting slots. Attach them loosely first, ensuring they face outward in the correct direction. Once both are in place, slide the dishwasher back into position and use a level to verify alignment. Adjust the leveling legs as needed before tightening the screws fully.
If you only need to adjust rather than replace, loosen the screws slightly and reposition the bracket to eliminate wobbling or uneven alignment. Re-tighten gently and test the door movement. The dishwasher should sit flush with the cabinets and not tip forward when opened.
Replacing old brackets extends your dishwasher’s life and prevents leaks or door stress. It’s an easy task that keeps the appliance operating quietly and efficiently. A few minutes of maintenance today can save you from expensive repairs in the future.
Special Installation Tips for Granite or Quartz Countertops
Granite and quartz countertops look beautiful, but they present a unique challenge during dishwasher installation. Since you can’t drill into stone, top-mount brackets aren’t an option. Doing so can crack the surface or void your countertop warranty.
Instead, you’ll need to use side-mount brackets or a universal adhesive mounting kit designed specifically for hard surfaces.
Side-mount brackets attach to the inside walls of your kitchen cabinets rather than the underside of the counter. To install, measure carefully to align the brackets with the cabinet sides before drilling.
Use short screws that won’t penetrate the outer wall of the cabinet. Once both brackets are secured, slide the dishwasher into position and test for balance with a level.
If your cabinets are too thin for screws, you can use adhesive mounting blocks or metal anchor strips. These products glue directly to the underside of the countertop using high-bond epoxy or double-sided mounting tape. Once the adhesive cures, the brackets attach to the blocks, providing a solid anchor point without drilling.
Another professional option is using a universal mounting bracket that extends across the top of the dishwasher. It allows you to screw the bracket into the side cabinets instead of the countertop itself. This method distributes weight evenly and avoids damage to stone materials.
Granite and quartz installations require more patience, but the results are durable and clean. Always double-check measurements and allow adhesives to cure fully before operating the dishwasher.
Properly mounted brackets will keep your appliance perfectly stable while preserving your beautiful countertops.
Safety Tips and Maintenance After Installation
Once your dishwasher brackets are securely installed, safety doesn’t end there. Regular checks and light maintenance ensure that your appliance remains stable for years.
The vibrations caused by daily wash cycles can gradually loosen screws, especially if the brackets weren’t tightened properly.
Every few months, open the dishwasher door and check whether it wobbles or creaks—these are signs that adjustments might be needed.
You should also inspect the screws and brackets for corrosion or rust, particularly in humid kitchens. If you see discoloration or buildup, clean the area with a dry cloth and lightly tighten the screws again. Avoid using lubricants or sealants near the mounting points since they can affect the metal’s grip.
Another important safety step is to never overload the dishwasher door. Using it as a shelf for heavy items can strain the brackets and hinges. Teach family members, especially kids, to avoid stepping on or leaning against the open door. These small habits protect your installation from unnecessary stress.
If you ever move your dishwasher for cleaning or floor replacement, recheck bracket alignment when reinstalling. For stone or quartz counters, ensure that adhesive mounts haven’t loosened over time. It’s also smart to keep the manufacturer’s manual handy in case you need to reference torque settings or part numbers.
Simple maintenance can prevent long-term damage to your cabinetry, flooring, and plumbing. With just a few minutes of routine checks each year, your dishwasher will stay stable, quiet, and safe—just as it was on installation day.
Troubleshooting Installation Issues
Even after careful installation, you might notice minor issues with your dishwasher’s positioning or stability. The most common problem is a tilting dishwasher, which often means one bracket isn’t fully secured. If the appliance leans forward when the door is open, check both brackets and tighten the screws evenly on each side.
Another frequent issue is rattling or vibration noises during wash cycles. This usually happens when the brackets are slightly loose or the dishwasher isn’t level.
Use a screwdriver to tighten each screw slightly, then test again by running a quick rinse cycle. If the noise continues, adjust the leveling legs until the sound disappears.
Sometimes, side-mount brackets pull loose from thin cabinets. To fix this, use longer screws or toggle bolts that can grip better. For side panels made of particleboard, adding small washers can distribute pressure and prevent the wood from cracking. Always ensure screws are snug but not over-tightened.
If your dishwasher doesn’t fit under the countertop, adjust the front leveling legs downward until it slides smoothly into place. Avoid forcing it—pressure can bend the mounting frame or damage the countertop edge.
Lastly, if your dishwasher door won’t close properly after installation, check that the appliance is perfectly flush with the cabinet front. Misalignment causes uneven pressure on the hinges. Loosen the bracket screws slightly, reposition the dishwasher, and retighten.
Most of these issues are easy to fix with simple adjustments. Taking a few extra minutes to troubleshoot ensures your installation stays safe, stable, and professional for years to come.
Most Common Questions About Installing Dishwasher Brackets
When you’re almost done with your dishwasher installation, a few last-minute questions can pop up in your mind. That’s completely normal — even seasoned DIYers pause before tightening the final screw, just to make sure everything’s done right. This section answers the most common questions people ask when securing their dishwasher brackets.
Can I install dishwasher brackets myself?
Yes, absolutely. Installing brackets is a beginner-friendly task that requires only basic tools and a little patience. As long as you follow the step-by-step guide and ensure your dishwasher is level, you’ll have no trouble completing it on your own.
Do I need both top and side brackets?
No, you only need one mounting style. Top-mount brackets are ideal for wooden countertops, while side-mount brackets work best for granite or quartz surfaces where drilling isn’t possible.
Are dishwasher brackets universal?
Most modern dishwashers come with universal brackets that fit multiple models. However, always check your manufacturer’s manual to ensure compatibility before purchasing a replacement kit.
Can I reuse old brackets from my previous dishwasher?
You can, but it’s not recommended. Old brackets might be bent, rusty, or weakened, which reduces their ability to hold the new dishwasher securely. New kits are inexpensive and ensure a more stable fit.
What if I have no wood under my countertop?
If your countertop is stone or solid surface, you’ll need a side-mount kit or adhesive mounting blocks that attach to the cabinets instead. These alternatives provide a strong hold without drilling into granite or quartz.
How tight should the screws be?
Tighten the screws until snug, but don’t over-tighten. Over-torquing can strip threads or bend the brackets, leading to instability.
Can I use adhesive instead of screws?
Yes, but only if your countertop doesn’t allow drilling. High-bond epoxy or metal adhesive pads can provide a reliable hold when screws aren’t an option, though screws remain the stronger choice.
How long does installation take?
For most DIYers, it takes about one hour from start to finish. Replacements or adjustments may take even less time once you’re familiar with the process.
Do I need to buy new brackets for replacement dishwashers?
Yes, it’s best to buy new brackets since mounting holes and frame designs can vary slightly between models. Using new hardware ensures a tight and accurate fit.
What happens if my dishwasher still wobbles after installation?
Check your leveling legs first, then confirm both brackets are tight and evenly positioned. If it still rocks, add a small washer under the bracket screw to increase grip and balance.
Conclusion
Installing dishwasher brackets might seem like a minor part of a kitchen upgrade, but it’s one of the most important steps in keeping your appliance stable and safe. These small metal supports prevent tilting, vibration, and long-term wear on your plumbing and cabinetry.
By taking the time to mount them correctly, you’re protecting both your dishwasher and the space around it.
The process is surprisingly simple once you have the right tools and understand the difference between top-mount and side-mount systems.
Even beginners can complete the installation in under an hour with proper guidance. The key is patience—measuring twice, aligning carefully, and tightening everything just enough to hold firm.
If you’re working with granite or quartz countertops, remember that side-mount brackets or adhesive mounting blocks are your best friends. They let you enjoy your premium countertops without risking cracks or damage. Always double-check alignment and test the door movement before calling the job done.
Properly installed brackets mean your dishwasher stays flush, quiet, and secure for years to come. You’ll open the door confidently, knowing your appliance isn’t going anywhere.
With a little time and care, you’ve turned what could be a frustrating project into a satisfying success story—and saved money on professional installation in the process.
So, grab your screwdriver, align those brackets, and take pride in knowing you installed your dishwasher the right way—clean, stable, and built to last.
I’m Emma J. Caldwell, the founder, lead writer, and home-cooking enthusiast behind KitchenGuideCo.com. With a background in culinary arts and over a decade of cooking experience in both professional and personal kitchens, I created this platform to demystify recipes, offer smart kitchen gadget reviews, and guide readers through meal prep with confidence and clarity.