You’ve just finished setting up your new dishwasher and are ready to run your first cycle. But before you press start, there’s one small yet crucial step that could decide whether your kitchen stays dry or ends up with a puddle under the sink.
Improperly installed drain hoses are one of the most common causes of dishwasher leaks. According to HomeAdvisor, nearly 25% of dishwasher water damage reports come from poorly sealed hose connections or missing clamps.
That’s why understanding how to install a dishwasher drain hose without leaks is essential for any homeowner or DIYer.
A dishwasher drain hose carries dirty water away from the machine into your sink drain or garbage disposal. If even one connection is loose or misaligned, water can slowly leak out, leading to mold, warped cabinets, or worse, hidden damage.
But don’t worry—this guide walks you through every detail of a proper installation, using easy-to-follow steps, safety tips, and pro-level techniques.
By the end, you’ll know exactly how to attach, secure, and test your drain hose so it stays watertight for years. So grab your tools, clear some space under the sink, and let’s make sure your dishwasher drains perfectly—without a single drop out of place.
Understanding the Role of a Dishwasher Drain Hose
The dishwasher drain hose may not look like much, but it performs one of the most important jobs in your kitchen. It’s the pathway that carries wastewater from the dishwasher to the plumbing system, ensuring every cycle ends with clean dishes and a dry kitchen floor.
A properly installed drain hose prevents water from leaking or flowing backward into the dishwasher. Without it, you risk standing water, foul odors, or even cross-contamination from your sink.
The hose works by connecting the dishwasher’s drain pump to either the garbage disposal or sink tailpiece, allowing the dirty water to exit safely.
Inside, the hose contains ridges that keep water flowing steadily, but if these become pinched, the drainage slows down. It’s also flexible enough to fit through tight spaces, yet sturdy enough to resist high water pressure during draining.
The key to preventing leaks is making sure each connection—dishwasher outlet, air gap or high loop, and sink drain—is properly sealed.
Most dishwashers use a high loop or air gap system to stop wastewater from flowing back into the machine. This safety feature is crucial for hygiene and should never be skipped.
Understanding how the drain hose works helps you install it more confidently and spot potential leak points before they become costly issues.
What does the dishwasher drain hose actually do?
It carries dirty water from the dishwasher into the sink drain or garbage disposal after every wash cycle.
Can a dishwasher work without a drain hose?
No, without a drain hose, wastewater has nowhere to go and will back up inside the dishwasher.
Why is the drain hose important for preventing odors?
It ensures dirty water exits completely, stopping trapped food particles and bacteria from causing bad smells.
How long should a dishwasher drain hose be?
Most hoses range from 6 to 10 feet. The length should be enough to reach the drain without stretching or sagging.
What happens if the drain hose is too long?
Excess hose can trap water or cause kinks that slow drainage and may lead to leaks or pump strain.
Can I connect the drain hose directly to the wall drain?
Only if it meets local plumbing codes and includes a high loop or air gap to prevent backflow.
Is the drain hose under constant pressure?
No, it only carries water during the drain cycle, but connections must be tight to prevent sudden leaks.
Tools and Materials You’ll Need for Leak-Free Installation
Before you begin, take a few minutes to gather all the tools and materials you’ll need. Having everything ready will make the process faster and reduce the chances of making a mistake halfway through. Most of these tools are easy to find and don’t require any special plumbing skills.
You’ll need a new dishwasher drain hose if the old one is damaged or too short. Most modern dishwashers come with one included, but it’s always a good idea to inspect it for kinks or cracks.
Next, grab two hose clamps—one for the dishwasher end and one for the drain connection. Use stainless steel screw clamps for a tighter seal that won’t corrode over time.
Other essentials include a screwdriver or pliers, measuring tape, and a utility knife for trimming the hose to fit perfectly.
Keep Teflon tape handy for threaded fittings and zip ties for securing the high loop under the counter. Place a towel or small bucket nearby to catch any residual water when disconnecting old hoses.
If your countertop is granite or quartz, an air gap kit or side mount clip may be required by building code. Always check your local plumbing requirements before you start.
Having these tools organized before you begin ensures you’ll complete your leak-free installation smoothly and efficiently.
Do all dishwashers come with a drain hose?
Most new models include one, but you may need to purchase clamps or an adapter separately.
What kind of clamps are best for a tight seal?
Stainless steel screw clamps are preferred since they don’t rust and can be tightened precisely.
Do I really need Teflon tape for installation?
Yes, it helps seal threaded connections and prevents small leaks at the fittings.
What if my countertop is granite or quartz?
You’ll need side-mount brackets or adhesive blocks since you can’t drill into stone.
Can I use plastic zip ties instead of metal clamps?
No, zip ties aren’t strong enough to handle water pressure or long-term vibration.
What’s the purpose of the bucket or towel?
It catches residual water from the old hose to prevent small spills during installation.
Should I replace my hose when replacing the dishwasher?
Yes, it’s best practice to install a new hose with every new dishwasher for maximum reliability.
Different Dishwasher Drain Hose Configurations Explained
Not every dishwasher drain setup looks the same, so it’s important to know which configuration applies to your kitchen.
The most common connection types are high loop, air gap, and direct garbage disposal hookup. Each method works to prevent dirty water from flowing back into your dishwasher.
The high loop method is the simplest and most widely used. It involves running the drain hose upward and attaching it under the countertop before looping it down to the drain connection.
This loop creates a gravity barrier that keeps wastewater from reversing into the dishwasher. It’s cost-effective and reliable when installed correctly.
The air gap method uses a small plastic or metal device mounted near the sink faucet. It separates the dishwasher’s drain hose from the plumbing system, ensuring air breaks the suction that could cause backflow. This setup is required by plumbing codes in some states, especially in newer homes.
Finally, there’s the garbage disposal connection, where the drain hose connects directly to the disposal’s side inlet. This is convenient but requires removing the small plastic knockout plug inside the inlet first. Forgetting this step is one of the most common causes of drainage issues.
Understanding these configurations helps you choose the best fit for your kitchen and prevents installation errors. Whether you use a high loop or air gap, the goal is the same—a watertight, leak-free, and efficient drainage system.
Which is better: a high loop or an air gap?
Both work well, but an air gap provides extra protection and is sometimes required by plumbing code.
How does the high loop method prevent backflow?
It raises the hose above water level so dirty sink water can’t siphon back into the dishwasher.
What if my kitchen doesn’t have an air gap hole?
You can use the high loop method and secure the hose under the counter with a clip or zip tie.
Do I need to remove the knockout plug in a garbage disposal setup?
Yes, it must be removed before connecting the hose or the dishwasher won’t drain.
Can I connect the drain hose to a double sink?
Yes, but it should always connect to the side with the garbage disposal or the primary drain line.
What’s the most common mistake in configuration?
Improper hose height—if it’s too low, wastewater can flow back into the dishwasher.
Can I use both an air gap and high loop together?
Yes, it’s safe but unnecessary; one properly installed method is enough to prevent backflow.
Step-by-Step Guide: How to Install a Dishwasher Drain Hose Without Leaks
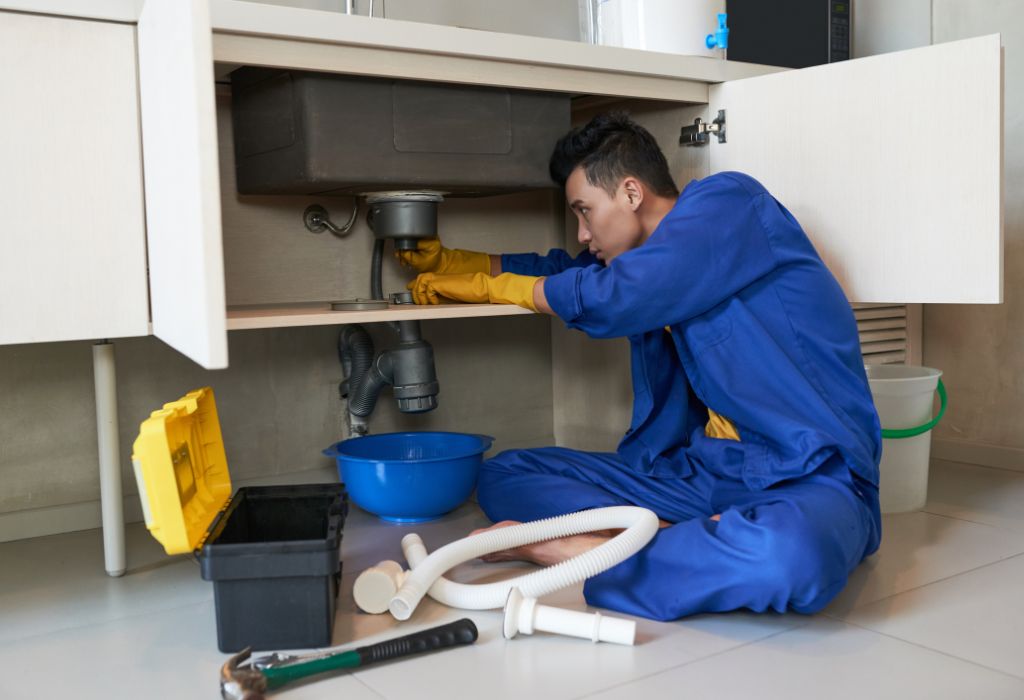
Now that you understand the setup, let’s walk through the installation process step by step. Start by turning off the dishwasher’s power supply at the breaker and closing the water valve. Safety always comes first. Then, gently pull the dishwasher out a few inches so you can reach the drain outlet at the back.
Step 1: Locate the drain connection point. It’s usually found near the dishwasher pump outlet on the back or side of the machine. Slide the drain hose over the outlet fitting, ensuring it fits snugly and securely.
Step 2: Attach the clamp. Place a metal hose clamp around the hose connection and tighten it evenly using a screwdriver. Avoid over-tightening because it can crack the plastic fitting or damage the hose itself.
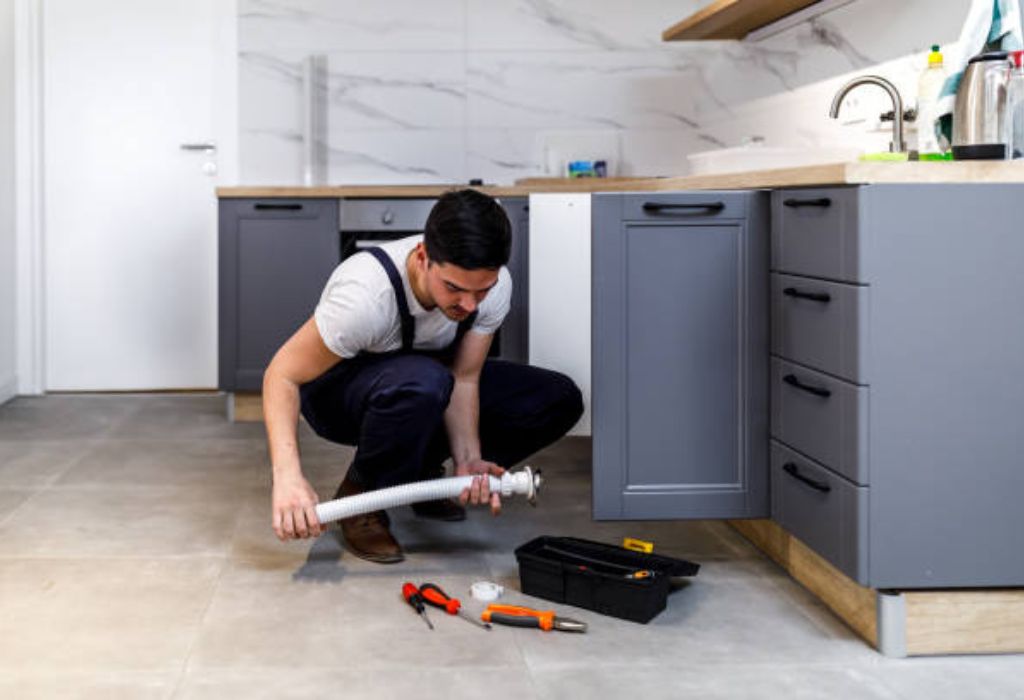
Step 3: Route the hose properly. Run it toward your sink or garbage disposal without twisting or bending. A kinked hose slows water flow and can create back pressure, which leads to leaks.
Step 4: Create a high loop or connect an air gap. Attach the hose under the countertop using a clip or zip tie to form a high loop. If your kitchen uses an air gap, connect the hose from the dishwasher to the inlet port on the air gap.
Step 5: Connect to the sink drain or garbage disposal. Push the other end of the hose onto the drain nipple or disposal inlet and secure it with another clamp. If using a garbage disposal, remove the plastic knockout plug before connecting.
Step 6: Test for leaks. Push the dishwasher back into place, reconnect power, and run a quick rinse cycle. Check every joint and clamp for moisture. If it’s completely dry after a few minutes of operation, your installation is leak-free.
Should I turn off both power and water before starting?
Yes, always shut off both to avoid accidents or electrical hazards during installation.
How do I know which side to attach the hose?
The dishwasher’s drain outlet is usually on the lower back or side—check your manual to confirm.
How tight should I make the hose clamps?
Tighten until snug and firm, but not so tight that the fitting bends or the hose tears.
Can I extend my hose if it’s too short?
Yes, using a dishwasher drain hose extension kit, but ensure the joints are double-clamped to avoid leaks.
What if the hose doesn’t fit my garbage disposal inlet?
Use a rubber adapter or universal connector to bridge the size difference safely.
How do I know if my routing has kinks?
If the hose bends sharply or collapses at corners, it needs to be rerouted or trimmed.
What’s the best way to test for leaks afterward?
Run a rinse cycle and place dry paper towels under each connection to check for moisture.
How to Ensure a Tight, Leak-Free Seal
A leak-free seal is all about precision and pressure balance. The key is to use the right clamp size and apply just enough force to keep the hose from slipping. A stainless-steel screw clamp gives more control than a spring clamp and allows even tightening.
Before securing any connection, make sure the hose end is clean and smooth. Dirt, soap residue, or old Teflon tape can prevent a proper seal. If you’re connecting to a threaded fitting, wrap Teflon tape clockwise around the threads three times before tightening. This adds an extra layer of leak protection.
When securing the hose to the dishwasher outlet or disposal, make sure the clamp is positioned over the ridge of the fitting. This prevents the hose from slipping off when water pressure increases. Tighten slowly, alternating sides of the clamp for even compression.
After setup, run a quick rinse cycle and inspect for any slow drips. A simple trick is to place a dry paper towel under each connection. If it stays dry after the cycle, your seal is perfect. If it’s damp, slightly tighten the clamp or re-seat the hose.
Remember, most leaks occur not because of loose clamps but because of uneven tightening or misaligned hoses. Take your time, secure both ends properly, and your drain system will stay watertight for years.
Should I use plumber’s tape or putty for sealing?
Use Teflon tape for threaded joints and plumber’s putty only for metal-to-metal seals.
How can I tell if a clamp is leaking?
You’ll see small drips or hear a faint hissing sound during draining—tighten slightly to stop it.
Can a worn-out hose cause invisible leaks?
Yes, micro-cracks can slowly drip behind cabinets, so replace old hoses immediately.
How do I prevent leaks at the air gap?
Ensure both inlet and outlet hoses are clamped properly and the air gap cap is seated tightly.
What’s the most leak-prone connection point?
The joint at the garbage disposal or sink tailpiece—this area experiences the highest water pressure.
Is silicone sealant recommended?
Only in small amounts around fittings, but don’t rely on it in place of proper tightening.
How soon should I test after installation?
Immediately—run a rinse cycle and inspect while water drains to ensure no leaks appear.
Common Mistakes That Cause Dishwasher Drain Leaks
Even a small oversight during installation can lead to frustrating leaks later. One of the biggest mistakes is forgetting to remove the knockout plug inside the garbage disposal’s inlet. If it’s left in place, water can’t drain properly and will back up into the dishwasher.
Another common issue is loose or misaligned hose clamps. When clamps aren’t tightened evenly, water seeps out slowly over time. Always double-check that each clamp is snug and positioned correctly over the connector ridge.
Some homeowners also use the wrong type of hose. Standard hoses might not fit newer dishwashers or could be too short, causing strain at the connections. Always measure before cutting or attaching anything.
Improper hose routing is another major cause of leaks. Avoid running the hose downhill from the dishwasher directly to the drain without a high loop. Without that loop, dirty sink water can flow back into the dishwasher.
Lastly, over-tightening screws or clamps can cause cracks or distortions in plastic fittings. Once that happens, even new seals can’t fix the issue. By avoiding these common mistakes, you can enjoy a clean, efficient, and leak-free dishwasher setup that lasts for years.
Why does my new dishwasher leak after installation?
Usually because a clamp isn’t tight enough or the hose isn’t seated fully on the outlet.
What happens if I forget the knockout plug?
The dishwasher will fill up with dirty water instead of draining through the garbage disposal.
Can over-tightening clamps cause leaks?
Yes, it can deform plastic fittings and create micro-cracks that leak under pressure.
Is reusing old hoses a bad idea?
Yes, old hoses can be brittle, cracked, or stretched, making them difficult to seal properly.
Why is my drain hose sweating or dripping externally?
This often happens due to condensation—insulate the hose or improve kitchen ventilation.
Can improper hose routing cause noise or vibration?
Yes, tightly bent hoses can rattle during draining; rerouting them can fix this issue.
Should I use tape instead of clamps for a quick fix?
No, tape cannot hold water pressure—always use proper clamps.
How to Replace an Old or Damaged Drain Hose
Replacing an old or damaged dishwasher drain hose is a straightforward process but requires careful attention. Over time, hoses can crack, stiffen, or develop mineral buildup that restricts drainage. If you see discoloration, mold, or small cracks, it’s time for a replacement.
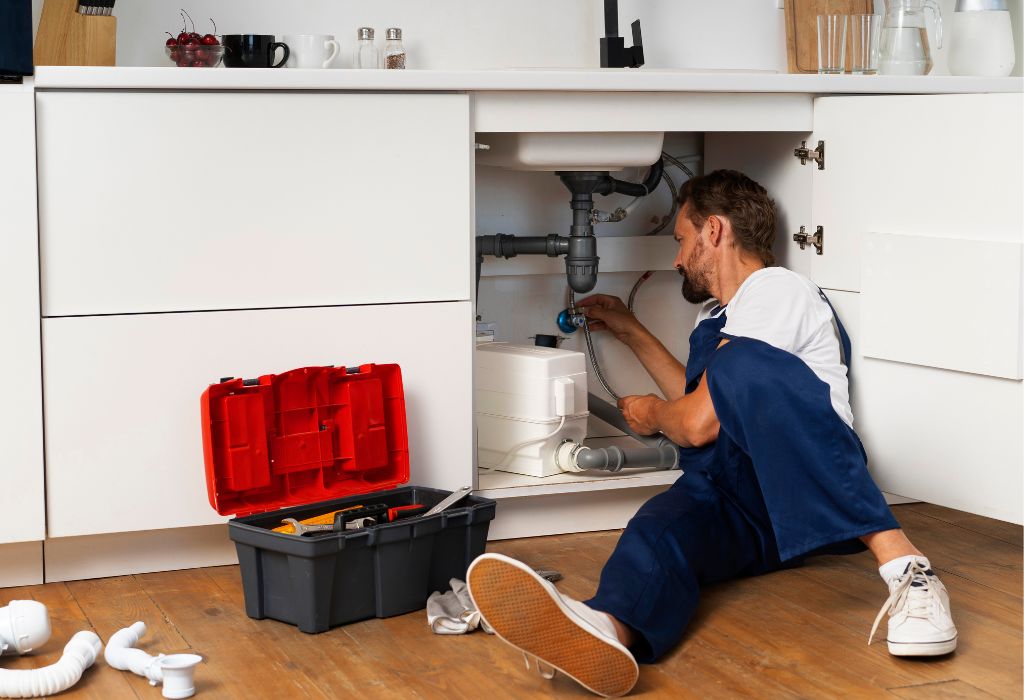
Start by turning off the dishwasher’s power and water supply. Gently pull the dishwasher away from the wall until you can reach the drain hose at the back. Place a towel or bucket underneath to catch any leftover water. Loosen the hose clamps on both ends and detach the hose completely.
Before installing the new one, check that it matches the same diameter and length as the old hose. Slide one end onto the dishwasher’s drain outlet and secure it with a clamp. Route it properly toward the sink drain or disposal, following the same path as before.
Trim any excess hose with a utility knife so it fits neatly without excess slack. Connect the other end to the drain or disposal port and tighten the second clamp. Once both ends are secured, test the system by running a rinse cycle.
Replacing a drain hose every 5–7 years is a good habit to prevent leaks and odors. It’s a quick, affordable maintenance step that keeps your dishwasher draining efficiently and your kitchen dry.
How do I know if my drain hose needs replacement?
Cracks, leaks, moldy smell, or stiffness indicate it’s time to replace it.
Is replacing the hose expensive?
Not at all—most replacement kits cost under $20 and include clamps.
Can I remove the old hose without pulling the dishwasher out?
In most cases, no; you’ll need to pull it slightly forward to reach the rear connection.
Should I lubricate the fittings when installing a new hose?
A little water or mild soap can help slide it on, but avoid grease or oil.
Can I reuse my old clamps?
Only if they’re rust-free and still tighten evenly, though new ones are safer.
How long does replacement take?
Usually less than an hour, even for beginners.
Should I test for leaks after replacing?
Always—run a short rinse cycle and inspect each joint carefully.
Safety Tips and Maintenance for Long-Term Leak Prevention
A successful installation is just the beginning—proper maintenance ensures your dishwasher remains leak-free for years. Every six months, inspect the hose for cracks, stiffness, or discoloration. Early signs of wear can help you replace it before it causes a problem.
Keep the area under your sink dry and clean. If you ever notice moisture, tighten your clamps or reapply Teflon tape to threaded fittings. Always check that the hose’s high loop remains secure and above the drain connection level.
Avoid placing heavy items or cleaning supplies on top of the hose, as this can flatten or weaken it over time. When doing deep cleans or renovations, make sure not to kink or bend the hose accidentally.
If your dishwasher starts draining slowly, check both ends of the hose for clogs before calling a technician. A simple flush with warm water or vinegar can help clear minor buildup.
Routine maintenance may seem small, but it prevents water damage and extends the lifespan of your entire dishwasher system. Staying proactive is the easiest way to guarantee a leak-free, worry-free kitchen.
How often should I check my hose connections?
Inspect them every six months or after moving the dishwasher.
What’s the best way to prevent leaks long-term?
Keep the hose supported, secure the high loop, and retighten clamps yearly.
Can cleaning products damage the hose?
Yes, harsh chemicals can weaken plastic—avoid bleach or solvents near the hose.
What if I smell mildew under the sink?
It may indicate a slow leak—wipe the area and inspect for moisture immediately.
Can I insulate my drain hose?
Yes, insulating reduces condensation and protects it from temperature changes.
Should I replace the hose after a kitchen renovation?
Yes, vibrations or repositioning can loosen fittings—replacing ensures a fresh seal.
What happens if I ignore a small leak?
Small drips can cause cabinet rot, mold, and water damage over time—always fix leaks early.
Conclusion
Installing a dishwasher drain hose without leaks might seem intimidating, but with the right approach, it’s a simple and rewarding project. Every successful installation comes down to careful preparation, correct routing, and solid, well-sealed connections.
A properly installed drain hose ensures your dishwasher runs quietly, drains efficiently, and protects your cabinets from moisture. Following the steps in this guide will help you prevent leaks, backflow, and unnecessary service calls.
Remember to check your connections regularly and replace the hose every few years. Whether you’re connecting to a garbage disposal or using an air gap, precision and patience make all the difference.
By mastering this small but vital skill, you’re not just saving money—you’re protecting your kitchen from long-term water damage. Take pride in the fact that you’ve completed a task many homeowners avoid, and enjoy the peace of mind that comes with a perfectly leak-free dishwasher.
I’m Emma J. Caldwell, the founder, lead writer, and home-cooking enthusiast behind KitchenGuideCo.com. With a background in culinary arts and over a decade of cooking experience in both professional and personal kitchens, I created this platform to demystify recipes, offer smart kitchen gadget reviews, and guide readers through meal prep with confidence and clarity.