A dishwasher is one of the most convenient kitchen appliances you can own, but its performance depends heavily on a properly installed water line. Installing the water supply correctly ensures steady pressure, leak-free operation, and long appliance life.
Whether you’re replacing an existing unit or installing a new one, learning how to install a dishwasher water line the right way prevents future headaches. According to the Association of Home Appliance Manufacturers, over 30 percent of dishwasher service calls involve water-supply issues that could have been avoided during installation.
This comprehensive guide explains every step — from choosing fittings and routing lines to connecting shut-off valves and testing for leaks. Even beginners can follow along confidently and achieve professional-grade results.
Understanding the Dishwasher Water Line System
A dishwasher’s water line supplies clean hot water from the home’s plumbing to the machine’s inlet valve. The inlet valve opens and closes automatically, allowing the appliance to fill as needed during each cycle.
Most dishwashers use a 3/8-inch compression water line connected to a shut-off valve under the sink. The line may be flexible braided stainless steel, copper, or reinforced plastic depending on local plumbing codes and your preference.
When installed properly, the line maintains steady pressure and temperature without vibration or dripping. Poorly installed connections, however, can lead to leaks, slow filling, or even flooding.
What is a water supply line?
It’s the tubing that carries hot water from your plumbing to the dishwasher’s inlet.
Can I use the same line from my old dishwasher?
Yes, if it’s in excellent condition and fits securely; otherwise, replace it.
How long should the water line be?
Usually 5–6 feet, long enough to reach comfortably without kinking.
What temperature water should feed the dishwasher?
Between 120 °F and 150 °F for optimal cleaning.
Can I use cold water instead?
Not recommended — it reduces cleaning efficiency and may leave residue.
Tools and Materials Required
Before starting, gather all necessary materials to avoid interruptions during installation. You’ll need:
- Adjustable wrench and channel-lock pliers
- Compression fittings (3/8-inch)
- Teflon or plumber’s tape
- Drill with hole-saw bit (if routing through cabinets)
- Braided stainless-steel water line or copper tubing
- Towels or small bucket for residual water
- Shut-off valve (if one isn’t already installed)
Do I need plumber’s putty for connections?
No, compression fittings form their own seals; use Teflon tape instead.
What kind of tubing lasts longest?
Braided stainless-steel is durable, flexible, and kink-resistant.
Is copper still acceptable?
Yes, but it requires precise bending and is prone to pinhole leaks over decades.
Should I buy extra washers?
Yes, keep spare rubber washers on hand for leak prevention.
Can I reuse an old shut-off valve?
Only if it turns freely and seals completely — otherwise replace it.
Locating the Water Supply Connection
Most dishwashers connect to the hot-water line beneath the kitchen sink. Identify the existing shut-off valve or install a new dual-outlet valve if your sink and dishwasher share the same supply.
The dishwasher water line should attach to the hot-water side, usually the left valve under the sink. Confirm by turning on the faucet and feeling the temperature after a few seconds.
Plan the route from the valve to the dishwasher’s inlet port. The tubing should pass through the cabinet wall behind the sink base, avoiding sharp bends or edges that could rub through the line over time.
Can I connect to the cold line?
Avoid it; dishwashers rely on hot water to dissolve detergent effectively.
Do I need a separate shut-off valve?
Yes, local codes typically require a dedicated shut-off for the appliance.
What if my valve threads don’t match the hose fitting?
Use an adapter or replace the valve with a compatible compression outlet.
Can I run the line through the floor?
Yes, if cabinetry space is limited, but insulate it against temperature swings.
Should the line be visible or hidden?
It’s usually routed through cabinets for protection and a clean appearance.
Installing or Replacing the Shut-Off Valve
If your sink lacks a dedicated dishwasher valve, install one on the existing hot-water supply. Begin by shutting off the home’s main water supply. Place a bucket underneath the pipe to catch any residual water.
Cut the copper or PEX pipe using a pipe cutter, then attach a dual-outlet stop valve — one outlet for the faucet and the other for the dishwasher. For compression-type connections, slide the nut and ferrule onto the pipe before tightening the valve with a wrench.
Once secured, reopen the main water line and check for leaks. The new valve should turn smoothly and stop water flow completely when closed.
Do I need plumber’s tape here?
Yes, wrap male threads before tightening compression nuts.
Can I install the valve on a PEX line?
Use a push-fit or crimp-style valve approved for PEX.
Should I call a plumber for this step?
Only if you’re unfamiliar with cutting or joining pipes.
How tight should the fittings be?
Firmly hand-tight, then an additional quarter turn with a wrench.
How do I confirm no leaks?
Wipe joints dry and inspect after five minutes under pressure.
Routing the Water Line Through Cabinets
Measure and mark a straight path between the shut-off valve and the dishwasher opening. Drill a 1-inch hole through the cabinet wall near the back corner to protect the line from foot traffic and utensil storage.
Feed the flexible water line through the opening, keeping the path smooth and free of obstructions. Avoid sharp turns or pinches that could reduce flow. If routing through multiple cabinets, use grommets or rubber bushings in each hole to prevent abrasion.
Leave extra slack near the dishwasher end to allow for pulling the appliance forward during maintenance. Secure the line loosely with cable clips to prevent rattling but allow movement for vibration damping.
Can I drill through metal cabinet walls?
Yes, but use a step-bit and file the edges smooth afterward.
Should I route above or below the drain hose?
Below, to prevent cross-contamination and simplify servicing.
Do I insulate the line?
Insulating is optional but reduces heat loss in long runs.
What if the hose kinks?
Straighten it immediately — kinks restrict flow and stress fittings.
How far from the floor should it run?
Typically 3–4 inches above cabinet base for easy access.
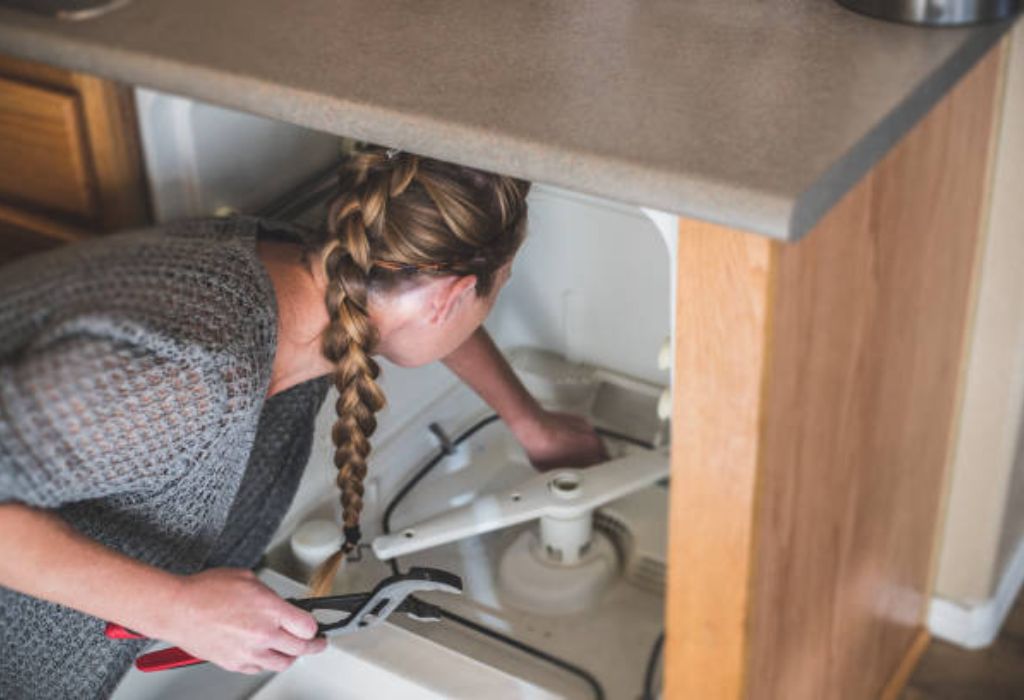
Connecting the Water Line to the Dishwasher Inlet
Locate the dishwasher’s inlet valve, usually positioned at the front-left corner underneath the unit. Remove the protective cap from the threaded port.
Attach the water-line fitting to the inlet valve by hand first, ensuring threads align perfectly. Tighten with a wrench one-quarter turn beyond hand-tight. Do not over-tighten; the brass threads can strip easily.
For copper lines, use a 90-degree elbow fitting to prevent bending stress. Stainless-steel braided lines often have built-in elbows to simplify alignment.
Should I use Teflon tape here?
Yes, on male threads only; don’t use sealant paste.
What if my dishwasher came with a proprietary fitting?
Use the manufacturer’s adapter for proper sealing.
Can I shorten the water line?
Yes, but cut cleanly and reattach with a new compression ferrule.
Does the inlet have a filter screen?
Many do — ensure it’s clean before connection.
Can I overtighten the connection?
Yes, overtightening flattens washers and causes leaks.
Securing the Connection to the Shut-Off Valve
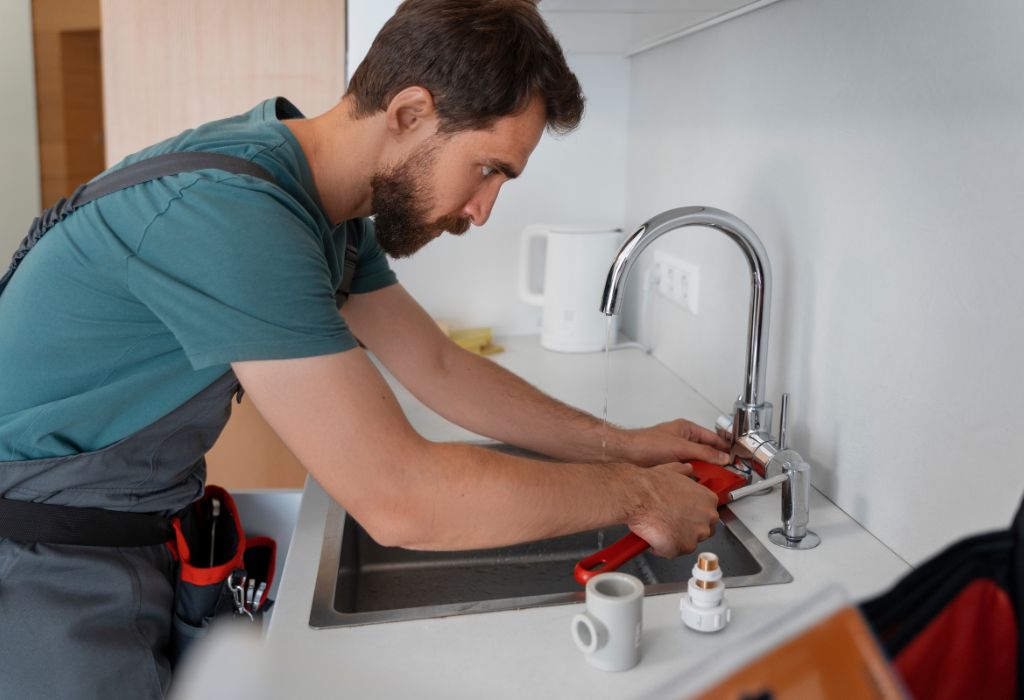
At the other end, attach the water line to the valve outlet under the sink. Ensure the ferrule and nut are positioned correctly before threading the line. Tighten by hand and finish with a wrench using moderate pressure.
Once the connection is secure, open the valve slowly to fill the line and release trapped air. Check all joints and couplings for drips using a paper towel. If moisture appears, tighten slightly until dry.
Keep the valve easily accessible for emergency shut-off. Avoid storing heavy items that could crush the line or dislodge fittings.
Can I leave the valve fully open?
Yes, but close it during long absences for safety.
How do I detect a micro-leak?
Wrap joints in tissue; even a single drop will leave a mark.
What if the line vibrates when filling?
Add foam insulation or a clamp to absorb motion.
Do I need a pressure regulator?
Only if household pressure exceeds 80 PSI.
Should I install a water hammer arrestor?
Yes, in homes with noticeable pipe banging when valves close.
Testing the Dishwasher Water Line
Testing is the most critical step. Plug in the dishwasher and run a short fill cycle while inspecting all visible joints. Keep a flashlight handy to check behind the appliance and beneath the sink simultaneously.
If leaks appear, stop the cycle immediately, drain the water, and re-tighten the affected connection. Small leaks usually result from loose fittings or misaligned washers.
After confirming everything is dry, complete a full wash cycle to verify consistent filling and proper water temperature.
Should I use hot or cold water for the test?
Hot, since that’s the line’s normal operating temperature.
Can leaks appear later?
Yes, recheck after 24 hours of use.
What if the dishwasher fills slowly?
Clean the inlet screen or confirm that the valve is fully open.
Why is there a humming sound?
Normal valve operation; only address if unusually loud.
Should I insulate around the line afterward?
Optional, but helps prevent condensation in humid environments.
Common Mistakes to Avoid
Even simple projects go wrong if rushed. Avoid these frequent errors:
- Over-tightening fittings — crushes washers and causes leaks later.
- Skipping thread tape — leads to seeping joints.
- Connecting to the cold-water line — reduces wash efficiency.
- Routing too close to electrical wiring — violates code and risks shock.
- Leaving no service slack — complicates future maintenance.
Why does over-tightening cause leaks?
It distorts sealing surfaces and weakens the metal threads.
Can I reuse old compression rings?
No, always use new ferrules for proper sealing.
What if my water line runs long distance?
Use rigid copper with elbows to minimize pressure drop.
Should I glue joints?
Never — compression fittings should remain serviceable.
Is PVC allowed for water supply?
No, only rated tubing such as PEX, copper, or braided stainless.
Maintenance and Inspection After Installation
Check all joints quarterly for signs of corrosion, discoloration, or mineral buildup. Tighten lightly if necessary, but never exceed original torque.
Run hot water at the sink before starting each dishwasher cycle; this ensures the appliance fills with pre-heated water and shortens cycle time.
Replace flexible hoses every five to seven years, or immediately if bulges or rust appear. Inspect the shut-off valve periodically to ensure it turns freely.
Can I clean the water line?
No, replace it instead; cleaning may weaken internal layers.
How long should the valve last?
Typically over a decade if kept dry and exercised regularly.
Why do fittings corrode?
Moisture accumulation from minor leaks or condensation.
Should I wrap the hose with insulation?
Optional, but it prevents exterior sweating in humid kitchens.
Can mineral buildup affect flow?
Yes, flush occasionally by disconnecting and running water briefly.
Upgrading to Modern Water Line Systems
Modern dishwashers often feature quick-connect kits that simplify water-line installation. These use push-to-connect fittings compatible with copper, PEX, or CPVC tubing. They require no wrenches and provide leak-proof seals instantly.
Another upgrade is installing a dual shut-off valve with integrated compression ports. This allows independent control of both the sink and dishwasher without extra fittings.
If you’re renovating, consider PEX supply lines for flexibility and corrosion resistance. PEX tubing withstands high temperatures and is easier to snake through cabinets.
Are push-fit connectors reliable long-term?
Yes, most are rated for 25 years when installed correctly.
Can I convert copper to PEX?
Yes, using push-fit couplers or crimp adapters.
Are stainless lines universal?
Generally, but verify length and thread type before purchase.
Do quick-connects need tape or paste?
No, their internal O-rings create the seal.
Should I upgrade older plastic hoses?
Absolutely; they’re prone to cracks under heat and pressure.
Energy Efficiency and Water-Saving Tips
Proper water-line installation contributes to both energy and water efficiency. Ensuring full hot-water flow reduces cycle length and eliminates the need for extra rinses.
To save water, only run full loads and scrape dishes instead of pre-rinsing. Install a flow-restricting valve if your supply pressure is unusually high, which maintains optimal dishwasher performance while reducing waste.
According to the EPA’s WaterSense program, efficient dishwashers can save over 3,000 gallons annually when paired with correct plumbing and water-temperature settings.
Does lower pressure save energy?
Yes, but maintain at least 20 PSI for proper fill rate.
Should I lower water-heater temperature?
120 °F is ideal — higher adds cost without cleaning benefit.
Do long lines waste energy?
Slightly; insulate them to retain heat.
Can leaks affect energy bills?
Yes, small drips waste hot water continuously.
Is it okay to use greywater for dishwashers?
No, only potable water should connect to kitchen appliances.
Troubleshooting Water Line Issues
If you notice slow fills or partial cycles, inspect the water line for kinks, debris, or valve blockage. Shut off power and remove the lower access panel to reach the inlet valve. Disconnect the line, then flush it briefly to clear any sediment.
For leaks, identify whether the problem originates from the inlet, valve, or fitting. A single worn washer can cause persistent dripping. Replace defective parts immediately to prevent flooring damage.
Why is my dishwasher noisy when filling?
Air trapped in the line or loose clamps — bleed air and retighten.
Why does water pool at the bottom after cycles?
Check the inlet valve; it may not close fully.
Why does pressure drop suddenly?
Another fixture may share the supply line; use a dedicated valve.
Can limescale block the inlet?
Yes, especially in hard-water regions — clean the screen regularly.
Why do fittings corrode quickly?
High humidity and lack of airflow under the sink accelerate oxidation.
Safety Precautions and Final Checklist
Before finishing, verify these critical safety points:
- Power is off at the circuit breaker.
- The water valve closes fully without sticking.
- All fittings are hand-tight plus one-quarter wrench turn.
- The hose path is smooth with no tension or contact with electrical wiring.
- Leak test has been performed for at least 10 minutes under pressure.
After confirmation, reinstall the dishwasher’s toe-kick panel and secure hoses neatly under the sink. Keep the owner’s manual nearby for future maintenance reference.
Do I need a permit for installation?
Usually not for replacements, but check local codes.
Is Teflon tape flammable?
No, it’s safe for hot-water applications up to 500 °F.
Should I disconnect after each use?
No, just close the shut-off valve when leaving home for extended periods.
Can vibration loosen fittings over time?
Minimal risk if installed correctly; recheck annually.
What’s the average service life of a water line?
Five to seven years for flexible, ten or more for copper or PEX.
Conclusion
Installing a dishwasher water line may look complicated, but it’s a straightforward task when you follow the correct procedure. With the right tools, materials, and careful attention to sealing connections, you can achieve a reliable, leak-free setup that performs like a professional installation.
A properly installed water line ensures your dishwasher fills efficiently, uses the correct water temperature, and runs safely for years. It also protects your cabinets and flooring from hidden leaks that can cause expensive damage over time.
Take the time to double-check every joint, use quality fittings, and perform a final leak test before pushing the dishwasher back in place. Once completed, you’ll have a dependable water supply system that keeps your dishwasher running smoothly — saving time, water, and energy with every wash cycle.
I’m Emma J. Caldwell, the founder, lead writer, and home-cooking enthusiast behind KitchenGuideCo.com. With a background in culinary arts and over a decade of cooking experience in both professional and personal kitchens, I created this platform to demystify recipes, offer smart kitchen gadget reviews, and guide readers through meal prep with confidence and clarity.