Installing a dishwasher where there was none in your kitchen might sound like a project meant only for professional remodelers — but it’s absolutely something a homeowner can tackle with the right preparation.
The reality is, modern dishwashers are designed with flexible plumbing and wiring options that make them surprisingly simple to add, even in older kitchens that weren’t originally built with space for one.
Think about how much time you spend every week standing over the sink. According to the U.S. Environmental Protection Agency (EPA), the average household can save over 230 hours a year and nearly 3,000 gallons of water by switching from handwashing to a dishwasher. That’s not just convenience — it’s efficiency and sustainability in one small upgrade.
Still, when your kitchen has no existing dishwasher setup, you’ll need to create space, extend plumbing lines, and ensure safe electrical access. The key isn’t brute force — it’s planning and precision.
Every connection you make, from the hot water supply to the drain hose, must be sealed and secure to prevent future leaks. Every wire needs to be properly grounded to avoid electrical hazards.
In this detailed guide, you’ll learn exactly how to install a dishwasher where there was none in your kitchen — step by step. We’ll cover how to choose the right location, how to prepare your cabinets, what plumbing and electrical upgrades are required, and how to test your setup for leaks or noise.
By the end, you’ll have the confidence to transform your kitchen into a more functional, modern space — saving time, water, and effort with every load of dishes.
Choosing the Right Location in the Kitchen

Before you even think about drilling holes or running water lines, the most crucial step in installing a dishwasher where there was none is selecting the perfect spot.
The right location determines not only how smoothly your installation goes but also how efficiently your dishwasher will perform over time.
In most kitchens, the best location is directly next to the sink. This placement allows easy access to the existing plumbing system — including the hot water supply, drainpipe, and electrical outlets — which minimizes the amount of modification required.
The closer your dishwasher is to these utility connections, the easier and more cost-effective your installation will be.
Start by measuring the available cabinet space. A standard built-in dishwasher is typically 24 inches wide, 24 inches deep, and 34 inches high.
If your cabinets were custom-built without a dishwasher in mind, you may need to remove a 24-inch base cabinet next to the sink. Make sure the new space aligns with your countertop height so the dishwasher fits seamlessly beneath it.
Next, check for clearance and access. When the dishwasher door is fully open, it should not block drawers, cabinets, or walkways. You should also be able to load and unload dishes comfortably without feeling cramped. If you have a corner sink, consider placing the dishwasher on the longer run of countertop space to prevent the doors from clashing.
Also pay attention to floor level. Kitchens with uneven floors can cause dishwashers to vibrate or leak. Use a carpenter’s level to check, and adjust with shims or leveling feet as needed.
Finally, ensure the area has proper ventilation and accessibility for future maintenance. You’ll want to pull the unit out occasionally for cleaning, filter replacement, or hose inspection, so avoid boxing it into a tight corner.
Pro Tip: Keep your dishwasher within three feet of the sink. This short distance helps prevent drainage issues, reduces water pressure loss, and minimizes the need for additional plumbing lines — saving you both time and money during installation.
Checking Plumbing and Electrical Requirements
Once you’ve chosen the right spot for your dishwasher, the next step is to make sure your kitchen has the essential plumbing and electrical connections to support it.
This is where many first-time installers feel intimidated — but with a bit of inspection and planning, it’s straightforward to set up the necessary utilities safely and efficiently.
Start by opening the cabinet beneath your sink. You’ll need to identify three key components: a hot water line, a drain connection, and electrical access. Most dishwashers connect to the same hot water supply that feeds your kitchen faucet.
If your sink uses copper or PEX pipes, installing a T-adapter valve on the hot water line will allow you to branch off a new supply to the dishwasher. Always wrap the threaded joints with Teflon tape to prevent leaks.
Next, check the drain system. The dishwasher’s drain hose must connect to the sink’s drainpipe or garbage disposal. If there’s no disposal, you can install a Y-branch tailpiece on the drainpipe beneath the sink to accept the dishwasher hose.
Make sure the hose will loop upward before connecting — this “high loop” prevents dirty sink water from backflowing into the dishwasher, which is required by many plumbing codes.
Electrical requirements are equally important. Modern dishwashers typically run on 120 volts, 60 Hz power, and should be connected to a dedicated 15- or 20-amp circuit. Some models use a plug-in power cord, while others must be hardwired.
If there’s no outlet nearby, have an electrician install one inside the adjacent cabinet. Never use extension cords for permanent appliances — they’re unsafe and violate electrical codes.
Finally, ensure the breaker panel can handle the added load without tripping. If your kitchen’s wiring is outdated, upgrading to a GFCI-protected outlet may be required for safety.
Safety Tip: Always shut off both the water and electricity at the main source before working. Double-check with a voltage tester and shutoff valve to confirm everything is safe before beginning any installation steps.
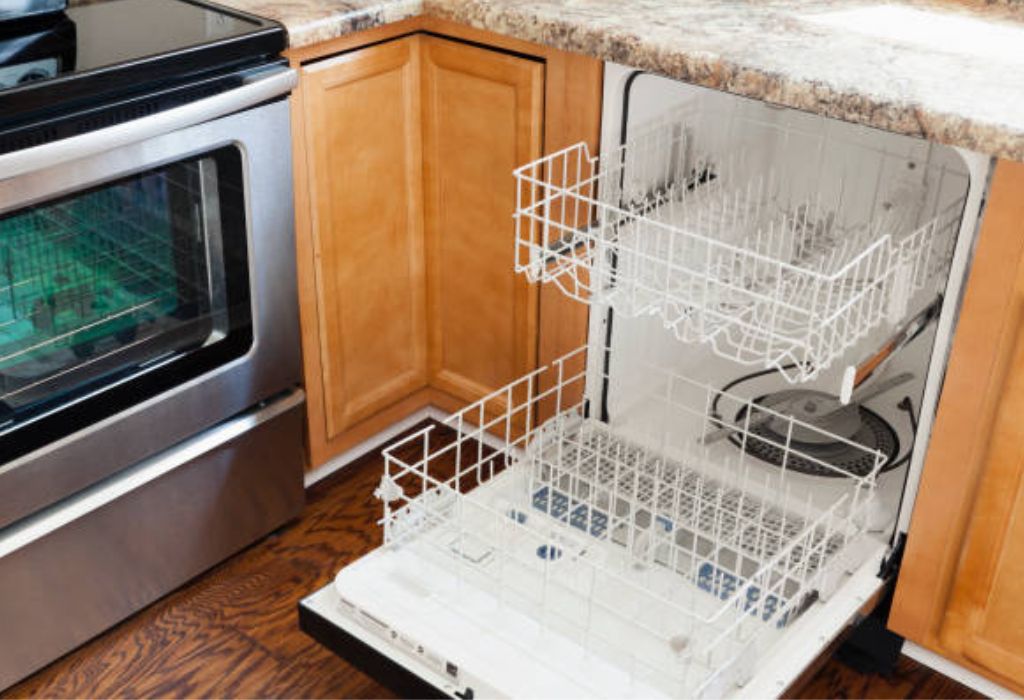
Preparing the Space for Dishwasher Installation
When installing a dishwasher in a kitchen that never had one, creating the proper space is often the most time-consuming but rewarding step. You’ll be converting an unused cabinet area into a built-in appliance space that fits neatly under your countertop and connects to water, power, and drainage systems.
Begin by identifying the section of cabinetry you’ll remove—most homeowners choose a 24-inch-wide base cabinet beside the sink. This position keeps your new dishwasher close to the plumbing and ensures easy access for maintenance.
Use a screwdriver or drill to remove the cabinet doors, shelves, and face frame carefully. If the countertop is supported by the cabinet you’re removing, add temporary braces or install a small crossbeam to hold it securely.
Once the space is open, check the floor level. Uneven floors can cause leaks, vibration, or misaligned doors. Use a carpenter’s level and add thin shims or plywood to even out any low areas.
Make sure the surface is flat and sturdy enough to support a fully loaded dishwasher, which can weigh over 100 pounds when operating.
Now, you’ll need to drill access holes through the side or back wall of the cabinet to feed the water line, drain hose, and power cable. Each hole should be about 1.5 inches in diameter, large enough for connections to pass through without forcing or kinking them.
Keep these openings smooth and centered near the bottom back corner of the cabinet to stay hidden and tidy.
Before sliding the dishwasher in, add a layer of insulation padding or soundproof matting around the opening if possible. This reduces vibration and noise during operation, especially on wooden or tile floors.
Finally, clear any debris, vacuum dust, and confirm that the new space allows at least one inch of clearance on each side for ventilation. A clean, properly sized cavity ensures your installation will go smoothly and your dishwasher will sit flush with the rest of your cabinetry.
Pro Tip: Line the base of the cavity with a thin vinyl sheet or tray—this can catch minor leaks and prevent water from damaging wooden floors or cabinet bases later on.
Adding Plumbing Connections
Once the cabinet space is ready, it’s time to connect the plumbing—arguably the most essential step in installing a dishwasher where there was none. A reliable water connection ensures that your dishwasher performs efficiently and remains leak-free for years to come.
Start by locating the hot water supply valve under your sink. This valve usually connects to the kitchen faucet. To create a new line for the dishwasher, you’ll need a T-adapter fitting or dual shut-off valve.
Turn off the main water supply, then unscrew the existing connection from the faucet and attach the T-adapter to the hot water valve. Make sure to wrap Teflon tape around the threaded ends before tightening to prevent any leaks.
Next, connect a stainless steel braided water line—typically 3/8-inch diameter—to the T-adapter. These lines are flexible, durable, and resistant to corrosion, making them ideal for dishwasher installations.
Run this water line through the hole you drilled earlier and attach it to the dishwasher’s inlet valve, located at the bottom front corner of the machine. Tighten the connection securely with an adjustable wrench, but avoid overtightening to prevent damage to the threads.
After completing the connection, turn the water supply back on slowly and check all joints for leaks. A small drip now can lead to major problems later, so dry the area completely and monitor for moisture for a few minutes.
In older homes, you might find that the existing shut-off valve doesn’t support a T-adapter or that the pipe fittings are worn. If that’s the case, replace the valve entirely with a modern compression-style valve designed to handle multiple outputs. It’s a small investment that improves long-term reliability.
Finally, secure the water line along the cabinet wall using plastic clips or cable ties to keep it from kinking when you push the dishwasher into place.
Pro Tip: Before connecting the dishwasher end, run the water through the line into a bucket for a few seconds to clear out any debris or trapped air. This simple step prevents clogs and ensures smooth water flow once you start using your dishwasher.
Electrical Wiring and Safety Setup
With the plumbing complete, the next step is to provide your dishwasher with a safe and dedicated power connection. Since dishwashers operate using both water and electricity, following proper electrical safety practices is absolutely critical.
Begin by confirming the power requirements of your dishwasher model. Most standard dishwashers in the U.S. require 120 volts on a 15- or 20-amp dedicated circuit.
Check your home’s breaker panel to ensure there’s an available circuit that won’t be overloaded by other appliances like refrigerators or microwaves. If needed, hire an electrician to install a separate circuit line — this ensures consistent performance and prevents tripping breakers.
There are two main electrical connection methods for dishwashers: plug-in power cord or hardwired connection. If your unit uses a plug-in cord, install a grounded outlet inside the adjacent cabinet or directly behind the dishwasher cavity. This outlet should be placed high enough off the floor to avoid accidental contact with water.
For hardwired connections, start by turning off the power at the breaker. Feed the electrical cable through a strain relief connector into the dishwasher’s junction box, which is typically located near the front base panel.
Connect the wires following standard color codes: black to black (hot), white to white (neutral), and green to ground. Secure the connections with wire nuts and gently tug each wire to ensure it’s firmly attached. Close the junction box cover afterward to protect the wiring.
Next, restore power and use a voltage tester to confirm the circuit is live. If you installed a plug-in model, test the outlet for proper grounding before plugging in the unit.
A GFCI (Ground-Fault Circuit Interrupter) outlet is strongly recommended, especially in damp areas, as it shuts off power immediately if it detects any current leak.
Once wiring is complete, neatly organize cables inside the cabinet using clips or zip ties. This prevents tangling or accidental pinching when you slide the dishwasher into position.
Safety Tip: Never use an extension cord to power a dishwasher. It’s unsafe, violates electrical code, and can cause overheating or fire hazards. Always rely on a permanent, grounded outlet or properly installed hardwired connection.
Connecting the Drain Hose
After plumbing and electrical wiring are set up, the next major task is connecting your dishwasher’s drain hose.
This component is responsible for safely channeling wastewater from the dishwasher into your kitchen’s drainage system, preventing backups and ensuring hygienic operation. Done properly, it keeps dirty water from returning into your dishwasher and contaminating clean dishes.
Start by locating the drain hose outlet on the back of your dishwasher. It’s typically a small plastic or rubber tube near the base of the unit.
Attach the provided drain hose securely using a hose clamp or compression fitting. Make sure the connection is tight but not overly tightened—too much pressure could crack the plastic fitting.
Next, route the hose through the hole you drilled earlier into the sink cabinet. You’ll have two main connection options: directly to the sink drainpipe or to the garbage disposal inlet.
If your kitchen has a garbage disposal, remove the small knockout plug from its side inlet using a screwdriver, then push the drain hose onto the inlet and secure it with a clamp.
If you don’t have a garbage disposal, connect the hose to a Y-branch tailpiece installed on the sink’s drainpipe. Tighten the clamp to form a watertight seal.
Always double-check that the hose is positioned with a high loop — a vertical rise that reaches just beneath the countertop before descending to the drain. This loop prevents dirty sink water from siphoning back into the dishwasher, which could lead to unpleasant odors and contamination.
Ensure that the drain hose isn’t kinked, crushed, or extended too far. Excessive bends can restrict water flow and cause backups during the drain cycle. Ideally, keep the hose under 10 feet long for optimal performance.
Once connected, run a quick test cycle to check that water drains smoothly without leaks or splashing from the connections.
Pro Tip: If local building codes require it, install an air gap device on top of your sink. This small chrome fixture provides an additional safeguard against backflow and is often mandatory in some states or municipalities.
Even if it’s optional, adding one gives your installation a professional touch and long-term protection.
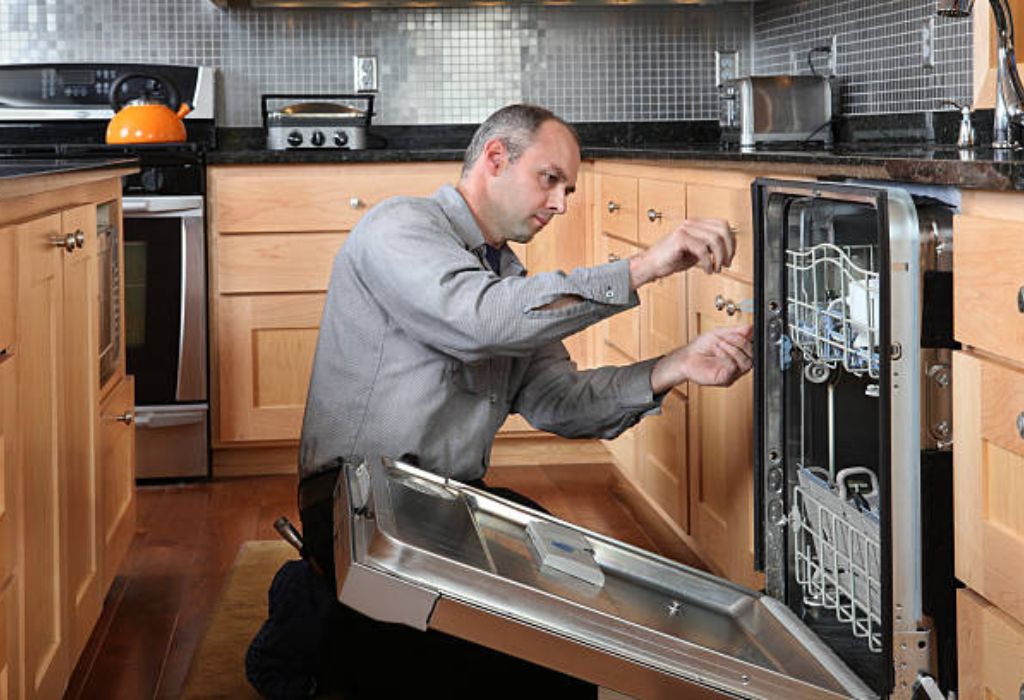
Installing the Dishwasher in Position
With your plumbing, drain, and electrical connections ready, it’s finally time to place the dishwasher into its new home. This stage might look simple, but doing it carefully ensures your appliance operates smoothly, sits level, and blends seamlessly with your kitchen cabinetry.
Begin by laying a soft blanket or cardboard sheet on the floor in front of the opening to prevent scratches as you move the unit.
Gently slide the dishwasher partway into the cabinet cavity, feeding the water supply line, drain hose, and power cord through the openings you prepared earlier. Go slowly — pulling or twisting these connections can loosen joints or cause leaks later.
Once the dishwasher is mostly in position, check that none of the hoses are kinked or pinched behind it. A compressed drain hose, for example, can prevent proper water discharge and trigger an error during the first wash cycle. Adjust cables and lines carefully to keep them running freely along the cabinet wall.
Next, use a carpenter’s level to check whether the dishwasher is perfectly horizontal and front-to-back aligned. Uneven placement can lead to leaks around the door or uneven water distribution.
Adjust the leveling legs at the front and back of the dishwasher until it sits flush and balanced. Most legs can be turned with a wrench or by hand, depending on the model.
Once level, open and close the dishwasher door a few times to ensure it moves smoothly and doesn’t hit adjacent drawers or handles. The base of the door should align evenly with the surrounding cabinets for a built-in look.
When everything is aligned, secure the dishwasher by using the mounting brackets at the top or sides of the appliance.
These brackets fasten the unit to the underside of the countertop or cabinet frame, preventing it from tipping forward when the door is opened. Be sure to use short screws that won’t penetrate through the countertop surface.
Finally, push the dishwasher completely into place and double-check all visible gaps. A consistent 1/8- to 1/4-inch gap around the edges is ideal for ventilation and appearance. Replace the kick plate at the bottom, hiding the connections neatly.
Pro Tip: If you have a stone or quartz countertop and can’t screw into it, use side-mount brackets that attach to the cabinet walls instead. They’re just as secure and preserve the countertop’s integrity.
Testing the Installation
Once your dishwasher is secured and properly connected, the next critical step is to test your installation. This ensures that all plumbing, drainage, and electrical connections are working perfectly before you begin using the appliance regularly. Skipping this step could lead to leaks, electrical faults, or performance issues later on.
Start by turning the water supply valve back on and inspecting all connections under the sink and behind the dishwasher.
Use a dry cloth or paper towel to check for moisture around the T-adapter, shut-off valve, and hose joints. Even a small leak should be corrected immediately by tightening fittings or reapplying Teflon tape.
Next, restore power at the breaker panel or plug the unit into the dedicated outlet. Once the power is on, close the dishwasher door and select a short rinse or test cycle.
Stay nearby and listen carefully as the appliance fills with water. You should hear a steady flow of water entering the machine without sputtering or unusual noises.
After the fill cycle, the dishwasher will start draining. Observe the drain hose connection beneath the sink or at the garbage disposal to ensure wastewater is flowing out smoothly with no leaks or backflow.
If water backs up into the sink, the drain hose may not have a proper high loop or could be kinked — fix this immediately.
Also, pay attention to vibrations and noise levels. A properly leveled dishwasher should run quietly without rattling or shaking. If you notice excessive vibration, recheck the leveling feet and make small adjustments until the sound decreases.
Once the cycle finishes, open the door to confirm that the interior is warm and that there’s no standing water at the bottom. This indicates that both heating and draining systems are functioning correctly.
Pro Tip: Run one full wash cycle with no dishes before your first real use. This flushes out any leftover dust, lubricant, or debris from the installation process and ensures the water lines are fully clear.
Cost Breakdown and Time Estimate
Installing a dishwasher where there was none is one of those projects that can range from surprisingly affordable to moderately expensive depending on your kitchen layout, tools, and whether you hire professionals.
Understanding the cost breakdown upfront helps you plan wisely and avoid mid-project surprises.
For DIY installations, the total cost typically falls between $150 and $400, assuming you already have basic tools.
The majority of this cost comes from plumbing and electrical materials, such as T-adapters, water lines, drain hoses, wire nuts, junction boxes, and possibly a new outlet or valve.
If your kitchen layout already supports nearby plumbing, you’ll save a significant amount since no major rerouting is required.
If you hire professionals, expect to pay between $300 and $700 for the complete installation, depending on your location and complexity.
Plumbers often charge around $100–$150 per hour, while electricians may cost a similar amount if a new dedicated outlet or breaker is needed. If cabinetry modifications are required—such as removing or cutting a base cabinet—carpentry costs could add another $100–$250.
The average total cost (including labor, fittings, and minor modifications) tends to hover around $450–$600, which aligns with national data from HomeAdvisor and Angi.
However, this price can vary depending on whether your dishwasher connects to an existing disposal, the distance from the sink, and the condition of your pipes.
As for time, a standard DIY project usually takes about 4–6 hours for first-timers. If you’re already familiar with basic plumbing or wiring, you could complete it in as little as three hours. Professional installers can often finish in under two hours, provided everything is prepped and easily accessible.
While the upfront investment might seem significant, the long-term benefits make it worthwhile. A dishwasher adds convenience, saves time, and increases your home’s resale value.
Most importantly, it reduces water consumption by up to 50% compared to handwashing, which translates to noticeable savings on your utility bills.
Pro Tip: Always test your dishwasher again 24 hours after installation. Minor leaks may appear once water pressure stabilizes, so it’s best to catch them early before they can damage cabinetry or flooring.
Maintenance Tips After Installation
Now that your dishwasher is fully installed and working properly, ongoing maintenance is the key to keeping it efficient, quiet, and long-lasting. A dishwasher that’s well cared for can last more than a decade — saving you thousands of hours of manual dishwashing and plenty on water bills.
Start with routine cleaning. Every month, remove and rinse the dishwasher’s filter and spray arms to clear out trapped food particles and grease. Clogged filters not only reduce cleaning performance but also cause unpleasant odors.
Run a cleaning cycle with two cups of white vinegar placed in a dishwasher-safe bowl on the top rack to dissolve limescale, soap scum, and buildup. Follow this with a short cycle using baking soda to neutralize odors and leave the interior sparkling.
Always inspect the door gasket and seals. These rubber components prevent leaks, but they can harden or accumulate residue over time. Wipe them down weekly with warm, soapy water and check for any tears or cracks. A worn gasket is inexpensive to replace but essential for preventing costly water damage.
Next, look at your drain hose and water line at least once a year. Ensure there are no signs of kinks, bulges, or corrosion. Tighten fittings slightly if they loosen, and replace any line that looks aged or brittle. Preventing leaks is much easier than dealing with warped wood floors later.
Also, make sure to run hot water in the sink for 30 seconds before starting the dishwasher. This ensures that hot water reaches the machine right away, improving wash performance and reducing cycle times. Periodically use a dishwasher cleaner tablet to break down grease and mineral deposits in hidden internal parts.
Finally, avoid overloading your dishwasher or blocking the spray arms. Proper water circulation is crucial for thorough cleaning and longevity. Let your dishwasher dry completely by leaving the door slightly open after each cycle to prevent mold and mildew.
Pro Tip: Once every six months, check your dishwasher’s leveling feet. Vibrations or floor settling can shift the unit slightly, causing rattles or small leaks. A quick adjustment keeps it stable and silent.
FAQs About Installing a Dishwasher Where There Was None
Can I install a dishwasher anywhere in my kitchen?
Not exactly. The dishwasher should be placed near existing plumbing lines and an electrical source — ideally next to the sink — to minimize new installation work.
Do I need both a plumber and an electrician for this project?
If your kitchen doesn’t already have a water line, drain, or outlet in place, hiring both is recommended. A plumber will handle water and drain connections, while an electrician ensures safe wiring and circuit setup.
How long does it take to install a dishwasher from scratch?
For a first-time DIYer, installation typically takes 4–6 hours. Professionals can complete it in under two hours if the space and connections are ready.
What size opening do I need for a dishwasher?
A standard dishwasher requires a 24-inch-wide, 24-inch-deep, and 34-inch-high opening under the countertop. Always double-check the manufacturer’s specs before cutting cabinetry.
Can I use a portable dishwasher instead?
Yes. Portable dishwashers can connect directly to your faucet and don’t need permanent plumbing, making them perfect for renters or small kitchens.
Do I need a garbage disposal to install a dishwasher?
No. You can connect the drain hose directly to a Y-branch tailpiece under the sink if you don’t have a disposal. Just make sure there’s a high loop to prevent backflow.
How much water does a modern dishwasher use?
Most new energy-efficient models use 3–5 gallons of water per load, significantly less than the 25 gallons typically used in handwashing.
Is a vent or air gap required?
Some local codes require an air gap device on the sink to prevent contaminated water from flowing back into the dishwasher. Even if not required, it’s a good safety addition.
Can I share the same drain line as my sink?
Yes, as long as the drain hose is properly looped or fitted with an air gap. This setup is common and code-compliant in most homes.
What tools do I need to install a dishwasher?
You’ll need adjustable wrenches, screwdrivers, a power drill, Teflon tape, wire strippers, hose clamps, and a level. Having these ready makes installation smoother.
Can I reuse old plumbing lines?
Only if they’re in excellent condition. Old, corroded pipes or valves should be replaced to prevent leaks and ensure consistent water pressure.
Do I need to install a new circuit breaker?
If your kitchen’s existing circuits are already at capacity, yes. Dishwashers require a dedicated 15–20 amp breaker for safe operation.
Can I install a dishwasher on any type of flooring?
Yes, but make sure the floor is level, stable, and water-resistant. Tile, vinyl, and sealed wood work best for this purpose.
What’s the best dishwasher for small kitchens?
Compact or 18-inch models from brands like Bosch, GE Profile, and Whirlpool are excellent for smaller spaces while maintaining strong cleaning performance.
How can I prevent leaks after installation?
Always use Teflon tape on threaded fittings, tighten all hose clamps securely, and recheck connections after the first 24 hours of use. Regular inspection prevents long-term water damage.
Pro Tip: Keep a small towel and flashlight handy during the first few wash cycles. This allows you to quickly spot any hidden drips or leaks before they become major issues.
Conclusion
Installing a dishwasher where there was none in your kitchen might sound like a challenging home improvement project, but with careful planning and patience, it’s completely achievable — even for a first-time DIYer.
By following the steps outlined in this guide, you can transform an unused cabinet space into a modern, functional appliance setup that saves you time, water, and effort every single day.
From choosing the right location and setting up plumbing to wiring the electrical system and testing the installation, every detail plays an important role in ensuring your dishwasher runs efficiently and safely.
The key is to take things step by step — measure twice, tighten connections properly, and double-check for leaks before finalizing your setup.
Once installed, you’ll quickly see the benefits. A dishwasher doesn’t just clean your dishes — it makes your kitchen workflow smoother and your daily routine easier.
It also helps you save money on utilities since modern dishwashers use far less water and energy compared to handwashing.
Over time, it even boosts your home’s resale value, as buyers often consider a built-in dishwasher an essential feature of a fully equipped kitchen.
If you encounter challenges with wiring, plumbing, or tight cabinet spaces, don’t hesitate to call in a professional for specific tasks. Combining DIY effort with expert help where needed ensures safety and long-term reliability.
With a little dedication, you’ll soon enjoy the convenience of pressing a single button and walking away — no more standing over the sink or wasting gallons of water. A properly installed dishwasher is one of those upgrades that truly changes the way you experience your kitchen every day.
Final Tip: Keep your installation manual handy, register your appliance for warranty protection, and perform regular maintenance. With those simple steps, your dishwasher will serve you efficiently for years to come.
I’m Emma J. Caldwell, the founder, lead writer, and home-cooking enthusiast behind KitchenGuideCo.com. With a background in culinary arts and over a decade of cooking experience in both professional and personal kitchens, I created this platform to demystify recipes, offer smart kitchen gadget reviews, and guide readers through meal prep with confidence and clarity.