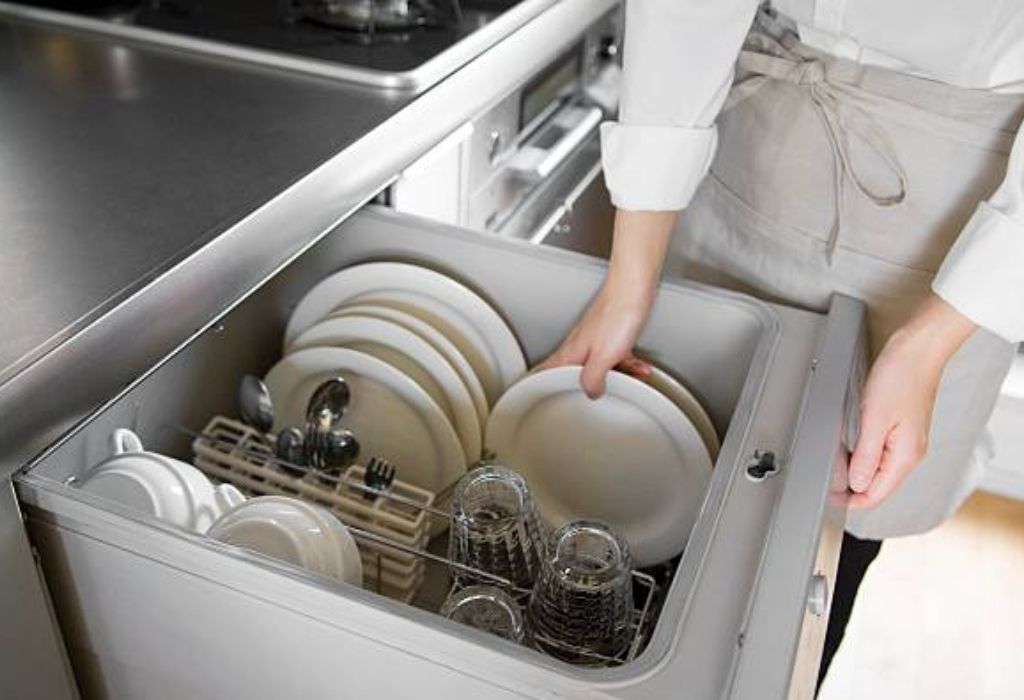
Installing a portable dishwasher is one of the most practical upgrades for a modern kitchen without permanent plumbing. Homeowners and renters often turn to portable models because they provide full-size cleaning power while remaining flexible and space-efficient.
According to Energy Star, more than 25 percent of compact-kitchen owners prefer portable dishwashers for their ease of use and minimal setup requirements.
A portable dishwasher connects temporarily to a standard kitchen faucet, drains directly into the sink, and can be rolled away when not in use. This makes it an excellent solution for apartments, older homes, or any kitchen layout lacking built-in connections.
Many units are also energy-efficient, consuming as little as three gallons of water per load—significantly less than handwashing.
Before you begin installation, understanding your faucet type, available space, and power accessibility ensures a smooth process. This guide will take you step-by-step through the correct setup, from preparing your kitchen to connecting hoses and testing for leaks.
By following professional installation practices, you’ll avoid common issues like low water pressure, hose leaks, and improper drainage.
Each section below provides detailed instructions, maintenance recommendations, and troubleshooting insights so your portable dishwasher operates efficiently and safely.
Whether you’re an experienced DIY homeowner or setting up your first appliance, the following steps will help you achieve reliable, leak-free installation and long-term performance.
Understanding What a Portable Dishwasher Is

A portable dishwasher is a self-contained cleaning unit designed for homes or apartments that lack built-in dishwasher connections. Unlike traditional built-in models that require permanent plumbing, a portable dishwasher connects temporarily to a standard kitchen faucet through an adapter and drains directly into the sink.
This allows users to enjoy full cleaning performance without modifying their kitchen’s existing plumbing setup.
These units are typically mounted on casters, making them easy to move when not in use. The design includes two main hoses — an inlet hose that delivers water and a drain hose that expels it.
Some advanced models even offer countertop conversion kits, giving users the flexibility to adapt their setup as needed.
Most portable dishwashers feature the same wash cycles, temperature controls, and drying functions as traditional units. Their compact size, however, makes them ideal for small kitchens, rental apartments, and vacation homes.
Despite their size, modern models can handle up to eight place settings per cycle and use water efficiently — often less than three gallons per wash.
These machines are also energy-efficient, with many carrying Energy Star certification, ensuring reduced electricity consumption and lower utility bills. Additionally, the convenience of rolling the unit out only when needed helps keep kitchen spaces organized and accessible.
What makes a dishwasher “portable”?
A portable dishwasher is mobile and connects via faucet rather than permanent plumbing.
Is it as effective as a built-in model?
Yes, when properly connected, it cleans equally well.
Can it be converted into a built-in?
Yes, but you’ll need to modify plumbing and cabinetry.
Do portable dishwashers use more water?
No, most modern models are designed for water efficiency.
Are portable units noisy?
They may produce slightly more sound, but modern insulation reduces overall noise levels.
Tools and Accessories You’ll Need
Before starting, gather all required tools and accessories. Having the correct items prevents leaks, saves time, and ensures a secure fit. You’ll need an adjustable wrench, Teflon tape, a small towel or bucket, and a compatible faucet adapter.
Most new dishwashers include the adapter, but always confirm the thread size before installation.
You’ll also need a grounded wall outlet within five feet of the sink. Avoid using extension cords or ungrounded sockets, as they can cause overheating or short circuits. Keep the area dry and ensure the floor is level to prevent vibrations during operation.
Check that your water pressure falls between 40 and 120 PSI. Low pressure may reduce cleaning performance, while excessive pressure can cause leaks. Once these conditions are confirmed, you’re ready to begin the installation.
Do I need plumbing tools?
Only a wrench and sealing tape—no specialized plumbing tools are required.
Is the faucet adapter universal?
Most fit standard kitchen faucets, but verify thread compatibility first.
Can I use an extension cord?
Never; plug the appliance directly into a grounded outlet.
Should I turn off water before setup?
Yes, especially while attaching the adapter to prevent accidental sprays.
Where should I position the dishwasher?
Keep it near the sink and outlet for short, untangled hose routing.
Preparing Your Kitchen for Installation
Preparation is essential for efficient installation. Begin by clearing the area around your sink and ensuring enough space for the dishwasher to roll into position. Check the faucet threads and remove any residue or corrosion to ensure a tight seal with the adapter.
Measure the floor space and confirm that both the power cord and hoses reach the faucet and outlet comfortably. Ensure the floor is flat and non-slippery to maintain appliance stability.
Inspect your water pressure and clean the aerator before connecting the adapter. This prevents debris from clogging the inlet valve. If your faucet doesn’t have standard threads, purchase a universal adapter or quick-connect kit.
Can I use a pull-out faucet?
No, pull-out sprayers can’t handle hose pressure; use a fixed faucet instead.
What if my faucet doesn’t fit the adapter?
Buy a compatible adapter at a local hardware store.
Should I install near the counter edge or sink?
Always near the sink for easy access and drainage.
Can I use the dishwasher on wood flooring?
Yes, but place a waterproof mat underneath to avoid moisture damage.
How much clearance is needed?
Maintain two inches around all sides for heat dissipation.
Choosing the Right Faucet Adapter and Hose Setup
Selecting the correct faucet adapter and hose setup is essential for a leak-free installation. Not every kitchen faucet shares the same thread type or diameter, so it’s crucial to verify compatibility before connecting your dishwasher.
Most portable units include a standard dual-thread adapter, but specialized faucets—such as pull-out sprayers or commercial-style taps—require additional fittings.
Inspect your faucet aerator threads first. Standard kitchen faucets usually have 15/16-inch male or 55/64-inch female threads. If your adapter doesn’t match, purchase a compatible one from a hardware store.
Some models also support quick-connect kits that simplify installation by snapping securely onto non-threaded taps.
Always check that your inlet and drain hoses are in good condition. Look for any signs of wear, cracking, or stiffness that could cause leaks under pressure. When connecting, ensure that the hose fittings align properly and that the washers inside the couplings are seated evenly.
Once connected, test water flow at low pressure to confirm that no leaks appear around the faucet or hose ends. If dripping occurs, rewrap the threads with Teflon tape or slightly tighten the fitting.
Can I use any universal adapter?
Yes, but ensure it matches your faucet’s thread type and diameter.
How tight should the adapter be?
Hand-tight plus a quarter turn is usually sufficient.
Do adapters need washers?
Yes, most require rubber washers to maintain a watertight seal.
Can hoses be extended for longer reach?
Yes, with manufacturer-approved extension kits.
Should I remove the adapter after each use?
Not necessary, but it prevents wear on faucet threads over time.
Step-by-Step Installation Process

Step 1: Attach the Faucet Adapter
Unscrew the faucet aerator and replace it with the adapter supplied with your dishwasher. Wrap Teflon tape on the faucet threads to prevent leakage. Hand-tighten first, then secure with a wrench using gentle pressure.
Step 2: Connect the Water Inlet Hose
Align the quick-connect fitting on the inlet hose with the faucet adapter and snap it in place. You should hear a click confirming a proper seal.
Step 3: Connect the Drain Hose
Place the drain hose inside the sink, ensuring it slopes downward without kinks. Secure the end with a clip to prevent movement during operation.
Step 4: Plug in the Dishwasher
Connect the power cord to a grounded outlet. Avoid shared circuits to reduce the risk of tripping breakers.
Step 5: Test the Connection
Turn on the faucet and run a short rinse cycle to verify water flow and drainage. If you see leaks, tighten connections slightly or reapply tape.
Can I leave the adapter attached?
Yes, as long as it doesn’t interfere with everyday faucet use.
How tight should I connect hoses?
Hand-tight with a quarter turn—avoid over-tightening.
What if water leaks at the faucet joint?
Re-seal the threads or adjust the adapter position.
Can I connect to a bathroom sink?
Not recommended; only standard kitchen faucets are suitable.
Do I need to prime before first use?
Run one empty rinse cycle to flush any debris or manufacturing residue.
Positioning and Leveling the Portable Dishwasher
Proper positioning and leveling are vital to ensure stable operation and efficient water drainage. Before connecting the hoses, roll the dishwasher close to your sink and align it so that both the power cord and water hoses have gentle curves without tension. Avoid stretching hoses across sharp corners or under heavy objects.
The unit should rest on a flat surface, ideally ceramic tile or vinyl flooring. Uneven floors may cause vibration, door misalignment, or incomplete draining.
Most portable dishwashers come with adjustable caster feet that can be raised or lowered to achieve balance. Use a bubble level to verify that the appliance sits evenly on all sides.
Keep the rear of the machine at least two inches away from walls to allow air circulation. The front should face the sink directly, minimizing hose bending and ensuring free water flow.
If your kitchen layout is tight, consider installing a compact rolling base or locking casters to hold the dishwasher securely during operation.
Why does leveling matter?
An uneven base causes water to pool and increases pump strain.
Can I place it on a carpet?
No, carpets trap moisture and reduce ventilation.
How far can the dishwasher be from the sink?
Ideally within six feet for safe water and drain flow.
Do I need to lock the wheels during use?
Yes, locking prevents vibration movement during cycles.
What if my floor slopes slightly?
Adjust caster feet or place a rubber mat for balance.
Tips to Ensure Leak-Free and Safe Operation
Maintaining a leak-free system protects both your kitchen and the dishwasher. Always turn off the faucet immediately after a cycle to relieve pressure from hoses and connections.
Inspect hoses weekly for cracks, bulges, or signs of wear. Keep the drain hose elevated above the dishwasher’s base to prevent wastewater backflow.
Avoid placing sharp objects or heavy pots directly on hoses while the unit operates. Clean the ends of both hoses regularly to prevent mineral buildup that can weaken seals.
Why is my hose leaking?
Loose washers or worn gaskets cause most leaks; replace them as needed.
Can I use plumber’s tape on every joint?
Use it only on metal threads—plastic threads may crack.
Should hoses be disconnected after each use?
Yes, especially in high-pressure areas; it extends hose lifespan.
How often should I check fittings?
Inspect after every few uses or weekly during heavy operation.
What if water pressure drops mid-cycle?
Pause the unit, check faucet flow, and restart once pressure stabilizes.
Maintenance and Cleaning After Installation
Routine maintenance ensures long-term performance and hygiene. After each cycle, disconnect and drain both hoses completely to avoid standing water. Clean the filter and spray arms every two weeks to prevent blockages and maintain spray efficiency.
Run a vinegar rinse once a month to dissolve mineral deposits and grease. Use dishwasher cleaner tablets periodically for deeper cleaning, especially in hard-water areas.
Always dry the exterior with a soft cloth and keep the wheels free from debris. Leave the door slightly open after each wash to release moisture and prevent odors.
Can I use bleach for interior cleaning?
Only on white-interior models—never on stainless steel.
How often should filters be cleaned?
Every two to three weeks, depending on usage frequency.
Are cleaner tablets safe?
Yes, they’re designed to break down residues safely.
Should the door remain open after cycles?
Yes, it prevents humidity buildup and mold.
What is the expected lifespan?
With proper care, a portable dishwasher lasts eight to twelve years.
Energy Efficiency and Water-Saving Practices
Portable dishwashers are designed to conserve resources, but optimal efficiency depends on user habits. Always run full loads rather than partial ones to maximize water use per cycle.
Avoid pre-rinsing dishes under the faucet—modern models are built to handle moderate food residue, saving several gallons of water per load.
Select the appropriate wash cycle based on soil level. The “Eco” or “Energy Saver” mode uses lower temperatures and shorter wash times while maintaining cleaning performance. For tough residues, soaking cycles are better than running two full washes.
Using high-efficiency detergents and rinse aids enhances drying performance and prevents residue buildup. Ensure that the water supply temperature is around 120°F for optimal cleaning without overusing energy.
Clean the filter regularly, as a clogged filter forces the motor to work harder, increasing energy consumption.
Does a portable dishwasher use more power than built-in models?
No, energy use is nearly identical across comparable sizes.
What’s the most efficient wash setting?
“Eco” or “Light Wash” modes balance power and water use.
Should I air dry dishes instead of heated drying?
Yes, it saves energy and reduces internal humidity.
How can I reduce water use further?
Run full loads, avoid pre-rinsing, and use quality detergent.
Does water hardness affect efficiency?
Yes, hard water reduces cleaning performance; consider a water softener.
Troubleshooting Common Problems
Even a well-installed dishwasher may encounter issues over time. If the unit fails to drain, inspect the hose for clogs or improper placement. For low water pressure, clean the faucet aerator and verify that the water supply valve is fully open.
If the dishwasher leaks under the sink, check the faucet adapter and rubber washers for wear. Replace damaged parts immediately to prevent water damage. For electrical issues, confirm that the outlet provides adequate voltage and that no other heavy appliances share the circuit.
Why isn’t water entering the dishwasher?
The faucet may be partially closed or the inlet screen obstructed.
Why does the cycle stop midway?
Overheating or temporary power interruptions are common causes.
Why are dishes still wet?
Enable the heated-dry option or crack the door open for air drying.
Why is water backing into the sink?
Raise the drain hose above the sink rim to eliminate backflow.
Can I repair leaks myself?
Yes, replacing seals or tightening joints often resolves small leaks.
Conclusion
Installing a portable dishwasher in any kitchen is a straightforward process when handled with proper tools and preparation. From connecting the faucet adapter to testing for leaks, each step ensures efficiency, safety, and long-term reliability.
Portable dishwashers offer a professional cleaning experience without requiring major renovations or plumbing alterations. With routine maintenance and correct handling, your unit will perform efficiently for years, saving both water and energy.
This guide equips you with everything needed to perform a professional-standard installation—secure connections, balanced operation, and easy mobility. Once complete, you’ll enjoy the same performance as a built-in dishwasher, perfectly suited for any kitchen layout.
I’m Emma J. Caldwell, the founder, lead writer, and home-cooking enthusiast behind KitchenGuideCo.com. With a background in culinary arts and over a decade of cooking experience in both professional and personal kitchens, I created this platform to demystify recipes, offer smart kitchen gadget reviews, and guide readers through meal prep with confidence and clarity.