Melting cheese in the microwave seems simple, right? It often looks easy, but it can be tricky! Many people have trouble getting it just right, ending up with burnt, rubbery, or unevenly melted cheese. Don’t worry, though, because getting perfectly melted cheese is achievable. This guide will walk you through, step by step, precisely how to melt cheese in microwave so you can enjoy all your favorite cheesy dishes. You’ll learn the best methods and avoid common mistakes so you can prepare the perfect melted cheese. Let’s get started!
Key Takeaways
- You’ll learn the best microwave settings for melting cheese without burning.
- Discover various cheese types and their ideal melting times.
- Find out about important tools and dishes for successful cheese melting.
- Get helpful tips for avoiding common melting mistakes.
- Learn to create a delicious, cheese sauce in minutes.
- Understand how to add moisture to improve your results.
Mastering the Microwave Melt
Achieving the perfect melt for your cheese is easier than you think. There are a few key things to consider, from the power level of your microwave to the type of cheese you’re using. These details ensure that the cheese melts evenly without becoming a rubbery mess. We’ll explore the different factors that can influence the melting process and provide you with actionable steps to become a microwave cheese-melting expert. By following the tips, you’ll soon be able to enjoy perfectly melted cheese for nachos, grilled cheese, or any other cheese dish that you love. Remember that practice makes perfect, and with a little experimentation, you’ll get it right every time.
Power Settings and Time
The first step to perfectly melted cheese is getting the microwave settings right. The power level is very important; using the full power (100%) can often result in burning or uneven melting. It’s usually best to use a lower power setting, such as 50% or 70%, to give the cheese time to melt gradually. This prevents the outside from burning before the inside melts. The time needed will depend on the power setting and the amount of cheese. It is always better to start with short bursts and check frequently than to risk overcooking your cheese. Taking the time to adjust the power and time settings will significantly improve your results.
- Start Low: Always begin with a lower power setting, such as 50%.
- Short Bursts: Microwave in short intervals, about 15-30 seconds at a time.
- Check Often: Open the microwave to check the cheese after each burst, stirring if needed.
- Avoid Overheating: The cheese should be melted and soft, not bubbling or browned.
Choosing the Right Dish
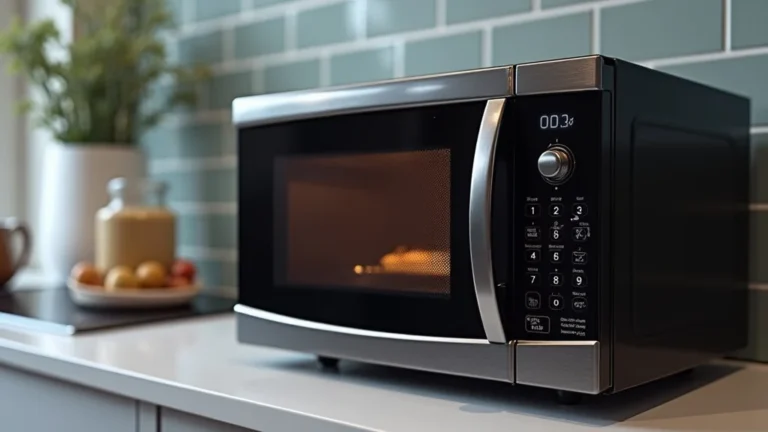
Selecting the right dish is as important as the microwave settings. The type of dish you choose affects how the cheese melts. Glass or ceramic dishes are ideal because they heat evenly. Avoid using plastic, as it can melt in the microwave and alter the flavor of your cheese. The shape of the dish also matters; a wider, shallow dish allows for more even melting compared to a tall, narrow one. Always use a microwave-safe dish to avoid any safety issues. With the right dish, you’ll be well on your way to success in melting cheese.
- Glass or Ceramic: These materials heat evenly.
- Shallow Shape: A wider dish encourages more even melting.
- Microwave Safe: Always ensure the dish is microwave-safe.
- Avoid Plastic: Do not use plastic dishes.
Monitoring the Melting Process
Keeping a close eye on your cheese as it melts is key to success. This means you must watch carefully after short bursts in the microwave. The goal is to reach a melted state without burning or drying out the cheese. The melting process can vary depending on the type of cheese, the power of your microwave, and the amount of cheese. By checking frequently and stirring, you can prevent uneven melting and get the right texture. Remember to let your eyes and the feel of the cheese tell you when it’s ready; this constant monitoring will help you make the best melted cheese.
- Watch Closely: Pay close attention during each heating cycle.
- Check Consistency: Look for a smooth, melted texture.
- Stir Regularly: Stirring helps distribute heat evenly.
- Avoid Overcooking: Overcooking can lead to a rubbery texture.
Cheese Types and Their Melting Behavior
Different cheeses melt differently; some melt quickly, while others are slower. Understanding how various cheeses behave under heat is essential for good results. For example, some cheeses melt smoothly and evenly, while others can become stringy or separate. This is due to their fat and moisture content. Knowing the characteristics of each cheese will allow you to adjust your technique. You will get the best results by using the correct power level and time. Let’s explore various cheese types and their melting properties.
Best Cheeses for Melting
Some cheeses melt more readily than others, making them ideal for microwave use. These cheeses usually have a good balance of fat and moisture, which leads to a smooth and creamy melt. Cheeses like cheddar, Monterey Jack, and mozzarella are known for their great melting qualities and versatility. These cheeses can be used in a variety of dishes. The best cheeses have the right texture to be melted. You will find that these cheeses are suitable for many purposes.
- Cheddar: Melts well with a slightly sharp flavor.
- Monterey Jack: Offers a smooth, creamy melt.
- Mozzarella: Known for its great stringy texture.
- Provolone: Has a mild flavor and great melting properties.
Cheeses That Need Extra Care
Certain cheeses require a gentler approach when melting because they can quickly become rubbery or separate. Cheeses such as Swiss and Gruyère, while delicious, can be more challenging to melt. They can become oily or stringy if heated too quickly. To melt these cheeses successfully, you’ll need to use lower power levels and shorter heating times. It’s also wise to check and stir the cheese regularly to ensure even melting. This approach will help you to get perfect results.
- Swiss: Can become stringy if overcooked.
- Gruyère: Melts well, but can separate if overheated.
- Feta: Does not melt, but softens nicely in the microwave.
- Parmesan: Generally does not melt well.
Cheese Comparisons
Here’s a comparison table to help you understand how different cheese types melt:
| Cheese Type | Melting Behavior | Best Uses |
|---|---|---|
| Cheddar | Melts smoothly | Nachos, grilled cheese |
| Monterey Jack | Very creamy | Quesadillas, dips |
| Mozzarella | Stringy | Pizza, casseroles |
| Provolone | Mild flavor | Sandwiches, pizza |
| Swiss | Can become stringy | Fondue, sandwiches |
| Gruyère | Good melt | Soups, gratins |
| Feta | Softens, doesn’t melt | Salads, dips |
| Parmesan | Doesn’t melt well | Sprinkling, flavoring |
This comparison makes it easy to decide which cheese to use for your dish.
Troubleshooting Common Melting Issues
Even with the best preparation, things sometimes don’t go as planned. However, some common issues can be avoided or fixed. These issues include uneven melting, rubbery textures, and drying out. Understanding the causes of these problems can help you learn from your mistakes and perfect your technique. You’ll learn how to correct the problem quickly. Here are some of the most common issues you might encounter and solutions to them.
Preventing Rubbery Cheese
Rubbery cheese is a common problem when melting in the microwave. This happens when the cheese is overcooked, causing the proteins to tighten and lose moisture. To prevent this, always use a lower power setting and short heating intervals. Watch the cheese closely during the process, and stop when it’s melted and has a soft texture. Overcooking is the most common reason for this problem. Always check the cheese to make sure it is perfect. This can be easily avoided by following simple steps.
- Low Power: Use a lower power setting.
- Short Bursts: Heat in small intervals.
- Watch Closely: Monitor the cheese carefully.
- Don’t Overcook: Stop heating when the cheese is melted.
Dealing with Uneven Melting
Uneven melting can result in some parts of the cheese being melted while others remain solid. This is often due to the uneven distribution of heat in the microwave. To address this, make sure to use a shallow dish that promotes even heating. Another step is to stir the cheese after each heating cycle. Turning the dish halfway through the process can also help to avoid this problem. Following these steps can help avoid this problem. With a bit of attention, you can make sure that all your cheese melts smoothly.
- Shallow Dish: Use a shallow dish.
- Stir Regularly: Stir the cheese after each interval.
- Rotate the Dish: Turn the dish halfway through.
- Check Power: Make sure your microwave is working correctly.
Avoiding Dried-Out Cheese
Dried-out cheese is another problem that can happen, especially if you’re heating it for too long or at too high a temperature. Cheese can become dry and crumbly if the moisture is lost during the melting process. You can prevent this by using a low power level and keeping the heating time short. You can also add a small amount of liquid, like milk or cream, to the cheese before heating it. This will help to keep the cheese moist. Following these steps helps retain moisture, which is the key to perfect melting.
- Low and Slow: Use a low power and short intervals.
- Add Moisture: Add a bit of liquid.
- Stir Well: Stir the cheese and liquid together.
- Watch Carefully: Monitor the cheese while it heats.
Making Cheese Sauce in the Microwave
Making a cheese sauce in the microwave is easy and quick. You can easily create a smooth and creamy sauce for your favorite dishes. Whether you want to top your nachos, pour over broccoli, or use it for mac and cheese, a homemade cheese sauce is a simple solution. It’s important to select the right ingredients and follow a few simple steps. The next section will guide you through the process, providing all the tips you need to create a delicious cheese sauce. With a bit of practice, you’ll have a cheese sauce ready in minutes.
Basic Cheese Sauce Recipe
Creating a good cheese sauce starts with a basic recipe. Here’s a simple recipe to get you started:
- Melt the Butter: Start by melting about 2 tablespoons of butter in a microwave-safe dish. Heat for about 30 seconds at a time until melted.
- Add Flour: Whisk in 2 tablespoons of all-purpose flour until a smooth paste forms. Heat this mixture for another 30 seconds to cook the flour.
- Add Milk: Gradually add 1 cup of milk, whisking constantly to prevent lumps.
- Microwave: Microwave in 30-second intervals, whisking after each interval, until the mixture thickens.
- Add Cheese: Remove the mixture from the microwave and stir in 1-2 cups of shredded cheese.
- Season: Season with salt, pepper, and any other desired spices.
Follow these steps to create a versatile cheese sauce that complements many dishes. You can easily adjust the amount of cheese or ingredients. This recipe is the base for many tasty cheese sauces.
Flavor Variations
There are many ways to change a basic cheese sauce to suit your taste. You can easily change the flavor to complement your food choices. This is possible by adding various spices, herbs, and other ingredients. For instance, adding a pinch of cayenne pepper will give the sauce some heat. For a smoky flavor, you can add a bit of smoked paprika. If you want a more complex flavor, try adding garlic powder, onion powder, or even a splash of hot sauce. With a little creativity, you can enjoy endless varieties of cheese sauce.
- Spicy: Add cayenne pepper or hot sauce.
- Smoky: Add smoked paprika.
- Herby: Include fresh or dried herbs.
- Gourmet: Add a touch of Dijon mustard or white wine.
Serving Suggestions
A good cheese sauce can be used in many ways, from snacks to entrees. It’s a versatile addition to your cooking. It can be used for classic dishes like mac and cheese or nachos, or drizzled over vegetables for a simple and tasty side dish. You can also use it as a dip for pretzels or chips, or as a base for a delicious fondue. Consider using it in casseroles, or as a topping for baked potatoes. The possibilities are endless. There are no limits to the ways you can enjoy this versatile sauce.
- Nachos: Pour over tortilla chips.
- Mac and Cheese: Use as the sauce.
- Vegetables: Drizzle over cooked vegetables.
- Dips: Serve with chips or pretzels.
Frequently Asked Questions
Question: What’s the best way to melt cheese without it getting rubbery?
Answer: Use a lower power setting on your microwave (50-70%) and heat the cheese in short bursts of 15-30 seconds. Check and stir it often to make sure it melts evenly and doesn’t overheat.
Question: Can I melt cheese in a plastic container?
Answer: It’s best to avoid melting cheese in plastic containers. The plastic could melt or release chemicals. Always use a microwave-safe glass or ceramic dish.
Question: What if my cheese sauce gets lumpy?
Answer: If your cheese sauce gets lumpy, try whisking it vigorously. You can also use an immersion blender to smooth it out. Make sure to add the milk slowly while whisking constantly to prevent lumps.
Question: How can I keep cheese from drying out in the microwave?
Answer: Add a small amount of liquid, like milk or cream, to the cheese before melting. This will help the cheese retain moisture. Heat in short intervals and stir frequently to avoid drying out.
Question: Does all cheese melt the same way?
Answer: No, different types of cheese melt differently. Some cheeses, like cheddar and Monterey Jack, melt smoothly. Others, like Swiss and feta, may need special attention to avoid becoming stringy or grainy.
Final Thoughts
How to melt cheese in microwave may seem like a basic task, but getting the perfect result takes a little bit of know-how. By understanding how to select the right cheese, use the correct microwave settings, and monitor the melting process, you can easily create dishes with delicious melted cheese. Remember, start with a lower power setting and short intervals, and watch your cheese carefully. Choosing the right dish and stirring frequently are also very important to avoid any problems. With these steps, you’ll be able to quickly prepare your favorite cheesy dishes. Experiment with different cheese types and flavors to make all your dishes taste the best! Now, go melt some cheese and enjoy!
I’m Emma J. Caldwell, the founder, lead writer, and home-cooking enthusiast behind KitchenGuideCo.com. With a background in culinary arts and over a decade of cooking experience in both professional and personal kitchens, I created this platform to demystify recipes, offer smart kitchen gadget reviews, and guide readers through meal prep with confidence and clarity.