You open your dishwasher after the cycle ends, expecting spotless plates and shining glasses. Instead, you find cloudy cups, greasy utensils, and that one cereal bowl still crusted with dried flakes. The frustration sets in, and you start wondering if the machine has lost its magic touch.
In most cases, it’s not the dishwasher’s fault at all — it’s the way it’s loaded. Even the most advanced models can’t perform miracles if dishes block spray arms or nesting spoons trap food residue. Proper loading is both an art and a science that decides whether your dishes sparkle or disappoint.
Think of your dishwasher as a mini-carwash for dishes. Every jet, rack, and angle is designed with purpose, directing high-pressure water to every corner. When you understand how those parts work together, you can load smarter, clean better, and save energy.
In this guide, you’ll learn how to load your dishwasher the right way — step by step. From arranging plates and glasses to handling fragile items and large pans, each tip here ensures your dishwasher performs at its best.
By the end, you’ll master not only the correct loading technique but also the habits that make your dishwasher last longer and clean more efficiently every single time.
Understanding How a Dishwasher Cleans
A dishwasher uses a mix of hot water, detergent, and mechanical action to remove food residue.
Inside, spray arms rotate at high speed, spraying water in carefully engineered directions. The combination of heat and pressure breaks down grease and sanitizes your dishes effectively.
When the water enters, it mixes with detergent to form a cleaning solution. This liquid hits surfaces at multiple angles, loosening stuck food particles. The dirty water is then drained, and a rinse cycle repeats the process for a sparkling finish.
Sensors inside modern dishwashers adjust water temperature, cycle length, and pressure automatically. If your dishes are tightly packed or blocking sensors, the machine may misread the load and run inefficiently. Proper spacing keeps these sensors accurate.
Heat is another crucial factor. Water heated to around 120–140°F dissolves detergent properly and kills bacteria. When items overlap or shield each other, hot water cannot reach every surface, leaving hidden grime behind.
Air or heat drying happens at the end of the cycle. Well-spaced dishes dry faster because air circulates freely. Overcrowding traps moisture, causing spots or cloudy glassware.
By understanding how the cleaning mechanism works, you can visualize why correct placement and spacing matter so much for optimal performance.
Pre-Loading Preparation: What to Do Before You Load
Before placing anything inside, always scrape off large food pieces. Modern dishwashers don’t need full pre-rinsing, but chunks of rice or pasta can clog the filter. A quick rinse or wipe keeps the wash cycle smooth.
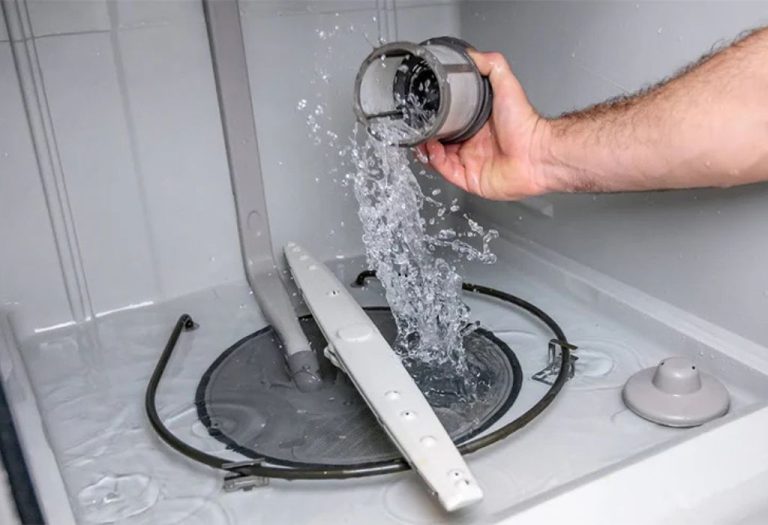
Check your dishwasher’s filter basket at the bottom. If it’s already filled with debris, empty it before reloading. A blocked filter prevents water from draining efficiently and leads to poor cleaning results.
Make sure spray arms move freely by spinning them with your hand. If they hit tall utensils or protruding pans, adjust the layout before starting the cycle. Unrestricted rotation is essential for even water coverage.
Also, choose the right detergent. Tablets, powders, and gels each behave differently depending on hardness of your water. Using the correct type recommended by the manufacturer maximizes performance.
Arrange items by material — ceramic, glass, plastic, or stainless steel — to prevent chemical reactions during high-temperature cycles. Avoid mixing metals and plastics in direct contact as heat may cause discoloration.
Finally, check that the dishwasher racks are adjusted properly. Many models let you raise or lower the upper rack to fit larger plates or tall glasses. A quick adjustment now prevents damage later.
Good preparation ensures every wash cycle starts under perfect conditions, reducing both energy and time wasted on re-washing.
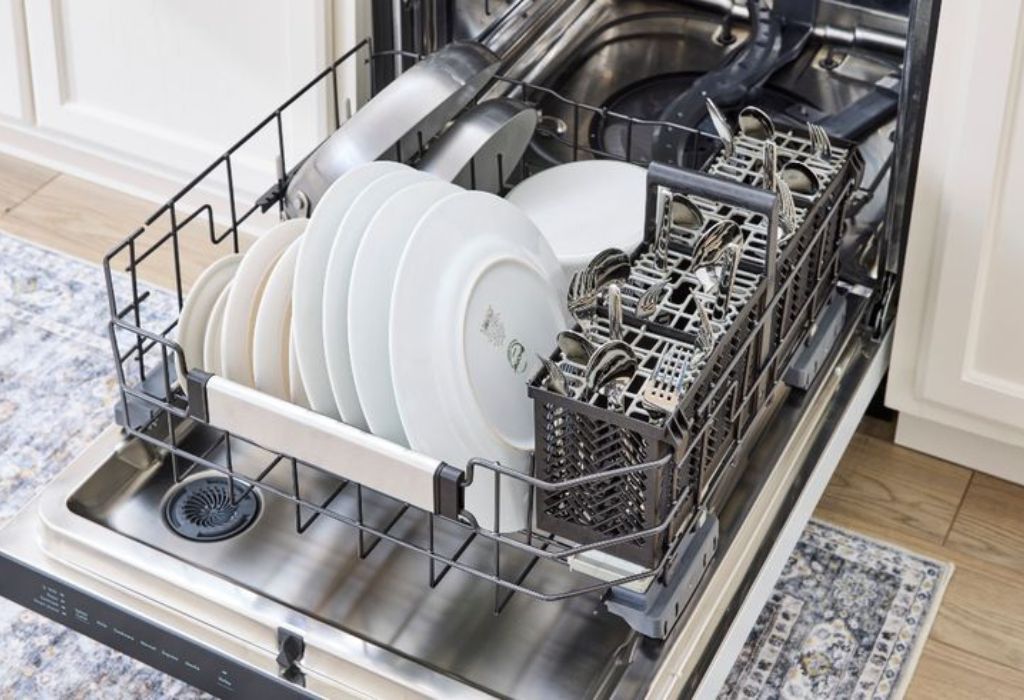
How to Load the Bottom Rack Correctly
The bottom rack is designed for plates, pans, pots, and other heavy items. These pieces face the strongest water jets coming from the lower spray arm. Placing them correctly allows full cleaning power without blocking other zones.
Always position plates vertically between tines with the dirty side facing the center. This angle helps water reach the food residues directly. Avoid stacking plates too close — a finger-width gap between each works best.
Pots and pans should face downward or at a slight tilt to allow water drainage. If your pan has baked-on food, ensure it points toward the main spray arm. Deep pots can trap water, so avoid placing them upside-down completely flat.
Large cutting boards or trays belong along the sides or back. Never place them in front of the detergent dispenser; they can block soap release during the cycle.
Avoid overlapping cookware that covers smaller dishes. If you hear rattling or clanging when closing the door, it’s a sign something is misaligned. Rearrange before starting to prevent damage.
Silver-lined or non-stick cookware should go on the bottom only if labeled “dishwasher safe.” Excess heat and pressure can erode coatings over time.
Once the bottom rack is properly arranged, spin the spray arm again. It should rotate freely without touching any items. This quick check ensures optimal cleaning and safety.
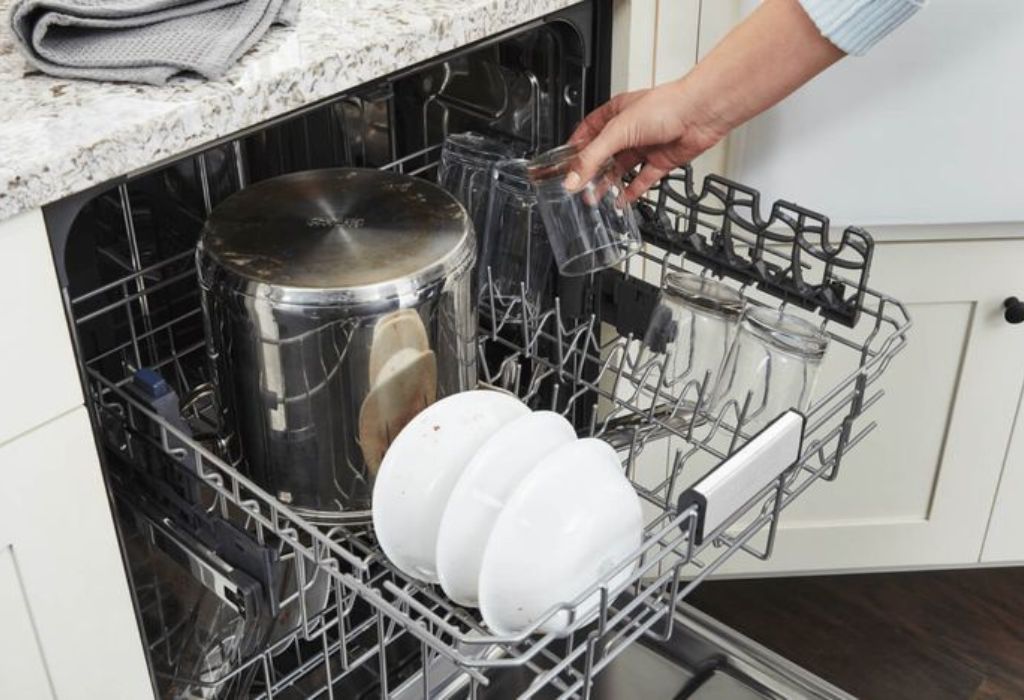
How to Load the Top Rack Efficiently
The top rack handles glasses, cups, bowls, and lightweight plastic items. This area receives gentler water flow and lower heat, ideal for delicate objects.
Place cups and glasses upside down at a slight angle. This position prevents pooling and helps the drying process. Avoid nesting glassware or placing items tightly together — the vibration can cause chips or cracks.
Bowls should be tilted toward the center for better rinsing. Staggering them in opposite directions prevents water from collecting inside. Mixing large and small bowls evenly distributes spray coverage.
Plastic containers go on the top rack only, as heat below can warp them. Secure lightweight pieces with clips or against rack tines to prevent flipping during the wash.
Wine glasses require special care. If your dishwasher has stemware holders, use them to stabilize delicate bases. Otherwise, space them well apart to avoid touching.
Always keep the area under the top rack clear of tall utensils or pan handles from below. They can block upper spray arms and reduce cleaning power for the whole load.
When finished loading, gently shake the top rack side to side. If anything moves or rattles, adjust spacing before closing. Stable positioning guarantees better wash and protects fragile pieces.
How to Load Delicate Items Like Glassware and China
Delicate glassware and fine china require special attention when loading. These items are thin, fragile, and easily scratched by contact with metal utensils or other glass. Proper placement keeps them spotless and safe during high-heat cycles.
Always place glassware upside down at a gentle angle on the top rack. This allows water to drain off completely and prevents streaks. Avoid pressing glasses tightly together since vibration during the cycle can cause chipping or cracks.
Fine china should never touch metal items. Separate them using the rack’s built-in dividers or silicone spacers. Mixing materials like silver and porcelain can lead to dull finishes and visible scratches.
Use a gentle or glassware cycle whenever possible. These modes lower water pressure and temperature, reducing the risk of breakage. Avoid heated drying for very delicate pieces since sudden temperature changes can cause micro-cracks.
If your dishwasher has a stemware holder, use it to stabilize wine glasses. The stems rest securely without touching the rack wires, ensuring a perfect clean without damage.
Never stack bowls or cups made from porcelain or thin glass. The force of the water can shift them and cause breakage. Instead, load fewer items and space them properly to ensure safety and cleanliness.
After washing, leave the door open slightly to let glassware air dry. This helps avoid heat stress and water spots while maintaining the clarity of delicate items.
How to Arrange Cutlery and Utensils the Right Way
Cutlery placement can make or break your dishwasher’s performance. The small gaps between forks and spoons decide whether water and detergent can reach every surface. Correct organization prevents spots, residue, and rust on silverware.
If your dishwasher has a basket, alternate fork and spoon handles up and down. This keeps items from nesting and allows better water circulation. Sharp knives should face down for safety when unloading.
Separate different metals when possible. Mixing stainless steel and silver can cause discoloration due to heat and detergent reactions. Group similar materials together for consistent cleaning.
Wooden utensils and knives with wooden handles should always be washed by hand. The heat and humidity inside a dishwasher can crack or warp them. Silicone and heatproof plastic utensils are safe alternatives for machine washing.
Long-handled spoons or ladles should be placed flat on the top rack if they block spray arms below. Always check that handles do not interfere with rotation. A free-moving arm means full coverage and cleaner results.
If your dishwasher has a dedicated cutlery tray on top, lay utensils individually without stacking. This design improves drying and prevents scratching on delicate finishes. Proper use of trays increases cleaning precision by keeping each piece separated.
After loading, ensure no utensils fall through the rack holes or obstruct the detergent dispenser. Even a single misplaced item can reduce the effectiveness of an entire cycle.
Best Practices for Loading Dishwasher-Safe Plastics

Plastics are lightweight and prone to heat damage, so correct placement is essential. Always verify that items are marked “dishwasher safe” before loading. Not all plastics can handle the high temperatures of modern dishwashers.
Place plastic containers, lids, and utensils on the top rack only. The top receives gentler heat and prevents warping or melting. Avoid placing plastic directly above the heating element located at the bottom.
To prevent small items from flipping over, use rack clips or dishwasher-safe mesh baskets. These accessories keep lightweight pieces stable and evenly cleaned. Unsecured plastics may trap dirty water or block spray arms during the cycle.
Avoid stacking plastic lids together. When they overlap, water cannot reach every surface, resulting in greasy spots or detergent residue. Space them apart for consistent washing and drying.
Select a lower heat or “eco” setting when washing plastics. This cycle reduces drying temperature, minimizing the chance of deformation. For air-dry models, plastics dry faster when the door is opened right after the cycle finishes.
Never mix plastics with heavily soiled pans or greasy cookware. Oil particles can stick to plastic surfaces easily and leave a film. Running a separate cycle for lighter items ensures better hygiene.
Finally, remember to secure all lightweight pieces properly before starting. A well-balanced load keeps your plastics safe, clean, and ready for reuse without deformation.
Loading Large or Odd-Shaped Items
Large cookware pieces require smart placement to balance weight and water flow. Baking sheets, casserole dishes, and frying pans are best placed along the sides or back of the bottom rack. Keeping them vertical maintains open pathways for spray jets.
Avoid stacking two large pans together. Water cannot reach inner surfaces if they overlap. Instead, alternate directions to expose every area to water and detergent.
Mixing oversized pots with smaller bowls can lead to poor results. Heavy items may shift during washing, damaging delicate dishes nearby. Group similar sizes for better stability.
If you must load a roasting pan or tall pot, remove or lower the top rack to create space. Many modern dishwashers have adjustable rack levels designed for this purpose. Use these features to fit everything comfortably.
Ensure large lids or trays do not block the detergent dispenser door. When blocked, detergent fails to release properly, leaving dishes dirty even after a full cycle.
Plastic or lightweight lids should go on the top rack to avoid melting from heater exposure. Always verify they are dishwasher-safe before including them.
Take an extra moment to test rack movement after loading big items. Smooth gliding and unrestricted spray arm rotation confirm a perfect setup before starting the wash.
Managing Mixed Loads: Dishes, Pots, and Utensils Together
Many households combine all dish types in one load to save time and water. While efficient, mixed loads need careful organization to avoid blocking water flow or scratching sensitive items. Strategic placement ensures every dish gets equal cleaning power.
Start by grouping similar materials together. Place metal pots and pans on the bottom rack where pressure is strongest. Keep delicate dishes and glassware on the top to protect them from direct heat.
Utensils should stay centered in their basket, not hanging loosely between plates. Handles should alternate directions to prevent nesting and improve spray coverage. Sharp objects must always face downward for safety.
Avoid placing tall items like ladles or spatulas where they can block spray arms. If necessary, move them to the top rack flat section. This adjustment ensures even water distribution across both levels.
Heavy grease or baked-on food should always face the spray jets directly. The lower rack’s higher water pressure handles tough grime efficiently. Meanwhile, the upper rack’s gentler stream works best for lighter soils and glass.
When combining different dish types, choose a cycle that balances both needs. The “auto” or “sensor” mode adjusts temperature and duration automatically for mixed materials. This saves energy while maintaining consistent results.
After the wash, remove lighter items first. This prevents water drips from upper shelves landing on cleaned pots below. A small unloading habit like this keeps dishes spotless every time.
Using Detergents, Rinse Aids, and Load Settings Correctly
The right detergent enhances cleaning power and protects your dishes from residue. Always follow the dosage instructions on the package rather than guessing amounts. Overusing detergent creates excess suds that can reduce water pressure and leave film.
Modern dishwashers are optimized for detergent tablets or pods. They dissolve gradually, releasing cleaning agents throughout the cycle. If your water is hard, choose detergents containing built-in water softeners for better results.
Rinse aid is equally important for spotless drying. It lowers water’s surface tension, allowing droplets to slide off easily. Adding rinse aid regularly prevents cloudy glassware and streak marks.
Avoid mixing different detergent types simultaneously. Combining powder and gel can alter pH balance and reduce effectiveness. Stick to one form suitable for your dishwasher model.
Use the appropriate cycle for the load type. Heavily soiled dishes need a normal or heavy cycle, while lightly soiled items perform well on eco or quick modes. Matching the cycle saves water and extends your dishwasher’s life.
If your dishwasher offers a “half-load” setting, use it only when racks are truly half full. Running it on small scattered loads wastes more energy than expected. Plan your washing schedule to operate with full loads whenever possible.
Keep the detergent compartment clean and dry before every wash. Moisture causes clumping, leading to improper detergent release during cycles. A quick wipe before refilling prevents such issues easily.
Avoiding Common Loading Mistakes
One of the biggest mistakes is overcrowding. When dishes are packed too tightly, water cannot reach every surface, leaving food residue behind. Always allow enough space between items for air and water circulation.
Never stack bowls or cups inside each other. The trapped water prevents cleaning and leaves stubborn stains or detergent spots after drying. Each item needs its own open angle for effective spray contact.
Do not block the spray arms with tall utensils, cutting boards, or pan handles. Even a small obstruction stops water flow to multiple zones, reducing cleaning quality for the entire load.
Avoid placing non-dishwasher-safe items inside, such as cast iron, wood, or crystal glass. High heat damages coatings and weakens delicate materials permanently. Hand-wash these to extend their lifespan.
Never add extra detergent thinking it will clean better. Excess foam creates residue and may leak out during cycles. The correct dosage ensures balanced cleaning and protects internal sensors.
Leaving the dishwasher door closed for hours after a wash traps moisture inside. This promotes odors and mildew. Always open the door slightly after each cycle to allow ventilation and faster drying.
Finally, check that all dishes face toward the spray arms rather than the door. Proper orientation ensures detergent hits directly where grime builds up most.
Optimizing Space for Maximum Efficiency
Smart organization allows you to wash more dishes in one go without compromising cleanliness. Start by loading larger items first to create a stable structure at the bottom. Then, fill remaining gaps with smaller plates or bowls.
Alternate item sizes for better balance. A mix of large and small pieces helps distribute water evenly and prevents water jets from being blocked. Symmetry inside the racks leads to more consistent cleaning.
If your dishwasher has foldable tines, adjust them to fit odd-shaped items. Customizing rack angles gives better support and maximizes every inch of space available.
Keep utensils and cutlery grouped in specific zones rather than scattered. This layout not only saves space but also simplifies unloading later. Knowing where each type belongs creates a smooth workflow.
Stack similar cups and glasses along the same row but never touching. This keeps them stable while maintaining open airways for drying. A well-spaced top rack can easily hold a dozen glasses without collisions.
If you often wash small lids, bottle caps, or baby items, use a mesh dishwasher basket insert. It prevents tiny pieces from falling through racks and reaching heating elements.
Maximizing space isn’t about stuffing more dishes — it’s about aligning everything in harmony with your machine’s water flow.
How to Load for Different Dishwasher Types (Standard vs Drawer vs Compact)
Different dishwasher models require unique loading strategies. Standard full-size models, drawer types, and compact dishwashers all distribute water and heat differently. Understanding these designs helps you load correctly for your specific machine.
Standard dishwashers use dual rotating spray arms for both racks. They handle larger loads efficiently when items are spaced evenly. Heavier cookware should always stay below while glassware and plastics belong on top.
Drawer-style dishwashers have two independent compartments that can run separately. Load smaller or fragile items in the top drawer and heavy cookware in the bottom one. Their flexibility allows half-load operation with reduced energy use.
Compact or countertop models have limited spray reach. Load fewer dishes at once and position heavily soiled ones near the center. Avoid blocking the single spray arm since water coverage is less powerful than full-size units.
Some advanced dishwashers feature third racks or adjustable arms. Use the uppermost tray for cutlery and small utensils to free up space below. Customizing the racks improves airflow and speeds up drying.
Each model has a different water pressure pattern, so follow the manufacturer’s diagram. Loading against these design cues leads to uneven results. Reading your manual once can improve performance dramatically.
By tailoring your loading technique to your dishwasher’s style, you ensure every dish, glass, and utensil gets maximum cleaning coverage with minimum effort.
Safety and Maintenance Tips After Loading
Dishwasher safety starts before pressing the start button. Double-check that spray arms spin freely and nothing obstructs movement. A single blocked arm can ruin the entire cycle’s effectiveness.
Ensure detergent and rinse aid compartments are closed firmly. Loose covers lead to premature release, wasting cleaning agents before the right time. Always hear a click when sealing these compartments.
Inspect door gaskets and seals for debris buildup. Small food particles or grease on the rubber lining cause leaks and reduce efficiency. Wipe them clean with a damp cloth once a week.
If your dishwasher smells musty, run an empty cycle with vinegar or baking soda. This natural cleaning method removes trapped grease and neutralizes odor without harsh chemicals.
Avoid running your dishwasher overnight if possible. It’s safer to supervise the first few minutes of a cycle to confirm everything operates correctly. Listening for unusual noises helps detect issues early.
Regular maintenance extends appliance lifespan significantly. Cleaning the filter, spray arms, and racks monthly ensures consistent performance. You’ll also save energy as the machine doesn’t work harder to overcome blockages.
A few minutes of inspection after loading can prevent major repairs later. Think of it as caring for a hardworking kitchen companion that deserves attention and respect.
Eco-Friendly Dishwasher Loading Habits to Save Energy and Water
Eco-friendly loading saves not just energy but also extends your dishwasher’s life. By adjusting a few small habits, you can reduce resource consumption while maintaining spotless results. Every efficient load contributes to long-term sustainability.
Always run your dishwasher with a full load, but not overloaded. Partial loads waste hot water and electricity without cleaning efficiently. Smart spacing ensures full coverage while keeping the water cycle balanced.
Use energy-efficient cycles such as “eco” or “light wash” for moderately dirty dishes. These settings lower temperature and shorten heating time, consuming up to 30% less energy. Modern dishwashers clean effectively even at lower water temperatures.
Skip pre-rinsing under running water. Scraping off food particles is enough since detergents work best with a small amount of grease. This simple change can save over 20 gallons of water per load.
Load items strategically to avoid re-washing. Repeated cycles double energy usage unnecessarily. Inspect before unloading to catch any remaining residue early.
Always maintain your dishwasher’s filter and spray arms. A clean system reduces friction and water resistance, allowing the appliance to operate more efficiently. Preventive maintenance equals sustainable performance.
Finally, air-dry whenever possible instead of using heat drying. Leaving the door open after a cycle uses zero energy and gives excellent drying results. Small eco-conscious choices make a big difference over time.
Frequently Asked Questions
Should I rinse dishes before loading the dishwasher?
Lightly scraping food debris is enough. Full rinsing wastes water and confuses soil sensors in modern dishwashers.
Can I put stainless steel and silver cutlery together?
Avoid it when possible. Mixing different metals during high-temperature cycles can cause chemical reactions and tarnish.
Where should I place plastic containers?
Always on the top rack. The lower rack’s heat can warp or melt lightweight plastic materials.
How do I stop glasses from getting cloudy?
Use rinse aid regularly and avoid overloading. Cloudiness often comes from mineral buildup and poor air circulation.
Is it okay to wash non-stick pans in the dishwasher?
Only if labeled dishwasher-safe. Repeated exposure to heat and detergent can damage coatings on most non-stick pans.
How often should I clean my dishwasher filter?
Once a week for heavy use or monthly for light loads. A clean filter prevents drainage issues and odor buildup.
Can overcrowding affect energy use?
Yes, tightly packed loads make the dishwasher work harder, using more water and electricity to achieve the same results.
Conclusion
Loading your dishwasher properly transforms how efficiently it cleans and dries every dish. By understanding water flow, spacing, and detergent behavior, you ensure that each item gets the attention it deserves.
Good loading habits save time, energy, and frustration. Instead of rewashing cloudy glasses or greasy pans, one well-organized cycle delivers spotless results. Clean dishes also mean lower power bills and less wear on your appliance.
Make loading a mindful routine rather than a rushed chore. Think of it as arranging a mini orchestra where every dish plays its part in harmony. When placed correctly, water jets perform like instruments tuned to perfection.
Review these guidelines regularly, especially when using a new dishwasher model. Manufacturers design racks differently, and adapting your technique helps maximize performance.
In the end, mastering how to properly load a dishwasher isn’t just about convenience — it’s about maintaining hygiene, saving resources, and getting the absolute best from your machine.
I’m Emma J. Caldwell, the founder, lead writer, and home-cooking enthusiast behind KitchenGuideCo.com. With a background in culinary arts and over a decade of cooking experience in both professional and personal kitchens, I created this platform to demystify recipes, offer smart kitchen gadget reviews, and guide readers through meal prep with confidence and clarity.