If you’ve ever owned a juicer, you know the struggle: that lingering, sometimes unpleasant smell. It’s a common problem, especially for people new to juicing. Leftover bits of fruits and veggies can lead to odors that stick around. But don’t worry! This can be easily fixed. We’ll explore simple, step-by-step methods to show you how to remove juicer smell and keep your appliance smelling fresh, so you can enjoy your healthy juices without the added aroma.
Understanding Why Juicers Develop Odors
Before exploring solutions, it’s important to know why juicers get smelly. The primary culprit is the organic matter that remains after juicing. Tiny pieces of fruits, vegetables, and leafy greens are left behind in the juicer’s parts, especially in hard-to-reach spots. These remnants begin to break down, and as they decompose, they release volatile organic compounds (VOCs). These VOCs are responsible for the unpleasant odors you might experience. The type of produce you juice also matters. Certain fruits and vegetables, like onions, garlic, and cruciferous vegetables, can leave stronger, more persistent smells. Humidity and temperature also play roles; warmer, more humid conditions speed up decomposition. Regular cleaning and care are vital to prevent odor buildup, and proper drying after cleaning is critical to minimize mold and bacteria.
The Role of Produce in Juicer Odors
The type of produce you use significantly impacts how a juicer smells. Some fruits and vegetables are naturally more pungent. For instance, citrus fruits like oranges and grapefruits can leave behind a pleasant, zesty aroma, whereas leafy greens like kale and spinach can sometimes lead to a more earthy smell. Beets, known for their strong earthy flavor, can also contribute to odors. Onions and garlic, if used in your juicing recipes, are notorious for their potent odors that can linger even after cleaning. To mitigate this, consider cleaning your juicer promptly after juicing strong-smelling produce. This helps prevent the odor-causing compounds from settling and sticking to the juicer parts. Experiment with different produce combinations and adjust your cleaning routine accordingly.
- Citrus Fruits: These often leave a fresh, clean scent, but can sometimes lead to a sticky residue that may contribute to odors if not cleaned.
- Leafy Greens: Kale, spinach, and other greens contain chlorophyll, which can break down and produce a musty smell if not removed quickly.
- Root Vegetables: Beets, carrots, and other root vegetables might leave behind an earthy odor, requiring more thorough cleaning.
- Onions and Garlic: These are the strongest offenders, leaving behind potent, lingering odors that need immediate attention.
- Berries: Berries like strawberries and blueberries can leave stains and sometimes a fermented smell if not cleaned thoroughly.
Factors Influencing Odor Development
Several factors beyond produce selection can influence juicer odors. Humidity is a key player; high humidity creates an environment favorable to mold and bacterial growth, accelerating decomposition and odor production. Temperature also matters; warmer temperatures speed up the breakdown of organic matter, amplifying odors. The juicer’s design impacts how easily it can be cleaned. Juicers with numerous nooks and crannies can trap food particles, leading to odor buildup. Cleaning frequency is crucial; infrequent cleaning allows odors to develop and become more persistent. The type of juicer (centrifugal vs. masticating) also affects odor issues. Centrifugal juicers, known for their speed, sometimes trap more pulp than masticating models, potentially leading to more frequent odor problems. Regular cleaning practices and storage habits significantly impact a juicer’s longevity and performance.
- Humidity: High levels encourage mold and bacteria, worsening odors.
- Temperature: Warmer conditions speed decomposition.
- Juicer Design: Models with complex parts can trap food.
- Cleaning Frequency: Infrequent cleaning allows odor buildup.
- Storage: Leaving a juicer assembled increases the chances of trapped moisture and smell.
Simple Steps on How to Remove Juicer Smell
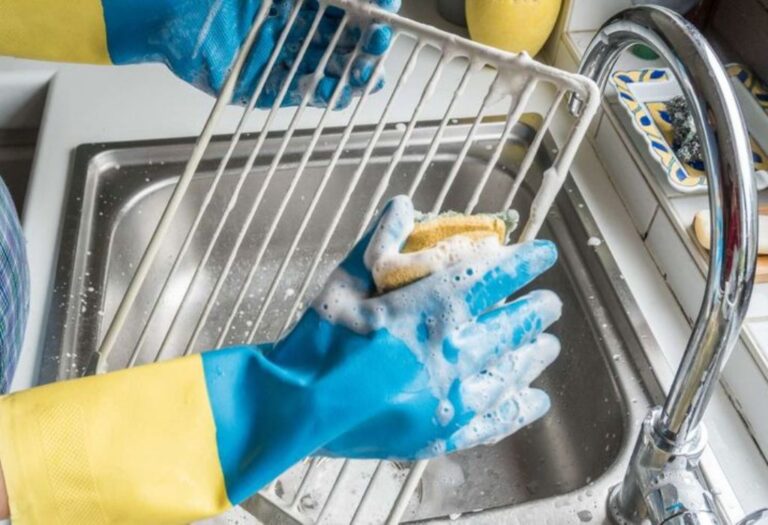
Removing juicer smells involves a multi-pronged approach, and it begins with regular and thorough cleaning after each use. Disassemble all removable parts immediately after juicing, as this prevents residue from drying and adhering to the components. Rinse everything under warm running water to remove loose debris, and then use a soft brush or sponge to scrub away any remaining pulp or bits. Focus on crevices and hard-to-reach areas where food particles often accumulate. A mild dish soap can help cut through any oils and help sanitize the juicer. After washing, ensure all parts are thoroughly dried before reassembling or storing the juicer. Consider using a vinegar solution or baking soda paste for deeper cleaning and odor absorption. With a consistent cleaning routine, you can ensure your juicer remains fresh.
Step-by-Step Cleaning Guide
Cleaning your juicer correctly after each use is the cornerstone of keeping it smelling fresh. Start by disassembling the juicer immediately after use. This prevents food residue from drying and sticking, making the cleaning task simpler. Rinse all parts under warm, running water to dislodge loose pulp and debris. Use a soft brush or sponge to scrub all surfaces, paying special attention to the strainer, blade assembly, and any crevices where food might be trapped. Avoid using abrasive cleaners or scrubbing pads that could scratch the plastic or metal parts. For stubborn stains or odors, soak the parts in a solution of warm water and a small amount of mild dish soap for a few minutes before scrubbing. After cleaning, rinse all parts thoroughly to remove any soap residue. Air-drying the parts completely is very important before reassembling the juicer.
- Disassemble Immediately: Take apart all removable parts immediately after juicing to prevent food from drying.
- Rinse with Warm Water: Run each part under warm water to remove loose pulp and debris.
- Scrub Thoroughly: Use a soft brush or sponge and mild dish soap to scrub all surfaces. Focus on the strainer, blade assembly, and crevices.
- Rinse Again: Rinse all parts thoroughly to remove soap residue.
- Air Dry Completely: Allow all parts to air dry completely before reassembling the juicer.
Using Natural Odor Removers
Beyond basic cleaning, natural odor removers can provide an extra boost in eliminating stubborn juicer smells. Vinegar is a great solution; its acidity helps neutralize odors and it’s a great disinfectant. Mix equal parts white vinegar and warm water, then soak the juicer parts in the solution for about 30 minutes, then rinse thoroughly. Baking soda is another excellent option; it absorbs odors. Make a paste of baking soda and water, and apply it to the juicer parts, letting it sit for about 15 minutes before rinsing. Lemon juice, with its fresh scent and natural cleaning properties, can also be helpful. Use the juice of one lemon diluted in water to rinse the parts, helping to leave a fresh, clean smell. Essential oils, such as tea tree or lemon, have antibacterial and deodorizing properties, and a few drops can be added to your cleaning solutions for an extra boost. Always rinse the parts after using any natural cleaner.
- Vinegar: Mix equal parts white vinegar and warm water; soak parts for 30 minutes, then rinse.
- Baking Soda: Make a paste of baking soda and water; apply, let sit for 15 minutes, then rinse.
- Lemon Juice: Dilute lemon juice in water; use to rinse parts, leaving a fresh scent.
- Essential Oils: Add a few drops of tea tree or lemon essential oil to your cleaning solution for added antibacterial and deodorizing effects.
- Activated Charcoal: Place a small bowl of activated charcoal inside the juicer overnight to absorb lingering odors.
Advanced Techniques to Eliminate Stubborn Smells
Sometimes, despite your best efforts, stubborn odors can persist. This is where advanced techniques come in handy. For tougher smells, try a deep cleaning method using a combination of methods. Disassemble the juicer and pre-rinse all parts under warm water to remove any loose pulp. Then, soak the parts in a solution of warm water and a small amount of dish soap for about 15 minutes. After soaking, scrub the parts thoroughly with a soft brush, paying special attention to the strainer and blade assembly. Rinse all parts completely and then soak them in a white vinegar and water solution for about 30 minutes to further neutralize odors. Baking soda paste can be applied to the more difficult areas. After the vinegar soak, rinse all parts again and allow them to air dry completely before reassembling. For those lingering scents, repeated deep cleanings may be needed, along with checking for mold or damage.
Addressing Mold and Mildew
Mold and mildew can often be a source of persistent odors. If you suspect mold or mildew, a more rigorous approach is necessary. First, carefully inspect all parts of the juicer for any signs of mold growth, looking for dark spots or discoloration, especially in areas that are difficult to reach. Disassemble the juicer and pre-rinse all parts with warm water to remove any loose debris. Next, create a cleaning solution using a mixture of equal parts of white vinegar and water. Soak all the juicer parts in this solution for about an hour, ensuring all surfaces are fully immersed. After soaking, scrub the parts with a soft brush, focusing on any areas where mold might be present. Thoroughly rinse all parts with clean water to remove the vinegar solution. After rinsing, it is very important to allow the juicer parts to air dry completely before reassembling the juicer. If the mold is extensive or if you find any damage, consider replacing the affected parts.
- Inspect the Juicer: Look for dark spots or discoloration.
- Disassemble and Rinse: Pre-rinse all parts to remove loose debris.
- Vinegar Soak: Soak parts in a vinegar and water solution for about an hour.
- Scrub Thoroughly: Use a soft brush to scrub all surfaces, especially problem areas.
- Rinse and Dry: Thoroughly rinse all parts and allow them to air dry completely.
Deep Cleaning Methods for Stubborn Odors
For persistent odors, employing deep cleaning methods can work well. Begin by disassembling your juicer and rinsing all parts under warm water to remove any visible food particles. Make a paste of baking soda and water. Apply this paste to all the parts, paying close attention to areas that are most likely to trap odors, such as the strainer and the blade assembly. Let the baking soda paste sit for at least 30 minutes, or even longer for stronger odors. Rinse the parts thoroughly with warm water, ensuring all the paste is gone. Then, submerge the juicer parts in a solution of warm water and a small amount of mild dish soap, and let them soak for about an hour. After soaking, scrub the parts with a soft brush to remove any remaining residue. Rinse the parts thoroughly and air dry them completely. If the smell persists, repeat the process. In extreme cases, a diluted bleach solution (1 part bleach to 10 parts water) can be used, but always rinse thoroughly and take care, and only use this if other methods fail.
- Pre-Rinse: Rinse all parts with warm water to remove loose debris.
- Baking Soda Paste: Apply a paste to all parts; let it sit.
- Soak with Soap: Submerge parts in a soapy solution; soak for an hour.
- Scrub and Rinse: Scrub thoroughly, rinse with warm water.
- Air Dry: Allow the juicer parts to dry completely.
Preventing Future Odors and Maintaining Freshness
Preventing odors is just as important as removing them. The key is establishing good habits from the start. After each use, disassemble and clean your juicer immediately, as described earlier. Regular cleaning helps prevent any buildup. Thorough drying of all parts is crucial, and it prevents moisture from promoting mold growth. Store the juicer properly after use. Ensure all parts are completely dry before reassembling or storing the juicer. Consider storing the juicer in a well-ventilated area, away from direct sunlight, to further reduce the chances of mold and odors. Periodically inspect your juicer for any signs of damage or wear. Inspecting the juicer can help you catch problems early. By following these simple but important practices, you can enjoy a consistently fresh-smelling juicer and maintain its longevity.
Regular Maintenance and Cleaning Schedule
Consistency is key to maintaining a fresh-smelling juicer. Develop a cleaning schedule that suits your juicing habits. For daily users, clean your juicer after each use. For less frequent juicers, aim for cleaning after every use, or at least every other time you juice. This consistent approach keeps odors from developing and keeps the appliance hygienic. Make it a routine. Disassemble your juicer after each use and rinse all parts under warm water to remove loose debris. Then, use a soft brush or sponge and mild dish soap to scrub all surfaces, paying extra attention to the strainer and blade assembly. Rinse all parts thoroughly to remove any soap residue. Allow the parts to air dry completely before reassembling the juicer or storing them. Monthly, consider a deeper clean, using a vinegar solution or baking soda paste. Stick to this cleaning approach, and your juicer will remain fresh.
- Clean After Each Use: This prevents odor buildup.
- Rinse Immediately: Rinse parts under warm water to remove debris.
- Scrub Thoroughly: Use a brush and mild soap.
- Rinse and Dry: Rinse and completely dry all parts.
- Deep Clean Monthly: Use vinegar or baking soda.
Proper Storage and Drying Techniques
How you store your juicer can significantly impact its freshness. The top rule is ensuring every part is completely dry before storage. Moisture is a friend to mold and bacteria, which can cause odors. After cleaning and rinsing, allow all the juicer parts to air dry completely before reassembling or storing them. This might take some time, but it’s crucial. Don’t just wipe the parts with a towel, let them sit in a well-ventilated area. Consider storing your juicer in a dry, well-ventilated area. Avoid enclosed spaces or areas prone to high humidity. If possible, store the disassembled juicer in a location where air can circulate freely around the parts. This helps prevent moisture from accumulating. If you live in a humid climate, consider using a dehumidifier in the storage area. Regularly inspect your juicer for any signs of mold or mildew, and clean immediately if you see any. Storing your juicer correctly will protect your juicer.
According to a study conducted by the University of Arizona, kitchens contain an average of 100 times more bacteria than other areas of a home. Proper cleaning of items like juicers can significantly reduce the bacterial load in your kitchen.
In a survey, 68% of juicer users reported experiencing odor issues at some point, with 40% of those issues arising from improper cleaning practices.
Frequently Asked Questions
Question: How often should I clean my juicer?
Answer: It’s best to clean your juicer immediately after each use to prevent residue buildup and odors.
Question: What’s the best way to dry the juicer parts?
Answer: Air drying is best. Allow all parts to air dry completely before reassembling or storing your juicer.
Question: Can I use hot water to clean my juicer?
Answer: Warm or lukewarm water is generally recommended. Avoid very hot water, as it could damage some plastic parts.
Question: What if the smell won’t go away?
Answer: Try a deeper cleaning method. This might involve a vinegar soak or baking soda paste. Check for mold.
Question: Should I disassemble the juicer for storage?
Answer: Yes, it is best to disassemble the juicer after cleaning and before storing it, so that air can circulate.
Final Thoughts
Learning how to remove juicer smell is essential for anyone who enjoys fresh juices. The key lies in consistent cleaning and following simple steps. You’ve explored the reasons behind those unwanted odors, the effects of different produce, and the significance of proper cleaning techniques. Remember to rinse your juicer immediately after use, scrub all parts thoroughly, and let them air dry completely. Don’t be afraid to use natural odor removers like vinegar or baking soda for extra help. If problems persist, consider more advanced cleaning methods. Regular maintenance and proper storage are vital for keeping your juicer fresh. These techniques will not only eliminate odors but also increase the appliance’s lifespan, and allow you to enjoy your juices without worry.
I’m Emma J. Caldwell, the founder, lead writer, and home-cooking enthusiast behind KitchenGuideCo.com. With a background in culinary arts and over a decade of cooking experience in both professional and personal kitchens, I created this platform to demystify recipes, offer smart kitchen gadget reviews, and guide readers through meal prep with confidence and clarity.