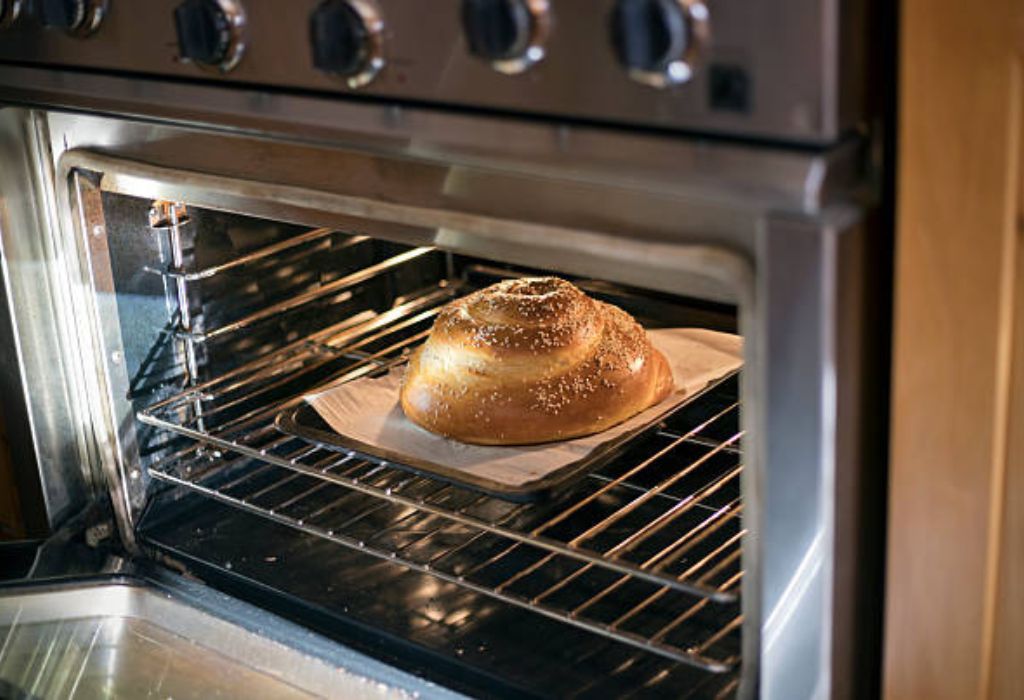
he kitchen fills with the warm, yeasty scent of rising dough as the oven slowly preheats, promising a loaf that will crackle softly when it cools. Many bakers follow recipes down to the gram, yet their bread still turns pale on top or dries out before the center is fully set.
The difference rarely comes from the ingredients themselves but from understanding how oven temperature controls every moment of the baking process.
Inside the oven, heat does much more than brown the crust because it transforms soft dough into a structured loaf within the first few minutes.
As the temperature rises, steam expands inside the dough and forces the bread to lift, creating what bakers call oven spring. A few degrees too low can stop this lift, while too much heat can seal the crust early and trap the center before it finishes baking.
When bakers discover the ideal temperature for their specific dough, everything becomes easier and more predictable. The crust develops color without burning, the crumb sets evenly, and the loaf cools into a texture that stays soft instead of collapsing.
Understanding temperature is not just a technical step but the key to turning homemade bread into something that looks and tastes like it came from a bakery.
Understanding Ideal Baking Temperature for Bread
Bread baking depends on precise heat because temperature controls how the dough transforms from a soft mass into a structured loaf.
When the oven reaches the correct level the yeast activity slows while the internal steam expands and lifts the dough. This balance creates oven spring which determines the final height and shape of the bread.
Most traditional loaves bake between three hundred seventy five and four hundred seventy five degrees depending on their density and hydration. Lean breads like baguettes often need higher heat to form a crisp crust while softer sandwich loaves bake at lower temperatures to maintain tenderness. Understanding these ranges helps bakers choose the right setting instead of relying on guesswork.
Heat affects the protein and starch inside the dough as the crumb structure begins to form. Gluten strands tighten and hold the expanding gas while starch gelatinizes to create softness inside.
If the temperature is too low the crumb may become gummy while excess heat can dry the loaf before the center finishes.
During the first ten to fifteen minutes temperature plays the most important role because oven spring happens quickly.
Once the crust sets the bread cannot expand further so the beginning stage determines success. A properly heated oven ensures expansion without breaking or collapsing the structure.
Different ovens may vary slightly in accuracy so bakers often use an internal thermometer to verify settings. Even a small difference can affect browning and rise especially in high hydration doughs. Learning how your oven behaves helps maintain consistent results in every bake.
Understanding ideal temperature allows bakers to improve texture without changing ingredients or techniques.
Once the relationship between heat and dough structure becomes familiar bread baking becomes more controlled and rewarding. This knowledge turns beginners into confident home bakers who can predict outcomes reliably.
Factors That Affect the Best Baking Temperature
Dough hydration changes how heat moves through bread because wetter dough requires higher heat to evaporate moisture properly.
Lean doughs with low fat content respond well to high temperatures that create crisp crusts. Enriched doughs with butter or milk need lower heat to prevent over-browning on the surface.
Flour type influences the strength of gluten and how the loaf sets during baking. High protein bread flour can handle hotter temperatures without collapsing while whole grain flour absorbs heat differently due to bran content.
Adjusting temperature helps balance crust color and internal doneness for each flour type.
Sugar and fat levels also change browning speed and crust color during baking. Sugars caramelize quickly and can darken the surface before the inside is ready. Lower temperatures help avoid burning while still allowing the crumb to set evenly.
Pan shape affects heat exposure because metal conducts heat faster than ceramic or glass. Free-form loaves on a stone receive direct bottom heat which supports rapid oven spring. Enclosed pans insulate the dough and require slightly lower temperatures to protect the crust.
Fermentation strength determines how much oven spring the dough can produce during the first stage of baking.
Over-proofed dough deflates easily at high temperatures while under-proofed dough may burst unevenly. Adjusting heat based on dough readiness improves final appearance and texture.
Understanding these factors helps bakers choose temperature rather than following a fixed number for all recipes. Every loaf responds differently depending on ingredients and structure. Once these variables become clear temperature adjustments feel simple and intuitive.
Does higher hydration always need higher temperature?
Wetter dough usually benefits from higher heat to evaporate moisture but excessive temperature can still cause premature crust setting.
Can whole wheat bread be baked at the same temperature as white bread?
Whole wheat often browns faster due to bran so slightly lower heat prevents burning while allowing the interior to finish properly.
Do enriched breads require a different temperature range?
Yes added sugar and fat increase browning which means enriched breads bake better at lower temperatures between three hundred twenty five and three hundred seventy five.
Does pan material affect ideal baking temperature?
Metal pans heat quickly and may require slight reduction while ceramic and glass bake slower and may need additional time.
Should temperature change based on proofing level?
If dough is over-proofed lower heat can help prevent collapse while under-proofed dough handles higher temperatures for stronger oven spring.
Recommended Temperatures for Different Bread Types
Sourdough loaves usually begin at higher temperatures to support strong oven spring before lowering heat later in the bake.
Many bakers start around four hundred seventy five degrees for the first stage then reduce to four hundred twenty five to finish. This method helps create blistered crust while keeping the inside moist.
Sandwich bread requires lower temperatures because the goal is softness rather than thick crust.
Most pan loaves bake between three hundred fifty and three hundred seventy five degrees for even crumb development. Lower heat prevents the surface from browning too quickly while the center sets gradually.
Artisan breads like baguettes and boules need intense initial heat for expansion. Baking stones or steels increase bottom heat and help create an open crumb. Temperatures between four hundred fifty and four hundred eighty degrees provide the best crust color and texture.
Enriched breads contain butter eggs or sugar which caramelize rapidly under high heat. Brioche challah and sweet rolls bake more safely between three hundred twenty five and three hundred fifty degrees. This prevents over-darkening while maintaining a tender interior.
Whole wheat and multigrain loaves contain bran and seeds that absorb moisture differently. Slightly lower temperatures around three hundred seventy five to four hundred degrees help ensure even baking.
Higher heat may cause the crust to harden before the inside finishes setting.
Adjusting temperatures based on bread type leads to more predictable and bakery-style results. Once bakers understand these ranges they can modify heat confidently instead of depending on a single number. This knowledge improves consistency across different recipes and loaf styles.
Why do sourdough recipes often start at higher temperatures?
High initial heat creates strong oven spring and helps develop blistered crust before lowering temperature to finish the bake evenly.
Can sandwich bread be baked at four hundred degrees?
It is possible but the crust may become too dark and firm so lower temperatures create softer texture for everyday loaves.
Do baguettes need steam at high temperature?
Yes steam keeps the crust flexible during early baking allowing expansion before crisping and coloring later in the process.
What happens if enriched bread is baked too hot?
Sugars and fats caramelize quickly causing the crust to burn while the inside remains under-baked or gummy.
Is whole wheat bread better at lower temperatures?
Slightly lower heat prevents the outer crust from hardening too fast and allows the dense interior to bake more evenly.
How Oven Heat Shapes Crust, Color, and Texture
Heat triggers the Maillard reaction which creates the golden brown color and complex flavor on the surface of bread. When the temperature is correct the crust develops gradually without burning. Too much heat accelerates browning before the crumb finishes resulting in uneven texture.
Moisture inside the dough evaporates as temperature rises which determines how thick the crust becomes. Faster evaporation produces crisp crust while slower evaporation keeps the surface soft. Adjusting heat helps control whether bread turns crunchy or remains tender.
Internal crumb structure depends on how quickly starch gelatinizes during baking. Higher temperatures set the crumb earlier which creates a more open texture in artisan loaves. Lower temperatures allow slower setting and produce softer uniform slices in sandwich bread.
If the crust firms too early the loaf cannot expand properly during oven spring. This happens when heat is too high or the oven is not pre-steamed before loading bread. Managing temperature and steam allows expansion without tearing or cracking.
Color variation also results from uneven heat inside the oven especially when racks block circulation. Turning the loaf or using baking stones helps stabilize surface temperature. Consistent heat supports even browning across all sides of the bread.
Understanding how heat affects crust and crumb helps bakers target specific results for each recipe. Instead of relying on luck they can control texture color and rise based on temperature choices. This knowledge makes bread baking more predictable and satisfying.
Importance of Preheating and Heat Retention
Preheating ensures the oven reaches full temperature before the dough enters so oven spring begins immediately. If the oven is not ready the dough warms slowly and loses gas before rising. This results in flat dense loaves with weak structure.
Baking stones and steels store heat and release it rapidly into the bottom of the loaf. This strong initial energy supports lift and improves crust color in artisan breads. Without sufficient heat the base may stay pale and the crumb may appear gummy.
Opening the oven door repeatedly causes heat to escape and interrupts baking momentum. Every drop in temperature affects oven spring during the first stage. Keeping the door closed helps maintain stable heat throughout the process.
Ovens differ in recovery time so some models heat back up faster than others. Home bakers may need to preheat longer than the signal suggests because indicators measure air not surface temperature. Allowing extra time improves results especially with heavy baking surfaces.
Heat retention matters during multi-loaf baking because the oven cools each time bread is loaded. Adjusting preheat settings or staggering batches maintains performance. Understanding how the oven behaves prevents inconsistent texture between batches.
Proper preheating and heat management lead to stronger rise and better crust development. Once bakers learn how their oven retains and recovers heat they gain control over every bake. This transforms simple bread making into a more reliable and enjoyable experience.
Using Steam for Better Oven Spring
Steam keeps the crust soft during the first stage of baking so the loaf can expand fully before setting.
When moisture fills the oven it delays surface drying which allows internal gas to stretch the dough upward. This process creates taller loaves with glossy crusts and open crumb structure.
Professional bakeries use built in steam injection systems but home bakers can add steam manually. Placing a preheated pan with boiling water or spraying the oven walls increases humidity instantly.
Steam should only be applied at the beginning because extended moisture prevents browning later in the bake.
Once oven spring finishes the steam must escape so the crust can firm properly. Venting the oven or removing the water source helps transition from expansion to browning. Leaving steam for too long can soften the crust and reduce crisp texture.
Some breads require more steam than others depending on hydration and shape. High hydration doughs like ciabatta benefit from strong steam because they need flexibility for expansion. Lower hydration pan loaves require only light moisture to avoid overly chewy crust.
Using baking stones or steels increases steam effectiveness by delivering strong bottom heat. The combination of heat and humidity supports rapid lift without tearing the surface. This balance helps achieve bakery style results even in a home oven.
Understanding when and how to use steam prevents flat or dull crusts. Once bakers learn proper timing they can control the balance between rise and color. Steam becomes a simple yet powerful tool for improving bread quality at any skill level.
Do all breads need steam at the beginning?
Lean artisan loaves benefit from steam while enriched breads with sugar and fat usually require less moisture to prevent softness.
How long should steam stay in the oven?
Steam is helpful only during the first ten to fifteen minutes and should be removed afterward for proper crust development.
Can I use ice cubes to generate steam?
Ice cubes can work but boiling water in a preheated pan produces stronger and more immediate steam for better results.
Does convection mode affect steam performance?
Convection can blow moisture away too quickly so most bakers prefer conventional heat when steaming bread.
Can too much steam ruin the crust?
Excessive steam prevents browning and can leave the crust soft so proper timing is important for balanced texture.
Convection vs Conventional Baking for Bread
Convection baking circulates air which speeds up heat transfer and can brown the crust faster. This setting may require reduced temperature and shorter baking time to avoid over-darkening. Conventional heat keeps the air still and supports steady moisture retention during early baking.
Most artisan breads bake better in conventional mode especially when steam is required. Moving air can remove humidity too quickly and limit oven spring. Still air allows the crust to remain flexible until expansion is complete.
Sandwich loaves may benefit from convection when multiple pans are baked at once. The circulating air helps maintain consistent temperature across different shelves. Reducing the heat slightly prevents the crust from drying before the inside finishes.
Some modern ovens combine convection with steam features for more control. These hybrid modes provide even heat distribution while protecting moisture levels. Understanding available settings allows bakers to choose the best function for each loaf type.
Testing both modes helps identify how individual ovens behave because performance varies between models. Some convection systems run stronger than others and may require greater adjustment. Once bakers observe results they can create reliable temperature guidelines.
Choosing between convection and conventional depends on crust preference and recipe requirements. When crispness and rapid browning are desired convection may offer advantages. When gentle rise and steam are needed traditional heat remains the better choice.
Common Temperature Mistakes Bakers Make

One common mistake is not preheating the oven long enough which weakens oven spring and reduces lift. Bread placed into a lukewarm oven warms slowly and loses gas before expansion. This often produces dense loaves with tight crumb structure.
Another error is baking at temperatures that are too low for the bread type. Low heat may cause pale crust and gummy interior because the crumb fails to set properly. Raising the temperature helps activate starch gelatinization and improve final texture.
Bakers sometimes rely solely on recipe times instead of checking internal temperature. Every oven performs differently so visual cues and thermometer readings provide more accuracy. Bread is typically done when the center reaches around two hundred degrees.
Opening the oven door too frequently allows heat to escape during critical baking stages. Sudden temperature drops interfere with oven spring and crust formation. Keeping the door closed supports consistent rise and even coloring.
Placing bread too close to heating elements can cause uneven browning. Rotating the loaf or adjusting rack height helps stabilize exposure to heat. Balanced placement improves appearance and prevents scorching.
Avoiding these mistakes leads to predictable and professional results. Once bakers understand how temperature affects each stage they can correct problems with confidence. Knowledge turns inconsistent outcomes into successful loaves every time.
Safety Tips and Thermometer Accuracy
Using an oven thermometer helps verify actual temperature because built in displays may be off. Even a small variation can affect crust color and crumb development. Monitoring internal temperature improves consistency across different baking sessions.
Instant read thermometers help determine when bread is fully baked internally. Most lean breads finish at around two hundred to two hundred five degrees. Enriched loaves may require slightly lower internal temperature to maintain softness.
Keeping oven mitts and heat resistant tools nearby prevents burns when loading steam pans. Hot water and metal surfaces create hazards during the early baking stage. Preparing tools in advance makes handling safer and more efficient.
Door glass should not be splashed directly with cold water because rapid temperature change can crack the surface. Using controlled steam methods protects the oven while still enhancing oven spring. Safety practices extend appliance lifespan and reduce risk.
Regular inspection of door seals prevents heat leakage during baking. Damaged gaskets allow temperature fluctuations that affect bread quality. Replacing worn seals supports stable performance and energy efficiency.
Following these safety and accuracy tips protects both the baker and the oven. Confidence grows when temperature and handling are properly managed. Safe practice ensures enjoyable and reliable bread baking every time.
Is an oven thermometer necessary for home baking?
It is helpful because oven displays can be inaccurate and small temperature differences affect bread results significantly.
What internal temperature indicates bread is done?
Lean breads finish around two hundred to two hundred five degrees while enriched loaves may finish slightly lower.
Can steam pans cause safety risks?
Yes boiling water and metal surfaces are extremely hot so using proper tools and protection prevents burns.
Should the thermometer stay inside the oven at all times?
Keeping it inside during preheating and baking helps monitor stability and ensures accurate tracking throughout.
Can inaccurate temperature ruin the loaf?
Even minor temperature errors can affect oven spring crumb structure and crust color leading to disappointing results.
Post-Bake Cooling and Storage for Best Texture
Cooling bread properly is essential because the crumb continues setting after removal from the oven. Cutting too early releases trapped steam and compresses the structure inside. Allowing at least one hour of cooling preserves texture and prevents gummy slices.
Placing the loaf on a wire rack helps air circulate around all sides. This prevents condensation from forming on the bottom and softening the crust. Proper cooling maintains crispness in artisan breads and softness in sandwich loaves.
Storing bread in paper bags preserves crust texture better than plastic. Paper allows airflow while keeping loaf protected from drying too quickly. Plastic traps moisture and can make crust soggy though it keeps bread soft longer.
Freezing is the best long term storage method for maintaining freshness. Sliced bread can be wrapped tightly and thawed at room temperature or warmed briefly in the oven. This prevents staleness and preserves flavor without additives.
Reheating bread restores crust quality when done properly. Brief exposure to moderate heat refreshes texture without drying the crumb. Avoid using microwaves because they soften bread rapidly and reduce quality.
Understanding cooling and storage helps extend enjoyment beyond the baking day. Once bakers learn how bread behaves after baking they can maintain ideal texture longer. Proper handling completes the final step in successful bread making.
Conclusion
Baking bread at the right temperature transforms dough into a loaf with balanced crust color and fully developed crumb. Understanding how heat affects oven spring moisture evaporation and starch setting helps bakers control results instead of relying on guesswork.
Once temperature choices become intentional bread turns out consistently better across different recipes and styles.
Different dough types require different temperature ranges depending on hydration ingredients and desired texture.
Lean breads thrive on higher heat while enriched and whole grain loaves bake more evenly at lower settings. Learning these distinctions allows bakers to adjust confidently and achieve predictable outcomes.
With proper preheating steam use and thermometer accuracy baking becomes easier and more rewarding. Each loaf improves as bakers observe how temperature influences rise color and final structure.
Mastering heat control turns homemade bread into bakery quality without changing ingredients or equipment.
I’m Emma J. Caldwell, the founder, lead writer, and home-cooking enthusiast behind KitchenGuideCo.com. With a background in culinary arts and over a decade of cooking experience in both professional and personal kitchens, I created this platform to demystify recipes, offer smart kitchen gadget reviews, and guide readers through meal prep with confidence and clarity.