You press the start button on your dishwasher, expecting to hear the familiar rush of water filling the tub. But instead, there’s silence — or maybe just a faint hum.
You open the door and find the dishes still dry, wondering if the appliance has finally given up. In many cases, the problem isn’t the dishwasher itself but a small, often overlooked part: the water inlet valve.
This component acts like a gatekeeper, controlling how much water enters your dishwasher during each cycle. When it malfunctions, the entire cleaning process comes to a halt.
It’s one of the most common yet misunderstood dishwasher issues, leading many homeowners to replace the entire unit when a simple test could reveal the real problem.
Testing the water inlet valve might sound complicated, but it’s actually a straightforward process that requires only a few basic tools. With a careful inspection, a multimeter, and some safety precautions, you can determine whether your valve needs cleaning, repair, or replacement.
In this guide, you’ll learn how to test your dishwasher’s water inlet valve safely and accurately, understand the warning signs of failure, and take steps to prevent future issues.
By the end, you’ll know exactly how to bring your dishwasher back to life — without calling a technician.
Understanding the Role of the Water Inlet Valve
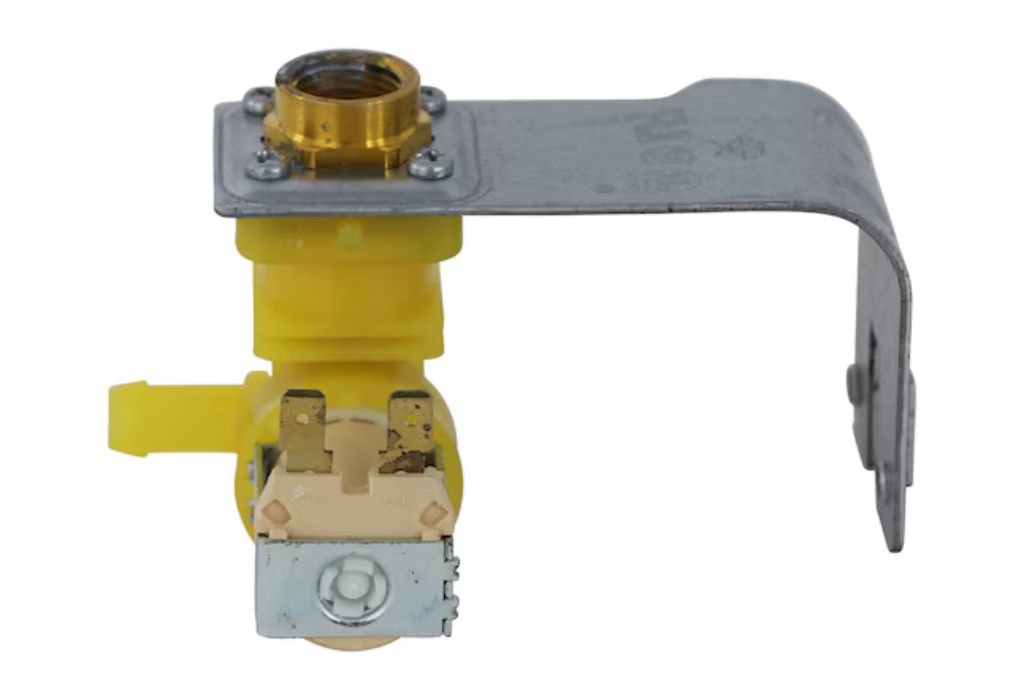
The water inlet valve is the heart of your dishwasher’s water system. It controls when and how much water flows into the tub during each wash cycle. Without it functioning correctly, the dishwasher either won’t fill at all or may overflow.
This valve works with the control board, opening and closing based on electrical signals. Inside, small solenoid coils lift internal gates that allow pressurized water to pass through. If these coils fail, the valve cannot respond properly to commands.
When the inlet valve begins to malfunction, symptoms can appear slowly. You might notice dishes coming out less clean or cycles taking longer to complete. These subtle hints often point to partial blockages or weakening electrical components.
The valve also maintains the right pressure level during filling. Too much pressure can damage internal seals, while too little can cause poor water coverage. Understanding its role helps in diagnosing water-related issues accurately.
Many homeowners misdiagnose water problems as pump or sensor faults. However, the inlet valve is often the root cause behind insufficient or inconsistent filling. Before replacing expensive parts, it’s always wise to test this component first.
With basic knowledge and safety steps, anyone can examine a dishwasher water inlet valve at home. It doesn’t require professional expertise — only patience and proper guidance.
Common Signs of a Faulty Dishwasher Water Inlet Valve
One of the clearest signs of a faulty valve is when the dishwasher fails to fill with water. If you start a cycle and hear the motor running but no water enters, the valve might be stuck shut. This happens due to internal wear, mineral buildup, or electrical failure.
Sometimes, water may continue to flow even after the cycle ends. This indicates the valve isn’t closing properly, allowing water to leak slowly into the tub. Over time, that small leak can flood the base of the dishwasher and trigger float switch errors.
A humming or clicking sound during operation can also suggest coil issues. The valve receives power but cannot move its internal parts. This mechanical resistance creates unusual noises that repeat every cycle.
You might also notice a burning smell near the valve housing. When solenoid coils short out, they overheat and can emit a faint electrical odor. This is a warning sign that requires immediate disconnection from power.
Performance problems like cloudy dishes, detergent residue, or poor rinsing often come from reduced water pressure. A clogged valve screen can restrict flow, leading to insufficient water circulation.
Some modern dishwashers display fault codes such as “E1,” “F6,” or “IE” to indicate water inlet issues. Checking the manual for these codes can confirm whether the valve should be tested next.
If you experience any of these symptoms, don’t panic or replace the appliance. A quick continuity test can verify whether the valve is the true culprit.
Preparing to Test the Water Inlet Valve Safely
Before touching any electrical or plumbing component, safety should be your top priority. Start by unplugging the dishwasher from the power source to eliminate electrical hazards. Then, shut off the water supply line connected to the valve.
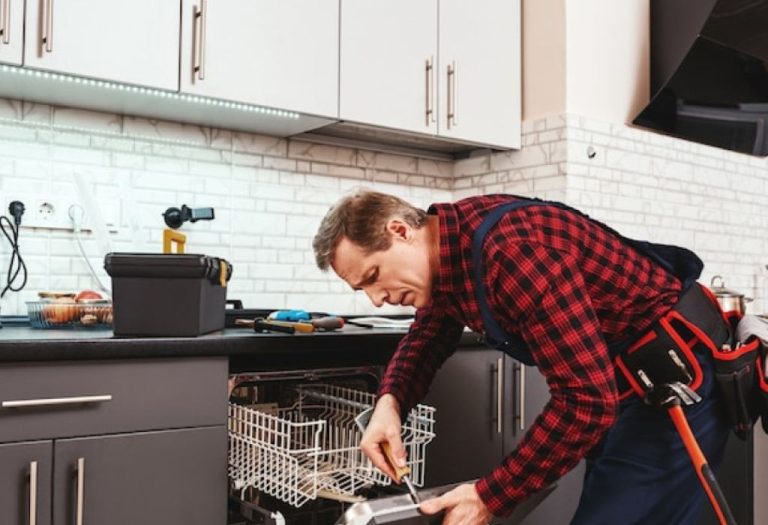
Next, open the dishwasher door and remove the lower kick panel using a screwdriver. This panel hides the base components where the valve is usually mounted. Keep all screws organized for reassembly later.
Locate the valve, typically found where the water line enters the dishwasher. It connects directly to a small hose leading toward the tub’s side or bottom. Identifying it correctly prevents accidental removal of other components.
Gather the tools you’ll need: a multimeter, wrench, pliers, towel, and flashlight. These basic items are enough for inspection and testing. Always work on a dry floor to avoid slipping or electrical risk.
If the valve is hard to reach, gently pull the dishwasher forward to create more space. Be careful not to stretch or damage any attached wires or hoses. Taking a photo before disconnection helps you remember where each connection goes.
It’s also smart to wear insulated gloves and eye protection while working. Even with power off, residual moisture can cause minor shocks or leaks.
Once everything is ready, you can proceed to the testing stage confidently and safely.
Step-by-Step Guide to Test the Dishwasher Inlet Valve
Begin by detaching the two electrical wires connected to the solenoid terminals. Use pliers gently to avoid damaging the connectors. Lay the wires aside so they don’t touch any metal surface.
Next, disconnect the water line from the valve using a wrench. Keep a towel handy because a small amount of water may drain out. Examine the hose ends for mineral deposits or corrosion that could block water flow.
Visually inspect the valve body for cracks, rust, or burnt marks. Any physical damage usually means replacement is necessary. However, if it looks clean, continue with the electrical test.
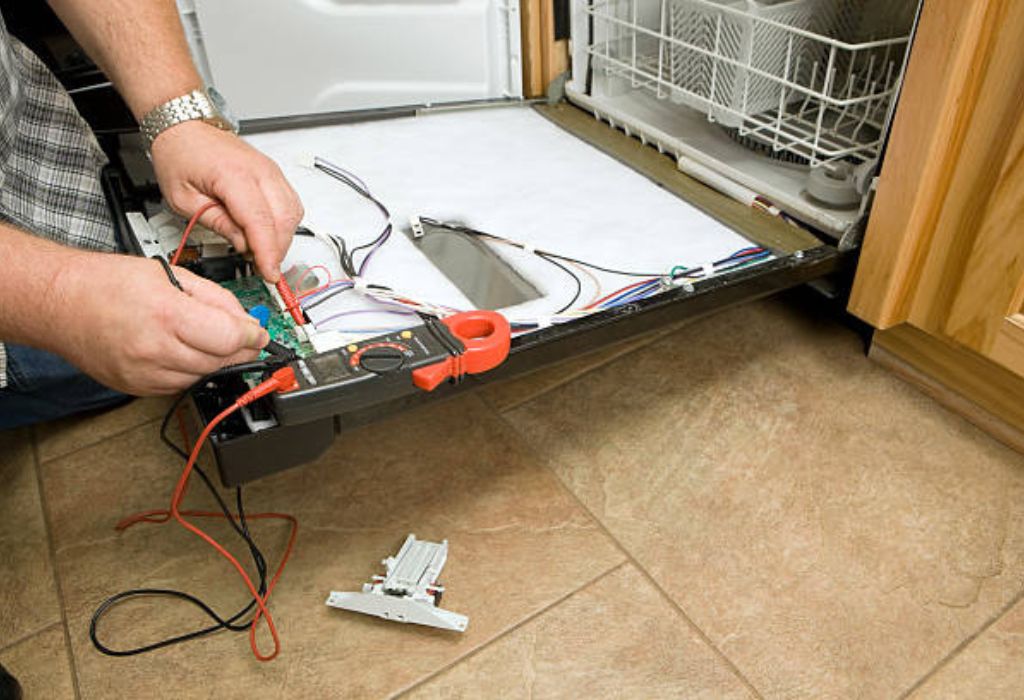
Set your multimeter to the resistance (ohm) setting. Touch each probe to one terminal on the solenoid. A functional dishwasher water inlet valve typically reads between 500–1500 ohms depending on the brand.
If the reading shows “OL” (open line) or zero resistance, the coil is defective. This means electricity cannot pass through, preventing the valve from opening. A new replacement will be required.
In case the reading seems normal, check the valve for mechanical blockages next. Blow gently through the inlet opening — air should not pass through when the valve is closed. If it does, the valve’s internal seal is worn out.
Once testing is complete, reconnect the wires and hoses carefully. Make sure everything fits snugly to avoid leaks.
This simple procedure confirms whether the inlet valve is the cause of your dishwasher’s water issues.
How to Inspect and Clean the Water Inlet Screen
Most water inlet valves include a small metal or plastic screen that filters incoming water. Over time, minerals, sand, and debris from your plumbing can clog this screen. A clogged screen restricts flow and mimics valve failure symptoms.
Start by removing the valve from its bracket if necessary. You’ll see the fine mesh filter sitting inside the water port where the hose connects. Use needle-nose pliers or tweezers to pull it out carefully.
Rinse the screen under warm running water. Use an old toothbrush or soft brush to loosen stubborn buildup. Avoid poking the mesh with sharp objects that could tear it.
If mineral deposits are heavy, soak the screen in a bowl of white vinegar for 15–20 minutes. Vinegar dissolves calcium and lime efficiently without harming the material. Rinse thoroughly after soaking.
Once the screen looks clean, reinstall it into the valve port. Ensure it sits flat and doesn’t block the opening. Connect the water line securely to prevent drips.
Cleaning this small part can often restore normal water flow and pressure instantly. Many homeowners replace the entire valve unnecessarily when a simple cleaning would fix the issue.
Make it a habit to check the screen every six months if you live in an area with hard water. This preventive step saves money and prolongs valve life.
Replacing a Defective Water Inlet Valve (If Needed)
If your test results confirm the valve is defective, replacement is the best option. Choose an OEM or manufacturer-approved valve that matches your dishwasher model. Generic substitutes may fit but often fail sooner.
Begin by disconnecting all hoses and wires as before. Remove the screws or brackets holding the valve in place. Keep the old valve nearby for reference while installing the new one.
Attach the new valve to the frame using the same screw holes. Reconnect the electrical terminals, ensuring they click firmly into place. Loose connections can cause intermittent failure.
Next, attach the water supply line and tighten it with a wrench. Do not overtighten, as excessive force can crack the plastic fittings. Once connected, turn on the water supply to check for leaks.
Slide the dishwasher back into position carefully, making sure no hoses are pinched. Reinstall the lower kick panel and plug the appliance back into power.
Run a short wash cycle to test the new valve’s performance. If the dishwasher fills smoothly and no leaks appear, the replacement is successful.
Always dispose of the old valve properly, especially if it contains electrical components. Recycling centers often accept them with other small appliances.
Troubleshooting Other Related Dishwasher Issues
Sometimes, a faulty inlet valve isn’t the only issue causing water problems. Low household water pressure can reduce filling efficiency even if the valve is fine. Use a pressure gauge to confirm at least 20 psi supply to the appliance.
Inspect the float switch inside the dishwasher tub. This small plastic device stops water flow when the level gets too high. If it’s stuck in the “up” position, the valve won’t receive the signal to open.
Electrical control board issues can also mimic valve problems. A damaged relay or burnt trace may fail to send voltage to the solenoid. Testing voltage during the fill cycle can confirm this situation.
If the solenoid coil overheats frequently, check for poor grounding or short circuits in wiring. Damaged insulation or corrosion at connectors can interfere with current flow.
Another overlooked issue is a kinked or clogged inlet hose. Even a small bend can restrict water and make the valve appear weak. Straighten or replace the hose if necessary.
In some dishwashers, a faulty thermistor or flow meter sends incorrect data to the main board. This can interrupt filling even though the valve works perfectly. Reviewing error codes in the user manual helps pinpoint such faults.
Addressing these related factors ensures your testing efforts deliver accurate conclusions.
Maintenance Tips to Extend Dishwasher Valve Life
Regular maintenance prevents costly breakdowns and keeps your dishwasher efficient. Always clean the inlet screen every few months to stop debris from clogging the valve.
Use a water softener if your region has hard water. Minerals like calcium and magnesium form scale deposits that restrict valve openings. Softeners extend the life of all water-using appliances in your home.
Run an empty dishwasher with a vinegar rinse once a month. Vinegar helps dissolve internal mineral buildup without harming seals or gaskets. It’s a simple but effective cleaning habit.
Avoid overloading the dishwasher because it strains internal pumps and sensors. Balanced loads help the water inlet system maintain proper flow and pressure.
Check under the sink periodically for leaks around the water connection. Early detection of drips or rust can prevent full valve failure later.
Also, never use industrial cleaning agents or harsh chemicals that might corrode internal components. Stick with dishwasher-approved detergents only.
By following these habits, you can easily add years to your dishwasher’s service life. Preventive care is always cheaper and easier than replacement.
Frequently Asked Questions
Why does my dishwasher not fill with water even after replacing the valve?
It may be due to a faulty float switch, low water pressure, or electrical signal failure from the control board.
How often should the inlet valve be cleaned or tested?
Inspect and clean it every six months, especially if your water supply has heavy mineral content.
Can low household water pressure damage the valve?
Yes, insufficient pressure forces the valve to stay open longer, wearing internal seals prematurely.
Is it safe to run the dishwasher with a partially clogged valve?
No, restricted water flow can overheat the pump and reduce washing efficiency. Always clean the valve first.
What’s the average cost to replace a dishwasher water inlet valve?
Most replacement valves cost between $20–$60, excluding labor if you hire a technician.
Conclusion
Testing your dishwasher water inlet valve is one of the easiest diagnostic tasks you can perform at home. With just a multimeter, screwdriver, and a bit of patience, you can confirm whether it’s working correctly.
Recognizing early warning signs such as slow filling, leaks, or humming sounds can save you from expensive repairs. Once you understand how the valve functions, troubleshooting becomes logical and stress-free.
If your tests show normal readings but the dishwasher still malfunctions, consider checking other components like the float switch or control board. These often interact closely with the valve’s performance.
By cleaning the inlet screen, maintaining good water pressure, and inspecting regularly, you’ll ensure years of reliable operation. Remember, most dishwasher problems stem from neglect rather than major defects.
A few minutes of care today can prevent hours of frustration tomorrow. Keep your inlet valve clean, test it occasionally, and your dishwasher will continue serving you efficiently for many more cycles.
I’m Emma J. Caldwell, the founder, lead writer, and home-cooking enthusiast behind KitchenGuideCo.com. With a background in culinary arts and over a decade of cooking experience in both professional and personal kitchens, I created this platform to demystify recipes, offer smart kitchen gadget reviews, and guide readers through meal prep with confidence and clarity.