If you’re wondering why juicer leaking from spout, you’re definitely not alone! It’s a common issue, especially for those just starting to juice fruits and vegetables. Don’t worry, it’s usually a simple problem with an even simpler fix. This guide will walk you through the most common reasons your juicer might be leaking and show you how to solve each one, step-by-step. Get ready to juice without the mess!
Common Causes of a Juicer Leaking
Juicer leaking can be frustrating, interrupting the flow of your fresh juice and creating a sticky cleanup. However, most leaks originate from just a few key areas. Addressing these areas can solve the issue quickly. Let’s explore the typical causes and pinpoint the location where leaks often begin. Identifying these common trouble spots is the first step toward a leak-free juicing experience. This process is about getting to know your juicer. You will become familiar with its components and how they interact. A good understanding of this will allow you to maintain it more efficiently. Keep in mind that consistent maintenance reduces leakage risks. This helps to extend the juicer’s lifespan.
Improper Assembly
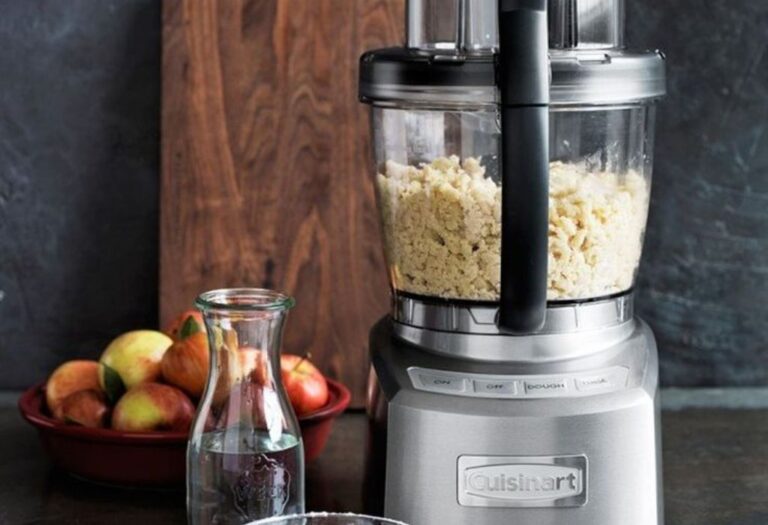
One of the most frequent reasons for a juicer leaking from the spout is that it hasn’t been assembled correctly. Juicers comprise many parts that must align perfectly for effective function. If any piece is misaligned, a leak is possible. These components include the juicing screen, the auger (or blade), the housing, and the lid. Each part plays a critical role in the juicing process and should be correctly installed. The lid, in particular, should be firmly locked or secured. Failure to do so will create gaps. These gaps provide a path for the juice to escape. Carefully consult your juicer’s manual. Examine the assembly diagrams. Make sure all parts are seated and locked in position before starting to juice. This avoids common assembly errors.
- Check the Juicing Screen: The juicing screen is the fine mesh filter. It separates the juice from the pulp. It should fit snugly into the juicer’s housing. If it’s loose or not properly aligned, juice can leak.
- Inspect the Auger (or Blade): The auger or blade crushes the fruits and vegetables. Ensure it’s correctly placed within the juicer. Check for any damage to the auger that might create gaps for leakage.
- Lid Security: The lid must be tightly secured. It often has locking mechanisms to keep it in place during operation. Make sure these are engaged.
The juicing screen is often made of stainless steel or a similar material. Over time, residue can build up, even with washing. This residue can cause an improper fit. Always inspect the screen for any obstructions or damage. Replace the screen if it is bent or damaged, as this might be the only fix.
The auger’s purpose is to crush and squeeze ingredients. Correct positioning of the auger is essential. This can be tricky with some juicers, so make sure it is in place. If it is correctly placed, the auger’s function is to create pressure. This pressure extracts the juice from the fruits and vegetables. The pressure must be contained, so the auger needs to align precisely.
The lid serves a critical role in preventing leakage. It does so by providing a secure seal that prevents the escape of juice. If not properly secured, juice may escape from the juicer. Check for any damage or obstructions to the lid’s locking mechanisms. Also, inspect the lid’s seal to ensure it’s intact. A damaged seal can lead to leakage.
Worn or Damaged Parts
Over time, juicer components can wear out or become damaged. This often leads to leaks. Seals, gaskets, and the juicing screen are especially vulnerable to wear. Regular inspections and timely
- Check the Seals and Gaskets: These rubber or silicone components create a watertight seal. They prevent juice from escaping. Inspect them for cracks, tears, or wear.
- Examine the Juicing Screen: As mentioned before, the juicing screen filters out pulp. If the screen is bent, cracked, or damaged, it can cause leaks.
- Assess the Housing: The plastic or metal housing of the juicer can also get damaged over time. Cracks or warping can lead to leaks.
Seals and gaskets are usually made of rubber or silicone. They are critical for preventing leakage. They form a tight seal between the various components of your juicer. Over time, these parts can wear out, causing them to lose their effectiveness. This wear is caused by the constant pressure and moisture exposure. Inspect the seals and gaskets regularly, and look for signs of damage or deterioration. Replacement seals and gaskets can typically be found online or from the juicer’s manufacturer.
The juicing screen’s small holes and delicate mesh make it particularly vulnerable to damage. Impact with hard objects or prolonged pressure can cause the screen to warp or crack. Regularly cleaning the screen is also important. This is because any blockage can increase pressure. This also makes the screen more susceptible to damage. In addition, always inspect the screen for wear and tear. Replace it immediately if you observe any damage. This will prevent leakage and ensure optimal juicing.
The housing of a juicer needs to be durable to withstand the stresses of juicing. Accidents or excessive force can cause cracks or warping in the housing. This can compromise the juicer’s ability to contain juice. If you find any damage to the housing, you should address it right away. Depending on the extent of the damage, you might need to replace the entire juicer. Regular cleaning and careful handling can help maintain the integrity of the housing. This extends the life of your appliance.
Incorrect Feeding and Overfilling
The way you feed ingredients into your juicer can also impact its performance. Overfilling the juicer can cause juice to back up and leak. Also, feeding ingredients too quickly or without proper preparation can create problems. Learning the correct techniques can help you avoid leaks and maximize your juicing yield. This includes cutting produce into appropriate sizes. This can prevent jams and reduce the strain on the motor. Proper feeding habits can also keep your juicer from leaking from the spout. Taking the time to feed ingredients slowly ensures the juicer’s components function effectively. This improves the overall juicing experience.
- Proper Produce Preparation: Cut fruits and vegetables into the size recommended by your juicer’s instructions. This helps them process effectively.
- Avoid Overfilling: Don’t overload the juicer’s feed chute. This can cause juice to back up and spill.
- Slow and Steady Feeding: Feed ingredients slowly and allow the juicer to process them. This reduces the risk of leaks and improves juice extraction.
Prepare produce carefully to prevent jams and to ease the strain on the motor. Larger pieces can clog the juicer. Always follow the manufacturer’s guidance. This often involves cutting fruits and vegetables into smaller, manageable chunks. This is especially true for items like carrots and celery, which can be tough to process.
Overfilling the feed chute can lead to several problems, including leaks. It can also lead to the juicer clogging. It also causes the juice to overflow. Juicers are designed to process a specific amount of produce at a time. Pushing too much produce at once overwhelms the motor and processing components. This makes the juice escape from the spout. Always feed ingredients at a steady pace. Watch how fast your juicer is processing the ingredients. Make adjustments to your feeding accordingly.
Feeding ingredients at a slower pace provides better juice extraction. It also reduces pressure on the components of the juicer. It gives each piece of produce time to process. This also lets the juicer efficiently separate the juice from the pulp. It prevents the juicer from getting backed up and spilling. You can also monitor the juicing process. This will help you identify any potential issues quickly. It also allows you to make adjustments to your feeding routine. Remember that patience when juicing will improve the overall results.
Troubleshooting Common Leaks and Issues
Sometimes, figuring out why juicer leaking from spout takes a bit of troubleshooting. This section will guide you through diagnosing and addressing common issues that might be causing leaks. This includes the following: addressing the pressure that builds up during juicing; and ensuring that all parts are clean. Cleaning your juicer is important. Doing these things can improve the effectiveness and longevity of your appliance. Also, maintaining your juicer involves consistent care. Regular inspections and cleaning sessions will extend your juicer’s life. The more you use your juicer, the more important it becomes to establish these good habits. This ensures both efficient operation and optimal performance.
Pressure Buildup
Pressure is an essential part of the juicing process, but excessive pressure can cause leaks. This often happens if the juicer becomes clogged or if the ingredients are too dense. Managing pressure is key to preventing leaks and ensuring your juicer works smoothly. Regular cleaning, using the right amount of produce, and selecting the right ingredients can prevent pressure buildup. Learning to recognize and address high pressure is crucial. This will help you keep your juicer functioning and will extend its lifespan. The juicer’s manual usually has guidance for handling the pressure.
- Clogging Prevention: Make sure you’re not overloading the juicer. Clear the pulp container regularly.
- Ingredient Selection: Avoid juicing excessively dense or fibrous ingredients. Blend them with softer fruits and vegetables.
- Cleaning During Juicing: If the juicer starts to strain, stop and clean the juicing screen.
Clogging usually happens when you are juicing too much produce at once. This backs up the juicer’s components. Clearing the pulp container at the appropriate intervals is necessary to prevent clogs. The frequency will depend on how much you are juicing and the types of produce used. Keeping an eye on the pulp container ensures smooth operations. It also prevents leaks caused by pressure buildup.
Certain ingredients, like celery and ginger, can contribute to pressure buildup. High-fiber foods can create more pulp. This can lead to clogs and increased pressure. Choosing a mix of ingredients with varying textures is a good idea. This improves juicing efficiency. It also prevents potential leaks. It will also help the juicer work smoothly. It can extend the life of your machine as well.
Straining usually means the juicer is struggling to process the ingredients. Sometimes, stopping and cleaning the juicing screen is necessary. This clears any blockages. It also allows the juicer to function at optimal levels. Cleaning the juicing screen during operation can often prevent a small problem from turning into a big one. It will also prevent leaks. This helps ensure that the juicer operates efficiently. Doing this helps extend the life of your machine.
Cleaning and Maintenance
Keeping your juicer clean is essential for both performance and longevity. Regular cleaning removes pulp, residue, and potential blockages. This can prevent leaks and other issues. Maintenance includes regular inspections. This helps identify any worn-out parts before they cause problems. Setting up a routine for cleaning and maintenance ensures your juicer stays in good working order. It will also provide you with fresh, delicious juice for years to come. In short, cleaning and maintenance will improve the lifespan of your juicer.
- Immediate Cleaning: Clean your juicer immediately after each use to prevent pulp from drying and hardening.
- Disassembly and Thorough Cleaning: Disassemble your juicer completely. Clean all parts with warm, soapy water.
- Regular Inspection: Inspect the seals, gaskets, and other components for wear and tear.
Cleaning your juicer immediately is more than just good hygiene. It is important for maintenance. It makes the cleaning process much easier. When juice or pulp dries, it can be difficult to remove. Also, dried pulp can contribute to blockages, causing leaks. Immediate cleaning also stops the buildup of bacteria, which can affect the juice flavor. This will help maintain optimal performance and hygiene.
Thorough cleaning requires full disassembly to access every component. Warm, soapy water effectively removes residue and ensures that all parts are clean. Pay attention to parts where pulp can build up. This includes the juicing screen, auger, and housing. Use a brush to scrub these areas. Thorough cleaning keeps the juicer running well. This also helps you maintain the juicer’s effectiveness.
Regular inspection of your juicer’s components is crucial for preventing leaks. Examine seals, gaskets, and other parts for wear and tear. This helps you identify potential problems early. The process will help you replace any worn parts immediately. This protects the juicer’s performance. These inspections are a vital part of maintaining the machine.
Step-by-Step Guide to Preventing Juicer Leaks
Now, let’s explore practical steps you can take to prevent juicer leaks. This step-by-step guidance will take you from the initial assembly to after-use cleaning and storage. It provides you with a comprehensive approach to maintain and prevent leaks. Understanding these steps and incorporating them into your juicing routine will guarantee a cleaner, more efficient juicing experience. This will also give you great-tasting, leak-free juice. You will also learn maintenance tips that will ensure your juicer lasts a long time.
Step 1: Assembly Checklist
Begin by assembling your juicer correctly. Incorrect assembly is one of the most common causes of leaks. Refer to your juicer’s instruction manual to ensure you are assembling it in the correct order. Check to make sure all parts are correctly positioned and securely locked into place. You can solve many potential leak issues with correct assembly. Taking the time to assemble your juicer correctly is the first step toward a leak-free juicing experience.
- Read the Manual: Familiarize yourself with all the parts of your juicer and how they fit together.
- Check the Juicing Screen Placement: Make sure the juicing screen is properly seated in the housing.
- Secure the Lid: Ensure the lid is firmly locked or secured.
The manual is your main resource for understanding the specific components and the assembly process. Each juicer model has unique parts and assembly processes. The manual provides the most accurate and reliable information. Take the time to read the manual thoroughly. Pay attention to diagrams and instructions. This will provide you with the information you need.
Correct placement of the juicing screen is critical for preventing leaks. The screen’s proper positioning ensures that the juice flows correctly. It also prevents pulp from escaping. Incorrect placement can lead to gaps, allowing juice to leak from the juicer. Always double-check the placement of the juicing screen. Ensure it is firmly seated within the housing.
The lid serves a crucial function in preventing leaks. It creates a tight seal. This prevents juice from escaping during operation. Verify that the lid is locked in place. Examine the locking mechanisms to ensure they are fully engaged. Failure to secure the lid properly can result in leaks. Make sure you take the time to check the lid.
Step 2: Feeding and Operating Tips
Once your juicer is assembled, the next step is learning how to feed the ingredients. Proper feeding practices and operating techniques play a vital role in preventing leaks. Feeding the ingredients correctly will prevent pressure buildup. It will also help the juicer work more effectively. Adjusting the speed and managing the amount of produce are also important considerations. Learning and applying these tips will guarantee that your juicing process is leak-free and runs smoothly. By following these operational best practices, you can enjoy a more efficient juicing experience.
- Prepare Your Produce: Cut fruits and vegetables into the appropriate sizes.
- Feed Slowly: Feed ingredients slowly to avoid overloading the juicer.
- Monitor the Pulp: Remove pulp regularly to prevent pressure buildup.
Preparing the produce is important to make sure everything works correctly. Proper preparation involves cutting fruits and vegetables into suitable sizes. Follow your juicer’s guidelines for ingredient dimensions. Cutting ingredients into the recommended sizes helps the juicer process them effectively. Doing this also prevents blockages. It also reduces pressure buildup. It also helps with a more efficient and leak-free juicing process.
Feeding ingredients slowly is important to prevent overloading the juicer. Overloading can lead to clogs and leaks. Allowing the juicer to process each piece of produce properly reduces the risk of these issues. Avoid pushing ingredients too quickly. This will allow the juicer to work smoothly and efficiently. This will also prevent problems with leaks.
Monitoring the pulp and removing it at appropriate intervals is essential for leak prevention. Pulp can accumulate and create pressure. This can lead to leaks. Remove the pulp regularly during juicing. Check the pulp container and empty it when necessary. This will help maintain optimal operation. This also ensures that the juicer continues to function correctly.
Step 3: Post-Juicing Procedures
After juicing, some cleaning and maintenance procedures can prevent future leaks. Taking the time to clean and store your juicer can help you maintain optimal performance. Doing this prevents potential problems. Doing these things can extend the juicer’s lifespan. By integrating these procedures into your routine, you can ensure a long-lasting and leak-free experience. These final steps are important for keeping your juicer in good condition.
- Immediate Disassembly: Disassemble the juicer immediately after each use.
- Rinse and Clean: Rinse all parts thoroughly and clean them with warm, soapy water.
- Proper Storage: Store all parts in a dry place.
Disassembling the juicer promptly after juicing is the key step in cleaning and maintenance. Delaying disassembly allows pulp and juice to dry. It can harden and become more challenging to remove. Prompt disassembly makes cleaning easier. It also reduces the likelihood of blockages that cause leaks. Doing this will also help prevent the build-up of bacteria.
Thoroughly rinsing all parts with warm, soapy water is critical to remove residue. Residue can lead to blockages and leaks. Use a brush to scrub the juicing screen. This guarantees that all parts are clean. Careful cleaning keeps the juicer running smoothly. It also helps maintain both hygiene and effectiveness.
Proper storage is essential to maintain the juicer’s integrity. Ensure all parts are completely dry before putting them away. This prevents the growth of mold or mildew. A dry storage area is important. It also prolongs the machine’s lifespan and keeps your appliance ready for its next use. Following these storage practices protects your appliance and keeps it in good working order.
Why Is My Juicer Still Leaking From The Spout? Advanced Solutions
Even if you follow the basic steps, you may still experience leaks. Sometimes, the problem is more complex than the common causes. These advanced solutions are for those who are struggling to stop the leaks. The following items require a more comprehensive approach. These solutions involve inspecting and replacing specific parts. This can require a deeper investigation into the appliance’s operation. These advanced troubleshooting techniques can solve more complex issues. They can also ensure that your juicer runs correctly. These recommendations will help you understand the root of the leak.
Seal Replacement and Repair
Seals and gaskets are essential components in any juicer. Over time, these parts can degrade, causing leaks. Taking the time to inspect and
- Identify the Seal Type: Determine the type and location of seals in your juicer.
- Inspect for Damage: Look for cracks, tears, or wear on the seals and gaskets.
-
Replacing worn or damaged seals is essential for preventing leaks. Select the correct
Different juicers use various types of seals. Take time to identify the exact kind and placement of these seals. Review your owner’s manual. This will help you locate all the seals. Inspecting them will help you identify which seals need to be
Inspecting seals and gaskets is an important part of troubleshooting leaks. Check for any damage to the seals. Even minor damage can compromise their ability to prevent leaks. Look for cracks, tears, or signs of wear. If any damage is found, replace the seals immediately. Timely replacement can prevent leaks from happening again. This will also ensure that your juicer performs at its peak.
Juicing Screen Maintenance
The juicing screen is a critical component for separating juice from pulp. Over time, the screen can become damaged. It is easy for the screen to become worn, which can lead to leaks. Regular maintenance, cleaning, and replacement of the juicing screen will keep your juicer functioning. This will also ensure that your juicer is functioning correctly. Doing these things can extend the life of your appliance.
- Regular Cleaning: Clean the juicing screen after each use.
- Inspect for Damage: Check the screen for any bends, cracks, or damage.
- Screen Replacement: Replace the juicing screen if damaged or worn.
Regular cleaning is an important part of maintenance. Pulp buildup can clog the screen. This makes cleaning the screen more difficult. Clean your juicer after each use to keep it from getting clogged. Follow the manufacturer’s guidance when cleaning the juicer screen. Properly cleaned screens will keep the juicer running correctly. They also prevent potential leaks and improve overall performance.
Regularly inspect the juicing screen for any damage. Inspecting the screen for any bends, cracks, or damage is important for preventing leaks. Over time, the screen can become damaged from use or improper cleaning. If any damage is found, replace the screen immediately. This ensures the juicer’s functionality. It also avoids potential leaks.
Replacing the juicing screen is a required maintenance task. This is the only fix if the screen is damaged. Select a replacement screen that fits your juicer model. Replace the screen. This will restore the juicer’s ability to separate juice from pulp. Regularly replacing the juicing screen ensures optimal performance. This will also reduce the risk of leaks.
Motor and Component Check
The motor and other components can also contribute to leaks. Inspecting these parts can help diagnose and solve complex problems. Regular inspections and maintenance of your appliance will keep it running well. This will also ensure that you get the most out of your juicer. You can find out more about the motor and other components below.
- Motor Function: Check the motor for any signs of strain or unusual noises.
- Component Integrity: Ensure all components are securely in place and free from damage.
- Professional Help: If you identify any issues that you cannot fix, consult a repair technician.
Check the motor function. Listen for strange sounds. These noises might indicate problems that can lead to leaks. Strain on the motor can impact the juicer’s ability to operate efficiently. These signs should be addressed immediately. Consult the manual if needed. You might also want to contact a professional.
Check all the components to ensure they are properly assembled and undamaged. This means checking the auger, housing, and other parts. Damage or misalignment in these parts can cause leaks. Regular inspections and immediate repairs can prevent further issues. This will also improve performance. This will also help you prolong the lifespan of your appliance.
It’s important to know when to seek assistance from a professional. If you have any serious issues with the machine, you should consult an expert. A professional will be able to diagnose and fix any underlying problems. This can prevent further damage to the appliance. Seek expert advice. You will get the best results.
Frequently Asked Questions
Question: What’s the most common reason for a juicer leaking?
Answer: Incorrect assembly is usually the primary cause of juicer leaks.
Question: How often should I clean my juicer?
Answer: Clean your juicer immediately after each use.
Question: What do I do if I see a crack in the housing?
Answer: If you find a crack in the housing, it may be time to replace that part or the entire juicer.
Question: Can I use hot water to clean my juicer parts?
Answer: Yes, but make sure the parts are safe for hot water; check the manual.
Question: How do I know when to replace the seals?
Answer: Replace seals when they show signs of wear or damage, such as cracks.
Final Thoughts
So, you’ve learned a lot about why juicer leaking from spout, and now you have the knowledge to fix most common issues. Remember, it usually comes down to simple things like proper assembly, keeping your juicer clean, and regular maintenance. You don’t need to be a repair expert. Just take a look at the parts and make sure everything’s in its right place. Don’t be afraid to take apart your juicer and give it a good clean after each use. A little bit of attention to detail and a consistent routine will keep your juicer running smoothly for years to come. Now you can get back to enjoying fresh, healthy juice without any annoying drips!
I’m Emma J. Caldwell, the founder, lead writer, and home-cooking enthusiast behind KitchenGuideCo.com. With a background in culinary arts and over a decade of cooking experience in both professional and personal kitchens, I created this platform to demystify recipes, offer smart kitchen gadget reviews, and guide readers through meal prep with confidence and clarity.